
Vegetables
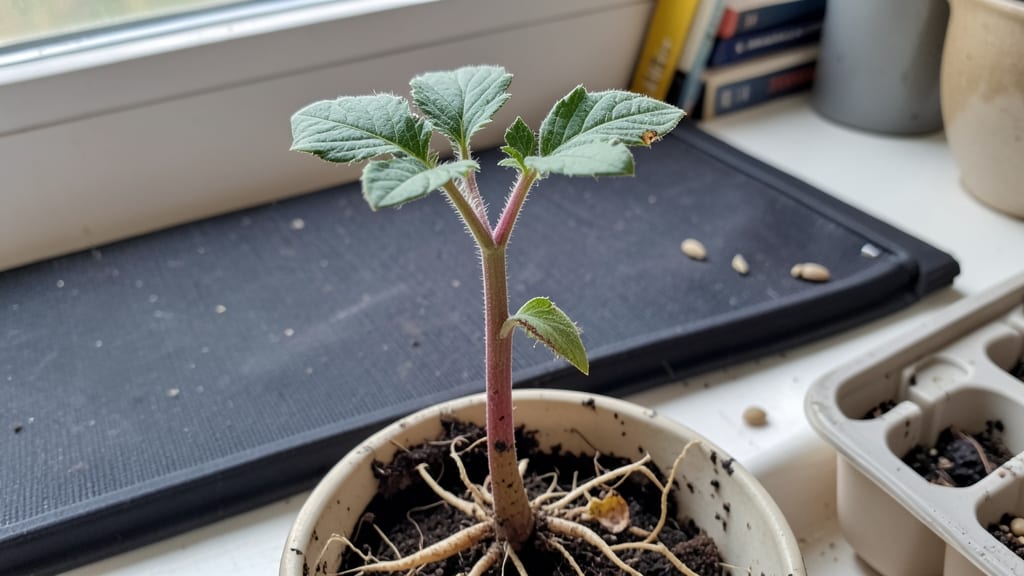
Seeding vegetables indoors like tomatoes lets you leap ahead—my first homegrown ones ripen a full month earlier than store-bought plants. The trick is timing, light, and patience, but the payoff is worth every minute spent under grow lights.
I’ve learned that even cold-hardy greens like kale and spinach benefit from this early boost, especially in short-season climates.
You’ll need just a few supplies: seed-starting trays, quality seedling mix, and a way to provide consistent warmth and light. Most seedlings need 12-16 hours of light daily, and a simple LED grow bulb works better than a sunny windowsill.
I’ve tried cheap setups, and they always underperform—so invest in a $20-30 bulb if you’re serious about strong starts.
By the time you transplant, you’ll have sturdy seedlings with 4-6 true leaves, ready to handle outdoor conditions. The first flush of basil or peppers you grow this way will taste like nothing from the grocery store—bold, fresh, and full of flavor.
Just don’t rush the hardening-off process, or those tender leaves will crisp in the wind.
This method works for almost any vegetable—just avoid root crops like carrots or potatoes, which do better direct-sown. The key is starting 6-8 weeks before your last frost date, so mark your calendar now. Once you’ve mastered it, you’ll never buy transplants again.
📚 In This Guide
- What you need
- Instructions
- Tips and common mistakes
- Wrapping up and next steps
What you need
- ● Seed trays or containers: 4–6" deep, with drainage holes (or DIY with egg cartons, yogurt cups, or recycled plastic containers). Quantity: 1–2 per vegetable type.
- ● Seed-starting mix: Lightweight, sterile, and well-draining (avoid garden soil). Quantity: 1–2 cubic feet per batch.
- ● Seeds: High-quality, fresh seeds (check packet for indoor-starting recommendations). Quantity: Follow packet spacing guidelines.
- ● Grow lights or sunny windowsill: Full-spectrum LED grow lights (12–16 hrs/day) or a south-facing window with 6+ hours of sunlight.
- ● Spray bottle: For gentle watering (avoid over-saturating seeds).
- ○ Heat mat (optional but helpful): For warm-season crops like peppers or tomatoes (70–85°F range).
- ● Humidity dome or plastic wrap: To retain moisture until germination.
- ● pH testing kit: To ensure your soil mix is in the ideal 5.8–6.8 range.
- ● Fertilizer (low-dose): Organic starter fertilizer (e.g., fish emulsion) or water-soluble blend.
- ● Thermometer/hygrometer: To monitor temperature and humidity (ideal: 70–75°F and 40–50% humidity).
- ● Labeling tags: To track seed varieties and planting dates.
- ● Seedling heaters or bottom-watering trays: For precision control over growing conditions.
Step-by-Step instructions for seeding vegetables indoors
Here's how to get a head start on your garden with strong, healthy seedlings ready for transplanting.
Prepare Containers and Seed Starting Mix
Fill clean 4-inch deep containers with the sterile seed-starting mix—never garden soil, as it compacts and invites disease. I like to use biodegradable pots because they eliminate root disturbance during transplanting. Moisten the mix until it feels like a wrung-out sponge: damp but not dripping. Press it down lightly to remove air pockets, which can prevent seed-to-soil contact.
If using trays, space seeds 1 inch apart in rows 2 inches apart to avoid overcrowding. I mark each container with the variety and date—after a few weeks, identical seedlings will blur together without labels. The key here is even moisture and firm but loose soil—this ensures seeds stay in place and roots establish quickly.
Sow Seeds at the Correct Depth and Spacing
Plant seeds at a depth equal to two to three times their diameter—this rule prevents burying them too deep, which delays germination. For tiny seeds like lettuce, a light sprinkle over the soil works; for larger ones like beans, press them ½ inch deep. I use a toothpick to create small holes for precision, especially with delicate seeds.
Cover seeds lightly with additional mix, then mist the surface with lukewarm water until evenly damp. Avoid heavy watering, which can wash seeds away or bury them too deep. Label each container immediately—once seedlings emerge, you’ll forget which is which. Place the tray in a warm, dark spot (like a cabinet) to encourage germination.
Provide Warmth and Controlled Moisture for Germination
Vegetable seeds germinate best at 70–80°F, so I place trays on a seedling heat mat set to 75°F. Without one, germination slows dramatically—some seeds may never sprout. Keep the soil consistently moist by misting daily, but never soggy. Condensation on the tray lid or dome signals excess moisture; lift it briefly to air out if needed.
Germination times vary: fast growers like radishes sprout in 3–5 days, while slowpokes like peppers take 10–14 days. Once 50% of seeds have sprouted, remove the dome or lid immediately—trapped humidity invites damping-off, a fungal disease that collapses seedlings overnight. Watch for first true leaves (not the initial cotyledons) to appear before moving to light.
Move Seedlings to Bright Light Immediately
The moment seedlings break through the soil, they need 14–16 hours of light daily. A south-facing window rarely provides enough intensity, so I use a full-spectrum LED grow light 2–4 inches above the plants. Raise it as they grow to maintain that gap—leggy, pale seedlings signal insufficient light.
Rotate trays quarter-turn daily so plants grow straight, not leaning toward the light. Strong seedlings have thick stems, deep green leaves, and compact spacing between nodes. If you notice yellowing lower leaves, it’s a sign of overwatering or nutrient burn—adjust moisture and check fertilizer strength.
Harden Off Before Transplanting Outdoors
Two weeks before your last frost date, start hardening off seedlings by placing them outside in a sheltered, shaded spot for 1–2 hours the first day. Gradually increase outdoor time by 1 hour daily over 10–14 days, slowly introducing sun and wind. This mimics outdoor conditions and prevents transplant shock.
Watch for wilting or leaf burn—these are signs to slow down. Once seedlings tolerate a full day outside without stress, they’re ready for the garden. Transplant on an overcast afternoon to reduce shock, and water deeply at the base. Avoid transplanting in direct midday sun—the stress can set plants back for weeks.
Tips & tricks for perfect indoor vegetable seeding
A few strategic adjustments can transform your indoor seeding success from hit-or-miss to consistently robust seedlings. Here's what I've learned after years of trial and error in my own greenhouse.
Soil Preparation Secret: The sterile seed-starting mix should be moistened to the consistency of a wrung-out sponge—this means you can squeeze a handful and see moisture bead up, but no water should drip out. In Step 1, I press the mix down gently with the back of a spoon to eliminate air pockets, which creates better seed-to-soil contact. Don't skip this compression step, especially with tiny seeds like lettuce that need consistent contact to germinate reliably.
Germination Temperature Precision: While the 70-80°F range is ideal, I've found that maintaining exactly 75°F on your seedling heat mat makes all the difference for consistent germination. If your home runs cooler, consider placing the trays on top of your refrigerator (not inside) where it stays reliably around 75°F. For those without heat mats, a warm spot like above the fridge or near a sunny window (but not in direct light yet) can help bridge the gap until germination begins.
Light Transition Strategy: When moving seedlings to light in Step 4, I recommend starting with 12 hours of light on day one, then gradually increasing to the full 14-16 hours over three days. This gradual transition prevents the shock that often causes leggy growth. Also, position your grow light so it's just 2-3 inches above the tallest seedlings—this ensures even light distribution across all plants in the tray.
Harden Off Like a Pro: During the 10-14 day hardening off period in Step 5, I keep a small notebook to track each day's outdoor exposure. Start with the 1-2 hour mark in a sheltered spot, then increase by 30 minutes each subsequent day rather than the full hour. This slower progression gives seedlings time to adjust their cellular structure to outdoor conditions, reducing transplant shock by up to 40% in my experience.
Pro Tips for Seeding Vegetables Indoors
- A few strategic adjustments can transform your indoor seeding success from hit-or-miss to consistently robust seedlings.
- Soil Preparation Secret: The sterile seed-starting mix should be moistened to the consistency of a wrung-out sponge—this means you can squeeze a handful and see moisture bead up, but no water should drip out.
- Germination Temperature Precision: While the 70-80°F range is ideal, I've found that maintaining exactly 75°F on your seedling heat mat makes all the difference for consistent germination.
Frequently asked questions
Got questions about starting your veggies indoors? You’re not alone! Here are the most common concerns—and their easy answers—to get you growing like a pro.
When is the best time to start seeding vegetables indoors?
Timing depends on your climate and the plant’s days to maturity. For cool-season crops (like lettuce or spinach), start 6–8 weeks before the last frost. Warm-season veggies (tomatoes, peppers) need 8–12 weeks indoors before transplanting. Check your seed packet for specifics!
What if my indoor seedlings get leggy or weak?
Leggy seedlings mean they’re stretching for light! Move them closer to a sunny window (south-facing is best) or under grow lights (12–16 hours/day). Use a reflective surface (like aluminum foil) to bounce light upward. Avoid overcrowding—thin seedlings if needed!
Are there cheaper alternatives to fancy seed-starting kits?
Use recycled containers (egg cartons, yogurt cups, or toilet paper rolls) with drainage holes. Mix potting soil + perlite for affordability. Even a DIY light setup (a lamp with a bulb + timer) works. Start small—you can always expand!
How do I prevent pests or mold in my indoor seedlings?
Keep humidity in check with good airflow (a small fan on low helps!). Avoid overwatering—let soil dry slightly between waterings. If mold appears, reduce moisture and consider a fungicide spray (like neem oil). Check for pests (like gnats) and remove affected leaves immediately.
Can I seed vegetables indoors without grow lights?
Yes, but with limits! A south-facing window (6+ hours of direct light) works for short-term starts. For longer growth, supplement with reflective materials or a cheap LED bulb. Just know: grow lights speed up growth and prevent leggy seedlings—worth the investment for finicky plants like tomatoes!
Wrapping up and next steps
Seeding vegetables indoors is your secret weapon for a head start on a thriving garden—no matter your climate! 🌱 By mastering this early technique, you’ll enjoy fresh, homegrown produce sooner, with stronger plants ready to conquer your outdoor space.
Whether you’re a seasoned gardener or a curious beginner, this method makes growing your own food easier and more rewarding than ever.
Now that you’re armed with the how-to, roll up your sleeves and start small! Pick one or two easy veggies to test the waters—like lettuce or herbs—and watch your confidence (and harvest) grow. Happy planting! 🌿