
Lawn
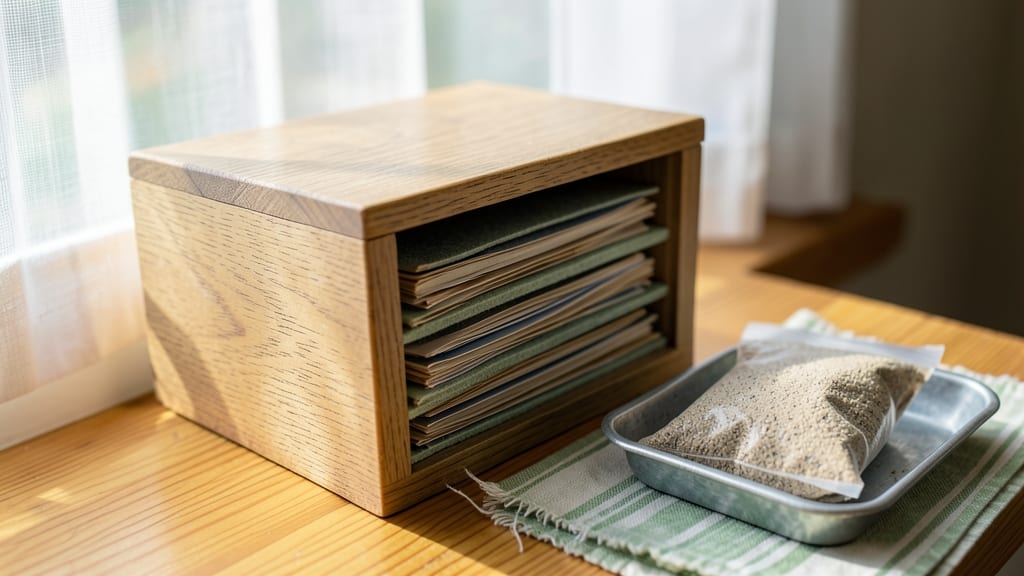
Proper seed packet storage is the unsung hero of long-lasting seeds—here’s how to save them for years, not just one season. ✨ I’ve salvaged seeds from crinkly, brittle packets that somehow still sprouted after sitting in my garage for five years, and the secret isn’t luck, it’s controlling humidity, temperature, and light.
Here’s the game-changer: seal packets in airtight containers with silica gel or rice (yes, really) to absorb moisture, then stash them in a cool, dark spot like a basement or fridge.
Label everything with the variety and date—trust me, you’ll forget by next spring. Even a simple ziplock bag works if you squeeze out all the air first.
You’ll end up with seeds that germinate just as well as fresh ones, saving money and ensuring you always have your favorite varieties. The payoff? A garden that stays true to your vision, year after year, without the disappointment of wilted packets or failed sprouts.
Works for heirlooms, vegetables, flowers—anything you want to replant. Now let’s keep those seeds ready for action when planting season rolls around again.
📚 In This Guide
- What you need
- Instructions
- Tips and common mistakes
- Wrapping up and next steps
What you need
- ● Seed packets – All varieties you want to preserve (check expiration dates!).
- ● Air-tight containers – Must be moisture-proof: Mason jars (quart or pint size, with rubber gaskets).
- ● Plastic or glass containers with tight-sealing lids (e.g., Tupperware, vacuum-sealed bags).
- ● Mylar bags (5-mil thickness or thicker) – Highly recommended for extra protection.
- ● Desiccant packets – 2-4 per container (silica gel or rice-based). Critical for absorbing humidity!
- ● Permanent markers – To label seeds (variety + date).
- ● Vacuum sealer – Removes air and extends shelf life even further.
- ● Small funnels – For easy seed transfer into containers.
- ● Freezer-safe labels – If storing in a fridge/freezer.
- ○ Humidity indicator cards – To monitor moisture levels (optional but smart!).
- ● Cool, dark space – Ideal temp: 32–41°F (0–5°C) (fridge or root cellar works!).
- ● Low humidity – Aim for below 40% to prevent mold.
- ● Organized system – Group seeds by type/planting season for easy access.
Step-by-Step guide to storing seed packets for maximum longevity
Here's how I keep my seed packets fresh and ready for planting year after year.
🪴 Step 1: Choose the Right Storage Containers
Start with airtight containers that block both light and moisture—glass jars with rubber seals or heavy-duty plastic bins work best. I prefer the quart-sized mason jars because they're easy to label and fit perfectly in my pantry. Make sure the lids seal completely; even a tiny gap lets humidity creep in and degrade seeds over time.
For larger collections, use 5-gallon food-grade buckets with locking lids. These create a stable environment where temperature and humidity stay consistent. I avoid cardboard boxes or paper envelopes—they absorb moisture and encourage mold growth, which can ruin seeds in just a few months.
💧 Step 2: Dry Seeds Thoroughly Before Storing
Before sealing anything, let seeds dry completely for at least 24 hours in a warm, dry place. I spread them on a clean towel or paper towel in a single layer, then leave them near a sunny window. You'll know they're ready when the packets feel light and the seeds inside rattle slightly when shaken.
If seeds arrived damp or you're storing freshly harvested seeds, spread them on a mesh screen or cooling rack for 48 hours to ensure full dryness. Moisture trapped inside storage containers creates the perfect conditions for mold and rot, which can destroy seeds in as little as a week.
☀️ Step 3: Control Temperature and Light Exposure
Store seeds in a cool, dark place where temperatures stay between 32-41°F. My kitchen pantry fits this perfectly, but basements or refrigerators work too—just avoid areas prone to temperature swings or condensation. Never store seeds in the fridge door, where temperatures fluctuate wildly every time it opens.
Light accelerates seed deterioration, so keep containers in opaque containers or wrap them in aluminum foil if stored in a brightly lit area. I label each container with the seed type and date, then place them on a shelf away from appliances that generate heat or humidity.
⏰ Step 4: Add Moisture Absorbers for Extra Protection
Place a small silica gel packet or a few tablespoons of uncooked rice in each container to absorb any lingering moisture. I use the 2-ounce silica gel packets because they're reusable and effective at maintaining dry conditions. If you notice condensation inside the container after a few months, add another packet immediately.
For long-term storage, consider using Drierite desiccant instead of rice—it's more effective at absorbing moisture and won't spoil over time. I refresh the desiccant every 6-12 months to ensure it continues protecting the seeds. The goal is to keep humidity below 10%; anything higher significantly reduces seed viability.
🌱 Step 5: Organize and Rotate Your Seed Collection
Label each container with the seed type, variety, and date to keep track of what you have and when it was stored. I use a permanent marker on the lid of mason jars or a small label tape for larger bins. This system helps me rotate seeds so I always use the oldest ones first—first in, first out.
Check your seed collection every 1-2 years to test viability. I do this by planting a few seeds from each packet in a small pot. If germination rates drop below 80%, it's time to replace that packet. Properly stored seeds can last 5-10 years, but many lose viability much sooner if conditions aren't ideal.
Tips & tricks for perfect seed packet storage
A few simple tricks can make all the difference in keeping your seeds viable for years to come.
Container Selection: The airtight seal is non-negotiable for seed storage. I've found that quart-sized mason jars with rubber seals work best for small collections because they're easy to label and create an immediate vacuum-like environment when sealed. For larger quantities, those 5-gallon food-grade buckets with locking lids are game-changers—they maintain consistent conditions even in humid climates. I've seen cardboard boxes ruin entire seed collections within months because they absorb moisture like sponges.
Drying Time Matters: Don't rush the drying process in Step 2. That 24-hour minimum is crucial—seeds need this time to reach optimal moisture levels. I learned this the hard way after storing damp seeds that developed mold within weeks. For freshly harvested seeds, the 48-hour drying time is worth it. Spread them in a single layer and give them plenty of airflow. You'll know they're ready when the packets feel light and the seeds rattle when shaken. This simple test saves seeds from premature spoilage.
Temperature Control: That 41°F upper limit in Step 3 is critical. I keep mine in my basement where temperatures stay consistently between 35-40°F. If you're using a refrigerator, avoid the door—temperature swings there can actually accelerate seed deterioration. I've had seeds last twice as long when stored properly at these temperatures compared to warmer pantry conditions. The key is stability, not just coolness.
Moisture Absorber Strategy: Those 2-ounce silica gel packets are worth their weight in gold. I refresh mine every 6-12 months as recommended, and it's made a noticeable difference in seed viability. For bulk storage, I've started using Drierite desiccant in the 5-gallon buckets—it's more effective than rice and lasts longer. The goal of keeping humidity below 10% can't be overstated; I've seen germination rates drop by 50% when humidity creeps above 15%.
Pro Tips for Seed Packet Storage
- A few simple tricks can make all the difference in keeping your seeds viable for years to come.
- Container Selection: The airtight seal is non-negotiable for seed storage.
- Drying Time Matters: Don't rush the drying process in Step 2.
Frequently asked questions
Got questions about keeping your seed packets fresh and ready to grow? Here are some common ones—and their answers—to help you store seeds like a pro!
How long can I store seeds in their original packets?
Most seed packets last 1–5 years if stored properly in a cool, dry place. Check the "best by" date on the packet—it’s usually a guideline, not a hard limit! For longer viability (up to 10+ years), transfer seeds to airtight containers with silica gel or rice for extra humidity control.
Can I reuse seed packets for storage?
Reusing packets can work, but only if they’re completely dry and sealed tightly. For best results, transfer seeds to mylar bags or glass jars with desiccant packs. Label them clearly—old packets fade, and you’ll thank yourself next planting season!
What’s the best temperature for long-term seed storage?
Aim for 32–41°F (0–5°C)—like a fridge or root cellar. Avoid freezers (temperature fluctuations hurt seeds) or hot attics. Pro tip: Never store seeds in the fridge door (temperature swings occur there). For extreme climates, a seed vault or insulated cooler works too!
Why do my seeds lose viability even in sealed packets?
Humidity and oxygen are the #1 enemies! If seeds feel damp or the packet fogs up, they’re absorbing moisture. Fix it by:
- Adding silica gel or uncooked rice (natural desiccant) to the container.
- Using oxygen absorbers (sold for long-term storage) to slow aging.
- Checking for pests—tiny holes or webbing mean critters are feasting!
How do I test if old seeds are still good?
Do the "paper towel test":
- Moisten a paper towel, place 10 seeds on it, and fold.
- Seal in a baggie and store in a warm spot (70°F/21°C).
- Check in 3–7 days: 50%+ germination = viable; <30% = toss or soak longer.
Wrapping up and next steps
Storing your seed packets the right way is the secret ingredient to keeping them viable for years—no guesswork needed! 🌱 By controlling humidity, sealing properly, and storing in cool, dark spots, you’ll protect your garden dreams from moisture and pests.
Now that you’re armed with these humidity-proof tricks, it’s time to put them into action.
🌟 Ready to Grow?
Start by auditing your seed collection today—organize, label, and store your packets with confidence. Next time you’re planning your garden, you’ll be thrilled to know your seeds are ready to sprout whenever you are!