
Planting
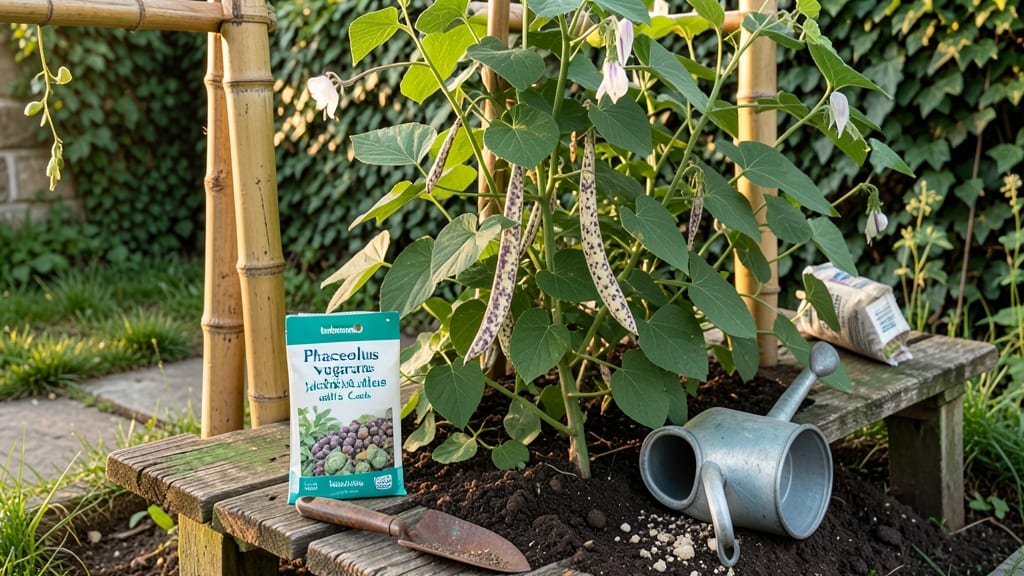
Saving heirloom plant seeds guarantees flavors and varieties you won’t find in stores—like the deep red tomatoes my grandmother grew that taste nothing like supermarket varieties. These seeds preserve plant traits through generations, creating a living connection to gardening traditions.
The key lies in selecting open-pollinated varieties that breed true from seed, avoiding hybrids that revert to wild types.
Start with just three essentials: a well-drained container, quality seed-starting mix, and patience. Heirloom seeds often germinate slower than hybrids, so keep soil consistently moist at 70-75°F for best results. Varieties like Brandywine tomatoes or Kentucky Wonder beans reward gardeners with heirloom quality—flavorful, productive, and worth the extra care.
Your harvests will taste like summer all year when you save seeds properly. Dry them thoroughly, store in airtight containers, and label clearly. The first year’s seeds may vary slightly, but by the third generation, you’ll have plants identical to the original—just like my great-grandfather’s prize-winning Cherokee Purple tomatoes.
This method works for vegetables, flowers, and herbs in any climate. Whether you’re growing in raised beds or containers, heirloom seeds adapt beautifully. The real magic happens when you pass these seeds—and the stories behind them—to the next generation of gardeners.
📚 In This Guide
- What you need
- Instructions
- Tips and common mistakes
- Wrapping up and next steps
What you need
- ● Heirloom seeds: Choose 3-5 varieties (e.g., tomatoes, beans, or herbs) from trusted suppliers. Aim for non-GMO, open-pollinated seeds for true-to-type heirlooms.
- ● Seed-starting trays or pots: 2–4" deep, with drainage holes (biodegradable options work too!).
- ● Seed-starting mix: Lightweight, sterile potting soil (avoid garden soil—it’s too dense!).
- ● Grow lights or sunny windowsill: 12–16 hours of light daily (LED grow lights are ideal).
- ● Misting bottle or spray nozzle: For gentle watering (overhead watering can spread disease).
- ● Plastic wrap or humidity dome: To retain moisture while seeds germinate.
- ● Labels & markers: To track varieties and planting dates (use toothpicks + masking tape for DIY labels!).
- ● Heat mat: Speeds up germination for slow starters like peppers.
- ● Fertilizer (low-dose): Organic options like fish emulsion or compost tea (avoid over-fertilizing seedlings!).
- ● Transplanting tools: Small shovel or spoon for moving seedlings outdoors.
- ● Journal or app: To log growth stages, weather notes, and harvest dates.
Step-by-step guide to growing heirloom seeds for year-round harvests
Here’s how to cultivate heirloom varieties with precision timing and care for continuous yields.
Select and Stratify Seeds for Optimal Germination
Heirloom seeds often require special treatment to break dormancy. For cold-hardy varieties like lettuce or spinach, place seeds in a damp paper towel inside a sealed plastic bag and refrigerate for 7–14 days—this mimics winter chilling. Warm-season seeds, such as tomatoes or peppers, may need a 24-hour soak in lukewarm water to soften their tough outer shells before planting.
I label each bag with the seed type and stratification date to avoid confusion. Once seeds sprout, they’re ready for planting. Watch for first signs of root hairs—that’s your cue to move them to soil. Skipping stratification can delay germination by weeks, so don’t rush this step.
Prepare Containers and Soil for Seedling Success
Use sterile seed-starting mix in 2–3 inch deep containers to prevent damping-off disease. Fill each cell or pot to 1 inch below the rim, leaving space for watering. Press the mix lightly to remove air pockets but avoid compacting it—heirloom seedlings need loose, well-aerated soil to develop strong roots.
Moisten the soil with a spray bottle until evenly damp, then sow seeds at a depth of twice their diameter. For delicate heirloom varieties like basil or chives, I use a toothpick to create small holes for precise placement. Cover lightly with additional mix and mist again to ensure consistent moisture.
Control Light and Temperature for Healthy Growth
Heirloom seedlings thrive under 14–16 hours of light daily from a grow light placed 2–4 inches above the trays. Without enough light, seedlings stretch toward the source, becoming weak and prone to falling over. I adjust the light height weekly as plants grow—too close causes overheating, while too far slows development.
Maintain soil temperatures between 65–75°F for most heirlooms. Use a seedling heat mat if your home runs cooler. Watch for first true leaves (not the initial cotyledons)—this signals it’s time to transition to individual pots if needed. Overcrowding stresses seedlings and invites pests.
Harden Off and Transplant for Long-Term Success
Two weeks before your last frost date, begin hardening off seedlings by placing them outside in a sheltered spot for 1–2 hours the first day. Gradually increase exposure over 10–14 days, ending with a full day outdoors. This toughens stems and prepares them for outdoor conditions.
Transplant heirloom seedlings into the garden or larger containers when they’ve developed 3–4 true leaves and soil temperatures stay above 50°F. Bury stems slightly deeper than in containers—this encourages root growth. Water deeply at transplanting to settle soil around roots and reduce shock.
Maintain Year-Round Conditions for Continuous Harvests
Extend the growing season by using row covers in early spring or cold frames in fall. Succession planting—sowing new seeds every 2–3 weeks—ensures a steady supply of heirloom produce. For tender varieties like tomatoes, bring pots indoors before frost or grow under grow lights in a sunny window.
Monitor soil moisture closely; heirloom plants often have deeper roots than hybrids and need 1–1.5 inches of water weekly. Mulch with 2–3 inches of organic material to retain moisture and regulate temperature. Prune regularly to encourage bushier growth and prevent disease—this is especially critical for heirloom tomatoes and peppers.
Tips & tricks for perfect heirloom seedling cultivation
Mastering heirloom seed growth requires precision—these insights will help you avoid common pitfalls and maximize your year-round harvests.
Stratification Precision: When refrigerating cold-hardy seeds like lettuce or spinach for the required 7–14 days, place them in a sealed plastic bag with a damp paper towel to maintain consistent moisture. I’ve found that labeling each bag with both the seed type and the exact stratification date prevents mix-ups, especially when working with multiple varieties. The key visual cue is the appearance of root hairs—this signals readiness to plant, not just elapsed time. Skipping this step can delay germination by weeks, so don’t rush it even if your schedule feels tight.
Light Management Strategy: The 14–16 hours of daily light required for heirloom seedlings is non-negotiable for strong growth. Position your grow light 2–4 inches above the trays and adjust weekly as seedlings grow—too close causes overheating, while too far results in leggy, weak plants. I’ve noticed that using a timer for automatic on/off cycles eliminates guesswork and maintains consistency. For seedlings showing signs of stretching (long stems with small leaves), immediately reduce the light height by ½ inch to correct the issue.
Transplanting Technique: When transplanting seedlings with 3–4 true leaves into the garden, bury stems slightly deeper than their original container depth. This encourages stronger root development at the stem base. I’ve had success with a simple trick: press the soil firmly around the base after transplanting to eliminate air pockets, then water deeply to help settle the roots. This reduces transplant shock significantly, especially when soil temperatures remain above 50°F as specified.
Season Extension Hacks: For continuous harvests, row covers in early spring and cold frames in fall are game-changers. I’ve found that succession planting every 2–3 weeks creates a staggered harvest timeline, preventing glut and waste. For tender varieties like heirloom tomatoes, moving pots indoors before frost and supplementing with grow lights maintains growth year-round. The critical threshold is maintaining soil temperatures above 50°F—below this, growth stalls completely.
Pro Tips for Heirloom Plant Seeds
- Mastering heirloom seed growth requires precision—these insights will help you avoid common pitfalls and maximize your year-round harvests.
- Stratification Precision: When refrigerating cold-hardy seeds like lettuce or spinach for the required 7–14 days, place them in a sealed plastic bag with a damp paper towel to maintain consistent moisture.
- Light Management Strategy: The 14–16 hours of daily light required for heirloom seedlings is non-negotiable for strong growth.
Frequently asked questions
Got questions about heirloom seeds? You’re not alone—growing from heirloom varieties can feel like solving a puzzle at first! Below are answers to the most common queries, from storage tips to troubleshooting. Let’s dig in!
What’s the difference between heirloom seeds and hybrid seeds?
Heirloom seeds are open-pollinated, meaning you can save them year after year for identical plants. Hybrids (like those from big-box stores) are bred for specific traits but won’t reproduce true to type. Heirlooms offer flavor, biodiversity, and long-term sustainability—perfect for gardeners who love tradition!
When’s the best time to plant heirloom seeds?
Timing depends on your climate and plant type! For cool-season crops (like lettuce or peas), sow seeds 4–6 weeks before the last frost. Warm-season plants (tomatoes, peppers) need soil temps above 60°F—wait until after frost risk passes. Pro tip: Check your seed packet for days-to-germination and adjust!
Are heirloom seeds more expensive than regular seeds?
Sometimes, yes—but not always! Prices vary by rarity and source. Local seed swaps, online heirloom sellers (like Seed Savers Exchange), or even grocery store organic sections can offer affordable options. Think of it as an investment: heirlooms save you money long-term by letting you save your own seeds!
Why aren’t my heirloom seeds germinating? Troubleshooting tips!
Try these fixes if your seeds aren’t sprouting:
- Check moisture: Keep soil damp (not soggy) and use a spray bottle for delicate seeds.
- Test depth: Plant seeds twice as deep as their width—too shallow = dry outs!
- Warmth matters: Use a heat mat or sunny windowsill for slow starters.
- Freshness check: Old seeds (3+ years) may need a paper towel test—soak, seal, and wait 7–10 days to see if they sprout.
How do I store heirloom seeds for next year?
Keep seeds viable for years with these steps:
- Let them dry completely (1–2 weeks in a cool, dark place).
- Store in airtight containers (glass jars or mylar bags) with a desiccant packet.
- Keep in a dark, cool spot (50°F or below, like a fridge or root cellar).
- Label everything! Include the variety and date to avoid surprises.
Pro tip: Some seeds (like onions) store better in mesh bags for airflow!
Wrapping up and next steps
Growing heirloom plant seeds isn’t just about preserving tradition—it’s about connecting with nature’s timeless flavors and ensuring your garden thrives year after year. 🌱 With the right tricks—like succession planting, companion planting, and proper seed storage—you’ll enjoy a bountiful, homegrown harvest that’s as rewarding as it is delicious.
Ready to take the next step? Start small: pick one heirloom variety, test the tricks, and watch your garden become a legacy!