Vegetables
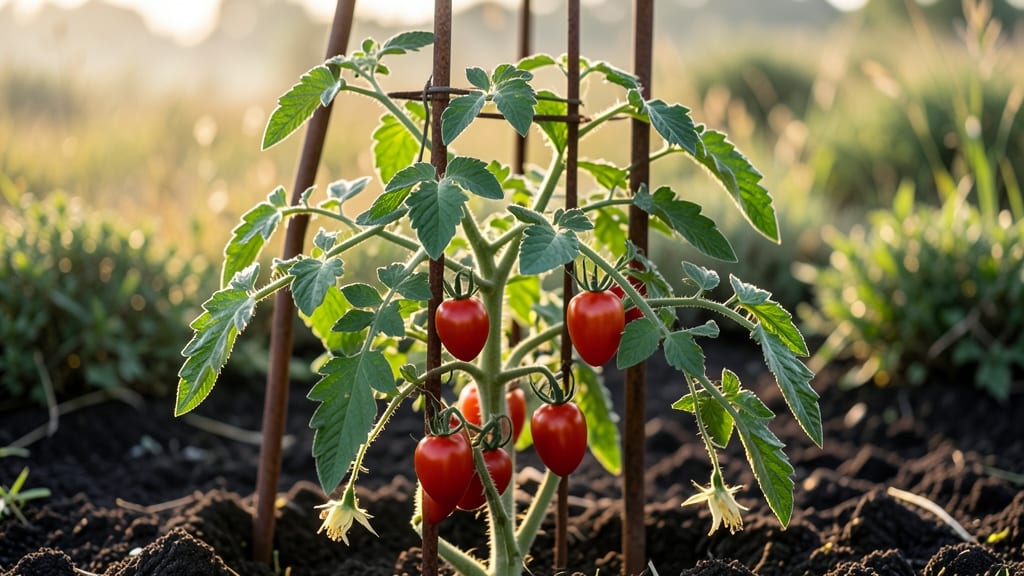
Growing Romano tomato seeds is where the real flavor adventure begins—this variety delivers that perfect balance of tangy sweetness and meaty texture that makes homemade sauces sing. 🌱 I learned the hard way that letting these plants sprawl without pruning means fewer, smaller fruits clustered at the top, but with the right cuts, you’ll end up with a vine packed with uniform, flavor-packed tomatoes.
The secret isn’t complicated: you’ll need well-draining soil, a sunny spot with at least 6-8 hours of sunlight daily, and a sturdy cage or stakes to support those heavy vines.
Start seeds indoors 6-8 weeks before your last frost, and transplant when seedlings are 4-6 inches tall—this variety thrives when given room to stretch but not too much freedom to wander.
Once planted, prune aggressively early on to encourage bushier growth—cut off suckers (those little shoots in the joint between stem and branch) to redirect energy into fruit production.
Within 4-6 weeks, you’ll see thicker stems and more blossoms, leading to a harvest that stretches from mid-summer to frost with proper care.
Romano tomatoes love consistent moisture but hate soggy roots, so water at the base 1-2 inches deep weekly, and feed every 2-3 weeks with a balanced fertilizer.
The payoff? A vine that looks like a lush, productive bush instead of a tangled mess—and tomatoes that taste like they came from a sun-drenched Italian hillside.
📚 In This Guide
- What you need
- Instructions
- Tips and common mistakes
- Wrapping up and next steps
What you need
- ● Romano tomato seeds – 5–10 seeds (or 2–3 plants if buying starts). Choose heirloom or hybrid varieties labeled for your climate zone.
- ● Seed-starting mix – 1–2 cups of lightweight, sterile potting soil (avoid garden soil—it’s too dense!).
- ● Seed trays or small pots – 4–6 individual cells or 3–4-inch pots (biodegradable pots are a plus!).
- ● Grow lights or sunny windowsill – A full-spectrum LED grow light (12–16 hours/day) or a south-facing window with 6+ hours of sunlight.
- ● Watering can or spray bottle – With a fine mist setting to keep seeds moist without drowning them.
- ● Fertilizer – A balanced, water-soluble fertilizer (5-5-5 or 10-10-10) or organic options like fish emulsion or compost tea.
- ● Pruning shears or sharp scissors – Small, clean tools for trimming suckers and shaping vines.
- ● Support structure – Cages (5–6 ft tall), stakes, or trellises to train vines vertically (romanos thrive with support!).
- ● Mulch – Straw, grass clippings, or shredded leaves to retain moisture and suppress weeds.
- ● Heat mat – Speeds up germination if your space is chilly (70–85°F is ideal).
- ● Humidity dome – Keeps seeds cozy until sprouts appear (3–7 days).
- ● pH testing kit – Ensures soil pH is 6.0–6.8 (romanos love slightly acidic soil).
- ● Compost or worm castings – Boosts soil nutrients for stronger plants.
- ● Garden twine – For securing vines to trellises or stakes.
- ● Glove – Protects hands from thorns (romanos get prickly as they mature!).
How to prune Romano tomato plants for maximum yield and health
Here's the pruning method I've used for years to coax thick, productive vines from Romano tomato seeds.
✂️ Step 1: Remove Suckers Early in the Season
Start pruning when your Romano seedlings reach 12-18 inches tall—this is when they begin forming suckers, those little shoots that grow in the leaf axils. These are the plant's attempt to create secondary stems, but they divert energy from fruit production. Use clean, sharp pruning shears to snip suckers 1/4 inch above the leaf where they emerge.
I always remove suckers on the lower third of the plant first. These lower suckers won't produce fruit anyway, so you're just shaping the plant. Watch for new suckers forming weekly—they grow fast, so check your plants every 5-7 days during peak growth. The goal is to keep the plant focused on developing a strong main stem and fruit clusters.
✂️ Step 2: Prune for Airflow and Light Penetration
Once your Romano plants reach 3-4 feet tall, it's time to open up the canopy. Start by removing any leaves that touch the ground or block sunlight from reaching the lower fruit clusters. Yellow or diseased leaves go first—these are energy drains and disease magnets. Use your fingers to gently pinch off smaller leaves rather than cutting, which prevents tearing.
Focus on the inner leaves that form a dense canopy. You want sunlight to reach all parts of the plant, especially the lower stems where new fruit will develop. Aim to leave 2-3 leaves above each fruit cluster—this ensures the plant has enough foliage to support ripening fruit while still allowing airflow. This pruning step dramatically reduces fungal diseases like blight that thrive in damp, shaded conditions.
✂️ Step 3: Maintain the Main Stem and Lateral Branches
When your Romano plants reach 5-6 feet tall, decide whether to grow them determinate (bush) or indeterminate (vine) style. For bushier plants with more compact growth, remove the main stem's top growth when it reaches your desired height—typically 4-5 feet. This triggers the plant to put energy into lateral branches and fruit production rather than vertical growth.
For vine-style growth, let the main stem grow taller but prune aggressively to maintain 3-4 main lateral branches. Remove all other suckers and weak lateral growth. The key is balance: you want enough foliage to support fruit but not so much that it shades the lower plant. Watch for new growth at the branch tips—these are your future fruit clusters, so protect them from damage.
✂️ Step 4: Late-Season Pruning for Fruit Ripening
As your Romano plants approach the end of the season, shift focus to fruit production. Remove any remaining suckers and prune back any overly vigorous growth that's shading fruit clusters. The goal now is to maximize sunlight exposure to existing fruit. I also remove any leaves that have developed signs of disease, even if they're on the upper parts of the plant.
Pay special attention to the lower stems where new fruit may still be developing. If you see small fruit forming late in the season, protect them by removing any leaves that would block sunlight. This late-season pruning can extend your harvest by 2-3 weeks by ensuring all existing fruit gets maximum light and air circulation. Stop pruning 4-6 weeks before your first frost date to allow remaining fruit time to ripen on the vine.
⏰ Step 5: Post-Harvest Pruning and Cleanup
After your final harvest, give your Romano plants one last pruning to prepare for winter. Cut back all remaining vines to 6 inches above ground level. This makes cleanup easier and reduces overwintering pests. Remove all plant debris from your garden area—never compost diseased tomato plants, as they can harbor fungal spores that survive winter.
I always sanitize my pruning shears with rubbing alcohol between plants to prevent cross-contamination. Store your shears in a dry place for next season. This final pruning also helps identify any weak spots in your growing system—note where your plants struggled and adjust next year's support system or planting location accordingly.
Tips & tricks for pruning Romano tomato plants
These pruning secrets will transform your Romano tomato plants from scraggly vines into productive powerhouses. The difference between a modest harvest and a garden overflowing with plump, flavorful tomatoes often comes down to these precise techniques.
Timing is Everything: In Step 1, when your plants reach 12-18 inches, don't wait for suckers to get large—act immediately. I've seen gardeners wait until suckers are 6 inches long, by which point they've already diverted significant energy from fruit production. Use your fingers to gently feel for new growth in the leaf axils every 5-7 days during peak growth. The earlier you remove them, the more energy your plant puts into developing those prized fruit clusters. This is particularly crucial for Romano tomatoes, which are already vigorous growers.
The 2-3 Leaf Rule: When you reach Step 2 and need to open up the canopy, remember this golden ratio: always leave 2-3 healthy leaves above each fruit cluster. I learned this the hard way after removing too many leaves and watching my tomatoes ripen slowly from lack of foliage. These leaves are essential for photosynthesis to feed developing fruit. The key is balance—you want enough foliage for energy production but not so much that it creates a humid, shaded environment perfect for fungal diseases like blight.
Equipment Matters: Never use dull or dirty pruning shears—they can tear plant tissue and introduce diseases. I invest in a pair of sharp, bypass pruners that I sanitize between plants using rubbing alcohol. For smaller leaves, I find that pinching with my fingers gives me more control than cutting. This gentle approach prevents unnecessary damage to the plant's vascular system. Also, keep your tools clean and dry when storing them—rusty or wet tools can harbor pathogens that will infect your next season's plants.
Pro Tips for Romano Tomato Seeds
- These pruning secrets will transform your Romano tomato plants from scraggly vines into productive powerhouses. The d...
- Timing is Everything: In Step 1, when your plants reach 12-18 inches, don't wait for suckers to get large—act immedia...
- The 2-3 Leaf Rule: When you reach Step 2 and need to open up the canopy, remember this golden ratio: always leave 2-3...
Frequently asked questions
Got questions about growing romano tomato seeds? You’re in the right place! Whether you're a new gardener or a seasoned pro, these answers will help you maximize your harvest. Let’s dive in!
How long does it take for romano tomato seeds to germinate?
Romano tomato seeds typically sprout in 5–14 days when kept in warm (70–85°F), moist conditions. Use a seedling heat mat if your space is chilly. Keep soil consistently damp but not soggy—overwatering can delay germination. Patience is key!
When is the best time to plant romano tomato seeds indoors vs. outdoors?
Start seeds indoors 6–8 weeks before your last frost date (use grow lights if natural light is weak). Transplant seedlings outdoors after soil warms to 55°F+ and nighttime temps stay above 50°F. Romano tomatoes thrive in full sun (6–8 hours/day), so plan accordingly!
Can I grow romano tomatoes in containers, or do they need a garden bed?
Romano tomatoes do well in containers (5+ gallons per plant) with proper support (cages or stakes). Ensure containers have drainage holes and use a lightweight potting mix. Just like in garden beds, prune aggressively to encourage bushier growth and better air circulation.
Why aren’t my romano tomato plants producing fruit, even after pruning?
Several factors could be at play: lack of sunlight, overwatering, nutrient deficiencies (especially nitrogen), or temperature stress (below 55°F or above 90°F). Check for pests (like aphids) and ensure your plants get 1–2 inches of water weekly. A balanced fertilizer can also give them a boost!
What’s the best way to save seeds from my romano tomatoes for next year?
Let a few tomatoes fully ripen on the vine (even if they’re past their prime for eating). Scoop out the seeds and ferment them in water for 2–3 days (this removes gelatinous coating). Rinse, dry on paper towels, and store in a cool, dark place. Label them! Romano seeds stay viable for 3–5 years.
Wrapping up and next steps
Growing romano tomato seeds into lush, high-yielding vines is totally within your reach—especially with the right pruning techniques! By mastering suckering, stake training, and strategic trimming, you’ll unlock bigger, tastier tomatoes and healthier plants. Whether you’re a seasoned gardener or just starting out, these tricks will transform your harvest.
Ready to elevate your garden game? 🌱 Grab those pruners, grab your seeds, and get growing—your future perfectly pruned romano tomatoes are waiting for you! Start small, observe your plants, and soon you’ll be sharing your bounty with friends (or your next homemade marinara masterpiece).