Pruning
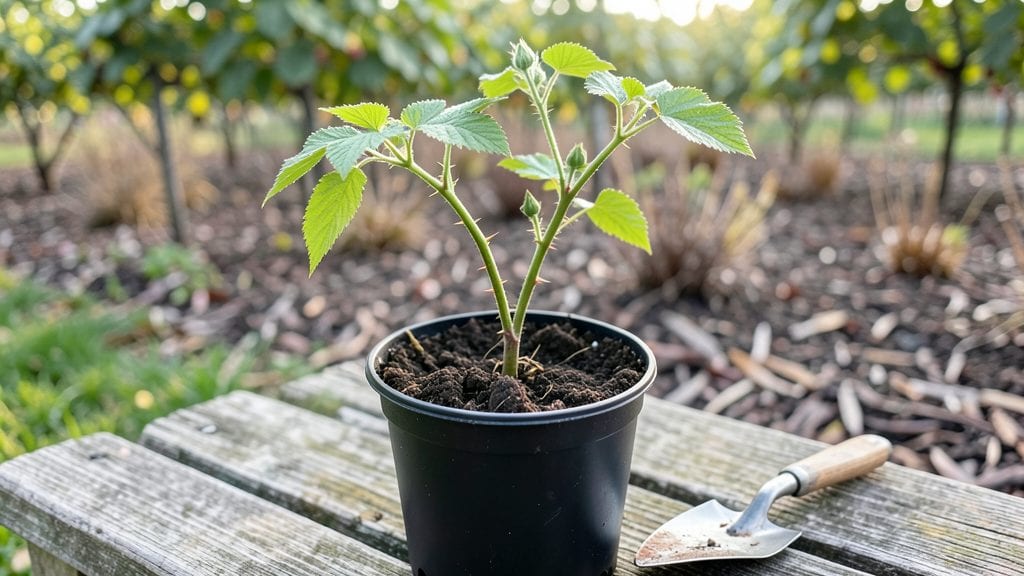
Transforming a raspberry bush seedling into a fruit machine starts with the right cuts—because how you trim now determines the harvest you'll enjoy next summer. 🌱 I learned the hard way that aggressive pruning leads to fewer canes, while gentle, strategic cuts encourage bushier growth and more berries.
The secret lies in understanding which canes produce fruit and when to give them space to thrive.
You'll need sharp pruners, a sunny spot with well-draining soil, and patience—because raspberries don’t rush. Start by planting your seedling where it gets at least 6-8 hours of sunlight daily, and mix compost into the soil to give roots a nutrient boost.
Water deeply after planting, then keep the soil consistently moist (but not soggy) for the first 30 days while roots establish.
By summer, you’ll see new canes emerge—these are your future fruit producers. The key is removing old, unproductive canes each year (they’ll be hollow or woody) and thinning crowded growth to improve airflow.
This simple habit prevents diseases and ensures every cane gets enough energy to produce sweeter, larger berries all season long.
Even in small spaces, this method works—just adjust spacing to 18-24 inches apart for dwarf varieties. The payoff? A bush that keeps producing from early summer through fall, with proper care. Let’s get those shears ready and turn that seedling into a berry powerhouse.
📚 In This Guide
- What you need
- Instructions
- Tips and common mistakes
- Wrapping up and next steps
What you need
- ● Pruning shears: Bypass pruners (sharp, clean blades) – 1 pair. Avoid anvil pruners to prevent crushing stems.
- ○ Loppers: For thicker stems (½"–1" diameter) – 1 pair (optional but helpful for mature canes).
- ● Gloves: Heavy-duty gardening gloves (cut-resistant) – 1 pair (protects against thorns and debris).
- ● Disinfectant: 70% isopropyl alcohol or bleach solution (1 part bleach to 9 parts water) – small spray bottle (sanitizes tools between cuts).
- ● Rake or hoe: For clearing debris and mulch – 1 tool.
- ○ Pruning sealant: Optional (e.g., tree wound pruning paste) – small tube (only for large cuts on established plants).
- ● Timing: Trim raspberry seedlings in late winter or early spring (before new growth starts) or right after harvest.
- ● Weather: Choose a dry, overcast day to avoid stressing the plant.
- ● Plant health check: Remove any dead, diseased, or crossing canes first.
- ● Mulch: Have organic mulch (straw or wood chips) ready to replenish after pruning.
- ● 💡 Sharpen your tools! Dull blades tear stems, inviting disease. Hone shears with a file before starting.
- ● 🌡️ Work in layers: Remove old canes (2+ years) first, then thin out crowded young shoots to 6–8 inches apart.
- ● 🎯 Label your cuts: Use a marker to tag canes you’re unsure about—reassess in a few weeks.
Step-by-step instructions for pruning raspberry bush seedlings
Here's how I shape young raspberry bushes for maximum fruit production—without cutting off future harvests.
✂️ Step 1: Identify and Remove Weak Growth
Start by examining your seedlings for thin, spindly canes that grow at odd angles. These won't support fruit well and compete with stronger growth. I like to use sharp pruning shears to cut these back to the ground—this redirects energy to the healthier canes.
Look for canes that are less than ¼ inch thick at the base. These are prime candidates for removal. You'll also spot canes growing from the base of the plant (suckers)—these should stay for now, as they'll become next year's fruiting canes.
✂️ Step 2: Thin Overcrowded Canes
Raspberry bushes naturally produce multiple canes from the same root system. Aim to leave 4-6 of the strongest, thickest canes per plant. This prevents overcrowding and ensures each cane gets enough sunlight and nutrients to produce fruit.
When thinning, cut at the base rather than mid-stem. This prevents disease from entering the plant through open wounds. If you're unsure which canes to keep, prioritize those that are upright and straight—they'll bear fruit more consistently.
🌿 Step 3: Prune for Airflow and Light
Next, focus on the interior of the bush where canes cross or rub against each other. These intersections create wounds that invite disease. Use your pruners to trim away any crossing canes, cutting them back to the main stem.
Also, remove any canes that grow inward toward the center of the bush. You want sunlight to penetrate all the way to the base. After pruning, step back and visualize the bush—you should see an open, pyramid shape with room for air to circulate.
🌱 Step 4: Shape for Future Growth
Now, give your raspberry bush its final shape by trimming the tips of the remaining canes. Cut back the top 6-12 inches of each cane to encourage bushier growth lower down. This is where next year's fruit will form.
If your seedlings are still young (under 2 feet tall), you can be more aggressive with this step. For taller canes, make the cut just above a bud that faces outward—this ensures new growth will spread rather than crowd the center.
⏰ Step 5: Clean Up and Monitor
After pruning, rake up and dispose of all clippings from the base of the plant. Leaving them behind can harbor pests or diseases. I like to sterilize my pruners with rubbing alcohol between cuts to prevent spreading anything.
Water the base of the plant deeply after pruning to help it recover. Over the next few weeks, watch for new growth from the base—these are your future fruiting canes. If you see any canes growing from the roots of last year's canes, remove them immediately to avoid overcrowding.
Tips & tricks for precision trimming raspberry bush seedlings
These simple yet game-changing tips will help you transform your raspberry seedlings into productive, fruit-bearing powerhouses—without sacrificing future harvests.
Tool Prep is Everything: Before you even touch a cane, sterilize your pruning shears with rubbing alcohol. I learned this the hard way after accidentally spreading disease between cuts. A quick wipe between plants prevents bacterial and fungal infections that can weaken your seedlings. Keep your tools sharp too—dull blades crush canes instead of making clean cuts, which invites rot.
The Quarter-Inch Rule: In Step 1, when identifying weak canes, I swear by the quarter-inch rule: any cane thinner than ¼ inch at the base should go. These spindly growths won't support fruit and just compete with stronger canes for nutrients. Pro tip: Run your thumb along the base—if it feels like a pencil, it's too thin. This simple check saves you from overcrowding headaches later.
Visualizing the Pyramid: After Step 3, when you're removing crossing canes, step back and visualize an open pyramid shape. The goal is sunlight reaching all the way to the base—this prevents mold and encourages fruit production. I like to imagine a Christmas tree shape: wide at the bottom, narrowing toward the top. If you can't see through the center, you're not done yet. This open structure is what separates healthy bushes from disease-prone ones.
Bud Direction Matters: When shaping canes in Step 4, always cut just above a bud that faces outward. I've made the mistake of cutting above inward-facing buds, which led to canes growing straight into the center—creating a dense, shaded mess. Outward-facing buds ensure new growth spreads outward, maintaining that crucial airflow and sunlight penetration you worked so hard to create.
Pro Tips for Raspberry Bush Seedling
- These simple yet game-changing tips will help you transform your raspberry seedlings into productive, fruit-bearing powerhouses—without sacrificing future harvests.
- Tool Prep is Everything: Before you even touch a cane, sterilize your pruning shears with rubbing alcohol.
- The Quarter-Inch Rule: In Step 1, when identifying weak canes, I swear by the quarter-inch rule: any cane thinner than ¼ inch at the base should go.
Frequently asked questions
Got questions about growing and maintaining raspberry bush seedlings? You’re in the right place! Here are answers to the most common queries to help you cultivate a thriving raspberry patch.
How long does it take for a raspberry seedling to produce fruit?
A raspberry seedling typically takes 1 to 2 years to bear fruit after planting, depending on the variety and growing conditions. Summer-bearing types may produce in the first season if planted early, while ever-bearing varieties often fruit in the second year. Patience pays off—healthy seedlings reward you with berries in no time!
When is the best time to prune raspberry seedlings?
Prune raspberry seedlings in late winter or early spring (before new growth starts) to remove dead, diseased, or weak canes. For summer-bearing varieties, cut back all old canes after harvest. Ever-bearing types need a two-stage prune: remove old canes in late winter and trim primocanes (new growth) in summer. Always use clean, sharp tools!
Can I grow raspberries from seed instead of seedlings?
While possible, growing raspberries from seed is not recommended for beginners. Seed-grown plants take years to fruit and may not match the flavor or vigor of nursery seedlings. Stick with certified raspberry seedlings for reliable, high-yielding bushes. If you’re determined to try seeds, expect a long wait and potential variability in traits!
What are the most common pests or diseases affecting raspberry seedlings?
Raspberry seedlings often face threats like spider mites, aphids, and Japanese beetles. Diseases such as cane blight or root rot can also strike. Monitor plants regularly, remove infected canes immediately, and apply organic neem oil or insecticidal soap as needed. Healthy soil and proper spacing reduce risks!
Do raspberry seedlings need winter protection?
Young raspberry seedlings benefit from mulching (with straw or leaves) to insulate roots and protect against frost heave. In colder climates, wrap canes loosely with burlap or use row covers. Avoid heavy mulch that could trap moisture—aim for 3–4 inches of organic material. Hardy varieties handle winter better than tender ones!
Wrapping up and next steps
Growing a thriving raspberry bush starts with the right care—and precision trimming is your secret weapon! 🌱 By mastering the art of pruning, you’ll unlock year-round harvests and a healthier, more productive plant. Whether you’re a beginner or a seasoned gardener, every snip brings you closer to a bountiful patch.
Ready to take the next step? Start small:
- Pick one bush to practice on this season.
- Grab your tools and follow the steps—confidence grows with repetition!
- Share your progress (or questions!) with fellow gardeners for extra support.