Pruning
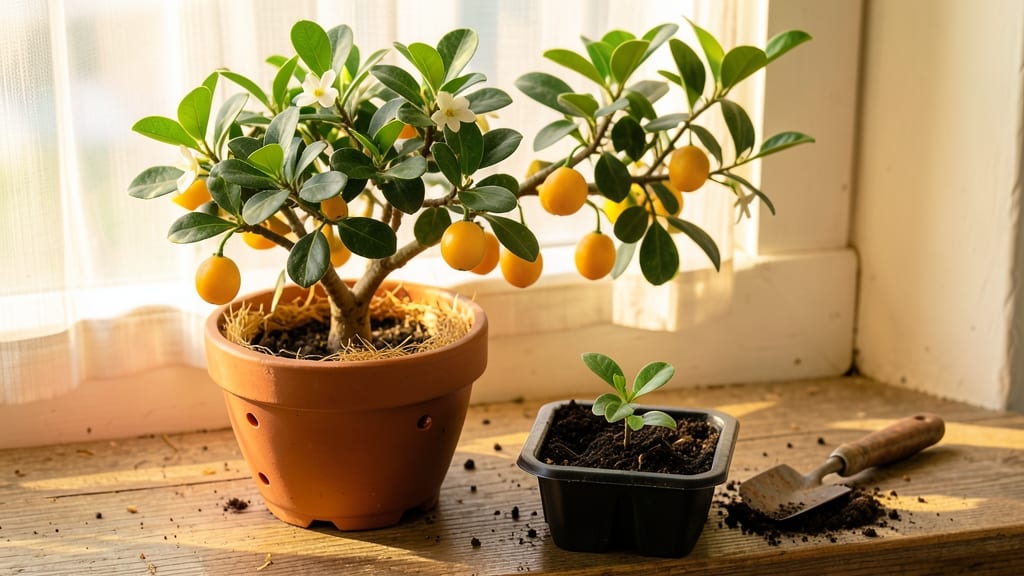
Growing a kumquat tree from seeds in water feels like magic—no soil stress, just roots reaching for their first taste of sunlight. 🌱 I’ve watched tiny seeds sprout into citrus saplings this way, and the process is simpler than you’d think, though it takes more patience than most gardeners expect.
The key is keeping the water fresh and the seeds warm, which tricks them into thinking they’re already in the ground.
You’ll need just a few things: clean glass jars, fresh kumquat seeds (saved from store-bought fruit), and a sunny windowsill or grow light. No fancy equipment—just a way to keep the water oxygenated and the seeds from rotting.
Most seeds take 3-6 weeks to sprout, but some stubborn ones wait months, so don’t give up too soon.
Once those first green shoots break the surface, you’ll feel like a citrus pioneer. The seedlings stay delicate for months, so handle them like glass, but with the right light and occasional pinch of fertilizer, they’ll grow into sturdy little trees ready for soil.
The real payoff? A homegrown kumquat tree that might one day bear fruit—if you’re willing to wait.
Here’s the catch: kumquat seedlings grow slow, and fruiting takes years. But the journey—watching those roots thicken, leaves unfurl, and branches stretch toward the sky—makes every week worth it. Between you and me, the hardest part isn’t the growing; it’s resisting the urge to rush the process.
📚 In This Guide
- What you need
- Instructions
- Tips and common mistakes
- Wrapping up and next steps
What you need
- ● Kumquat seeds: 3–5 fresh, plump seeds (harvested from ripe kumquats—avoid store-bought, as they’re often treated to prevent sprouting).
- ● Small glass or jar: A clean, transparent container (8–12 oz) with a wide mouth for visibility (e.g., a mason jar or baby food jar).
- ● Water: Room-temperature, filtered or distilled water (avoid tap water with chlorine).
- ● Paper towels or coffee filters: 2–3 sheets (cut to fit the jar’s opening).
- ● Rubber band or string: To secure the paper towels in place.
- ● Pencil or toothpick: For creating drainage holes (if using a jar without them).
- ○ Spray bottle (optional): For misting the seeds lightly if needed.
- ● Small pot (4–6 inches): With drainage holes (e.g., terracotta or plastic nursery pot).
- ● Well-draining potting mix: A blend of peat moss, perlite, and sand (or a citrus-specific mix).
- ● Spray bottle or watering can: For gentle hydration post-germination.
- ● Grow lights or sunny windowsill: A spot with 6–8 hours of indirect light daily.
- ○ Humidity dome or plastic wrap: To retain moisture during early growth (optional but helpful).
Step-by-step instructions for germinating kumquat seeds in water
This no-soil method works reliably—just follow my timing and moisture cues.
🌱 Step 1: Extract and Clean the Seeds
Cut open a ripe kumquat and carefully remove the seeds—you'll need about 4 seeds for this method. Rinse them under cool running water to remove any pulp clinging to the surface. I use a soft toothbrush to gently scrub away any remaining fruit residue, which can rot if left behind. Pat the seeds dry with a paper towel and let them air-dry for 10-15 minutes before proceeding.
Here's the thing—don't skip the drying step. Wet seeds left in a damp environment will develop mold before they even sprout. You'll know they're ready when the shells look slightly matte and no longer feel slick to the touch.
💧 Step 2: Prepare the Water and Jar
Fill a small glass jar (like a mason jar with a wide mouth) with 2 inches of room-temperature water. Use filtered or distilled water if possible—tap water with chlorine can slow germination. Place the 4 cleaned kumquat seeds around the inside of the jar, ensuring they're not touching each other or the sides.
Cover the jar loosely with plastic wrap or a breathable lid to retain moisture while still allowing airflow. This prevents the seeds from sitting in stagnant water, which would rot them. Set the jar in a location with indirect light—like a windowsill that gets morning sun but no harsh afternoon rays.
⏰ Step 3: Monitor and Change the Water Daily
Check the water level every 24 hours and add more room-temperature water to maintain the 2-inch depth. You'll see the seeds plump up within 3-5 days as they absorb moisture. Once tiny white roots appear—usually around day 7-10—that's your signal to keep the water level consistent but not submerged.
I know it seems tedious, but changing the water daily prevents bacterial growth that can drown the seeds before they sprout. Watch for the roots to reach about 1-2 inches long before moving to the next step. This ensures they're strong enough to handle transplanting.
🌿 Step 4: Transplant to Soil When Roots Are Established
Once the roots reach 1-2 inches, carefully transfer each seedling to a small pot filled with well-draining potting mix. Gently press the soil around the roots, leaving the top half of the seed exposed. Place the pots in a warm spot with bright, indirect light for the first week to reduce transplant shock.
Water lightly every 2-3 days until you see the first true leaves—those are the second set of leaves that appear after the initial seed leaves. This usually happens within 2-3 weeks after transplanting. Real talk: Don't overwater now. Kumquat seedlings are delicate and will rot if the soil stays soggy.
☀️ Step 5: Gradually Introduce Direct Sunlight
After the seedlings show 4-6 true leaves, begin acclimating them to direct sunlight by placing them in a south-facing window for 1-2 hours daily. Increase sunlight exposure by 1 hour each week until they can handle 6+ hours of sun. You'll notice the leaves darken in color and the stems thicken as they strengthen.
This gradual process prevents sunburn, which can scorch tender new growth. Within 3-4 months, your seedlings will be ready to move into larger pots or the ground—if you're in a warm climate. If frost is still a risk, keep them indoors under grow lights until spring.
Tips & tricks for germinating kumquat tree seeds
Here's what I learned after watching my first batch of kumquat seeds fail—don't make my mistakes!
Seed Selection Matters: Choose seeds from fully ripe kumquats—they're easier to extract and have higher germination rates. I always pick the largest, plumpest seeds from the center of the fruit, as they tend to sprout more reliably. If you're using store-bought kumquats, pick ones that yield easily when squeezed gently—they're ripe enough for seed extraction.
Water Quality is Critical: The 24-hour daily water change isn't just about freshness—it's about preventing bacterial buildup that can rot your seeds before they sprout. I've found that using room-temperature water (not cold) helps maintain consistent moisture without shocking the seeds. If you notice cloudy water after 24 hours, that's your sign to change it immediately—it means bacteria are starting to grow.
Root Development Timing: Watching for those 1-2 inch roots is the most exciting part! I've seen roots appear as early as day 5 in warm conditions, but typically they show up around day 7-10. The key is patience—don't rush the process by keeping the seeds submerged. Just maintain that 2-inch water level and you'll get strong, healthy roots ready for transplanting.
Transplanting Strategy: When your roots reach 1-2 inches, don't be tempted to rush the transplant. Let them sit in water for another 24 hours to harden off slightly—they'll be more resilient when you move them to soil. I use a small spoon to gently lift each seedling, being careful not to damage those delicate roots. The first true leaves usually appear within 2-3 weeks after transplanting, so keep your expectations realistic during this waiting period.
Pro Tips for Kumquat Tree Seeds
- Here's what I learned after watching my first batch of kumquat seeds fail—don't make my mistakes!
- Seed Selection Matters: Choose seeds from fully ripe kumquats—they're easier to extract and have higher germination r...
- Water Quality is Critical: The 24-hour daily water change isn't just about freshness—it's about preventing bacterial ...
Frequently asked questions
Got questions about growing kumquat trees from seeds?
You’re not alone! Here are answers to the most common queries—from germination tips to troubleshooting—so you can jumpstart your citrus adventure with confidence.
How long does it take for kumquat seeds to germinate?
With the water-germination method, expect sprouts in 2–4 weeks if conditions are ideal (warmth, humidity, and patience!). Keep the jar in bright, indirect light and change the water every 2–3 days. If nothing happens after 6 weeks, the seeds may be dormant—try soaking them in warm water overnight first.
What’s the best temperature for germinating kumquat seeds?
Aim for 70–85°F (21–29°C)—this mimics tropical conditions and speeds up germination. Place your jar near a sunny window or use a seedling heat mat if your home runs cooler. Avoid drafts or sudden temperature drops, which can stall sprouting. Pro tip: A clear plastic bag over the jar traps moisture and warmth!
Can I plant kumquat seeds directly in soil without water germination?
Yes! Skip the water step and plant seeds ½-inch deep in well-draining potting mix. Keep the soil moist (not soggy) and cover with a humidity dome or plastic wrap. Germination may take 3–8 weeks, but direct planting reduces transplant shock. Just be patient—kumquats are slow starters!
Why are my kumquat seeds rotting or moldy in water?
Overcrowding or stale water causes rot. Fix it: Use one seed per jar (or rinse seeds daily if sharing space) and replace water every 2–3 days. Add a splash of hydrogen peroxide (1 tsp per cup of water) to prevent mold. If seeds turn mushy, remove them and start fresh—healthy seeds stay firm and sink!
How do I know if a kumquat seedling is healthy?
A thriving seedling has bright green leaves, a sturdy stem, and no yellowing. Roots should be white and spongy (not brown or slimy). If leaves wilt or drop, it’s thirsty—water lightly and increase humidity. Warning: Avoid overwatering; soggy soil invites root rot. Keep it in bright, indirect light until transplanting!
Wrapping up and next steps
Growing a kumquat tree from seeds is a rewarding journey that blends patience with the joy of nurturing life! 🌱 Whether you’re drawn to the citrusy charm or the low-maintenance water germination method, you now have all the tools to succeed.
Start by gathering your supplies, follow the simple steps, and soon you’ll witness tiny roots sprouting—proof that even indoor gardening can be magical.
Ready to take the next step? Plant your sprouted seedling in soil once roots reach 1–2 inches, and keep nurturing it with love (and sunlight!). Your future kumquat tree awaits—happy growing! 🌟