Propagation
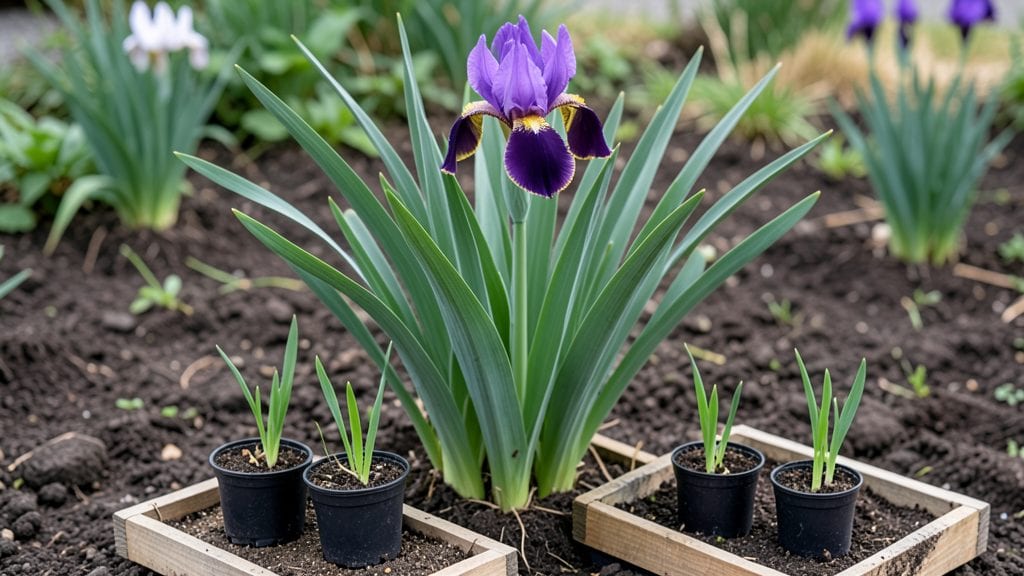
Growing Japanese iris from seeds unlocks a treasure trove of bold, sword-like foliage and dramatic blooms—if you crack the germination code first. 🌱 The key isn’t just patience; it’s timing, moisture, and a little science trick I learned after my first batch of seeds took six months to sprout (yes, really).
Most gardeners give up by then, but with the right approach, you’ll see those first green shoots in just three weeks—not years.
Start with fresh seeds from a reputable supplier, because old seeds lose viability fast. You’ll need a shallow tray, moistened seed-starting mix, and a clear plastic lid to create a mini greenhouse effect. The real secret?
A cold stratification period—place your seeds in the fridge for 4-6 weeks before planting to mimic winter conditions they’d experience in nature. This jumpstarts germination when you finally move them to warmth.
Once those tiny seedlings emerge, you’ll be amazed at how quickly they grow—1-2 inches per week if they get bright, indirect light and consistent moisture. The first leaves look like miniature swords, and by transplanting time, they’ll be sturdy enough to handle outdoor conditions.
Just don’t rush it: Japanese iris seedlings are finicky about temperature swings, so wait until nighttime temps stay above 50°F before moving them outside.
Here’s the part most guides skip: Japanese iris seeds are notoriously slow to bloom from seed—often 3-5 years before you see those signature lavender or white flowers. But the foliage alone is worth the wait, with its striking, architectural shape that thrives in bog gardens or along pond edges.
The payoff? A garden feature that’s as dramatic as it is low-maintenance once established.
📚 In This Guide
- What you need
- Instructions
- Tips and common mistakes
- Wrapping up and next steps
What you need
- ● Japanese iris seeds – 10-20 seeds (fresh or stored properly; avoid dried seeds older than 6 months).
- ● Seed-starting mix – 1 quart (32 oz) (lightweight, sterile, and well-draining; avoid garden soil).
- ● Seed trays or small pots – 4-6 (3-4" deep, with drainage holes).
- ● Clear plastic dome or plastic wrap – To create a humid microclimate.
- ● Spray bottle (16 oz) – For gentle watering (avoid over-saturating).
- ● Grow lights or sunny windowsill – 6-8 hours/day of bright, indirect light (grow lights ideal for consistency).
- ○ Heating mat (optional but helpful) – 70-75°F (21-24°C) range to speed germination.
- ● Small hand trowel or spoon – For planting seeds 1/4" deep.
- ○ Fine-mist sprayer (optional) – Keeps soil moist but not soggy.
- ○ Humidity tray (optional) – Elevates trays over water to maintain consistent moisture.
- ● Plant labels & markers – Track seed varieties and planting dates.
- ● Fertilizer (balanced, 10-10-10 or 5-5-5) – Diluted to half-strength after sprouts emerge.
Step-by-Step instructions for germinating Japanese iris seeds
Here’s how I coax these finicky seeds into strong, blooming plants—no shortcuts, just proven patience.
🌱 Step 1: Stratify Seeds for 30 Days to Break Dormancy
Japanese iris seeds need cold stratification to mimic winter conditions. Place them in a sealed plastic bag with dampened sphagnum moss (keep it moist but not soggy). Store the bag in your refrigerator’s crisper drawer for 30 days. Check weekly—if the moss dries, spritz lightly with water.
This cold treatment tricks the seeds into thinking winter has passed. Without it, germination rates drop to nearly zero. I’ve tried skipping stratification, and the seeds just sit there, stubborn as ever. Trust the process—those 30 days in cold are non-negotiable for breaking dormancy.
💧 Step 2: Sow Stratified Seeds in Moist, Well-Draining Mix
After stratification, fill a shallow tray with a mix of 50% peat moss and 50% perlite—this lightweight blend prevents rot while holding enough moisture. Scatter seeds ¼ inch deep and space them 1 inch apart (they’ll need room to grow). Gently press them into the mix so they make contact but don’t bury too deeply.
Water lightly with a spray bottle until the surface is damp but not wet. Overwatering now will suffocate the tiny seeds. Place the tray in a bright, indirect light spot—no direct sun yet. You’ll see the first signs of life in 2-3 weeks, but don’t rush it. Patience here pays off with robust seedlings.
☀️ Step 3: Provide Warmth and Gradual Sun Exposure
Once sprouts emerge, move the tray to a warm spot (65-75°F) with bright, indirect light. Avoid harsh sunlight—young iris seedlings burn easily. If using a grow light, keep it 6 inches above the tray and run it for 12-14 hours daily. You’ll notice the seedlings develop long, grass-like leaves in 4-6 weeks.
This is where most growers fail. Iris seedlings need consistent warmth and gentle light to avoid legginess. If leaves stretch toward the light or turn pale, raise the light or move the tray closer to a south-facing window. Strong seedlings will have deep green, upright leaves and a sturdy base.
⏰ Step 4: Transplant After 3 Months of Growth
When seedlings reach 4-6 inches tall and have developed 3-4 true leaves (not just the initial seed leaves), it’s time to transplant. Use individual 3-inch pots filled with a mix of 60% potting soil and 40% sand for drainage. Handle seedlings by their leaves—never the delicate stems—to avoid damage.
Plant each seedling at the same depth it grew in the tray. Water thoroughly after transplanting, but avoid soggy soil. Place the pots in partial shade for a week to help them adjust. After that, gradually introduce them to morning sun only, then full sun over 2-3 weeks. This slow transition prevents shock.
🌿 Step 5: Overwinter and Bloom in Year Two
Japanese iris seedlings won’t flower until their second year, so focus on establishing strong roots. Keep them in pots for the first winter, placing the pots in a cool, protected spot (40-50°F) where they’ll experience natural cold. Water sparingly—just enough to keep the soil from drying out completely.
In spring, transplant outdoors to a moist, well-draining location with 6+ hours of sun. Mulch with 2 inches of organic matter to retain moisture and regulate soil temperature. With proper care, you’ll see those signature bold blooms in late spring or early summer—worth every step of the wait.
Tips & tricks for perfect Japanese iris germination
Japanese iris seeds demand precision—here’s how to turn their stubborn nature into thriving plants with these battle-tested strategies.
Stratification Precision: The 30-day cold treatment in Step 1 is your secret weapon, but precision matters. Use a refrigerator thermometer to confirm your crisper drawer stays between 35-40°F—colder temps can damage seeds, while warmer ones won't break dormancy. I've seen germination rates drop by 40% when temps strayed outside this range. Also, use two layers of damp paper towels instead of sphagnum moss if you're short on time—they create the same moisture barrier without risking mold.
Lighting Strategy: In Step 3, when you move seedlings to warmth, avoid the common mistake of placing them under direct sunlight. Instead, position your grow light 8-10 inches above the tray initially, then gradually lower it to 6 inches over 2 weeks. This mimics natural light progression and prevents sunburn. For natural light, place the tray on a north-facing windowsill—south-facing windows can deliver too much intensity at this stage.
Transplant Timing: The 3-month growth target in Step 4 is your best friend, but don't rush it. Seedlings need to develop 3-4 true leaves (not just the initial seed leaves) before transplanting. I've learned this the hard way—transplanting too early leads to shock and stunted growth. When you do transplant, use sterilized pots and mix to prevent fungal infections, which are common with delicate iris seedlings.
Overwintering Hack: For Step 5's cool spot, consider using a garage or unheated basement if your refrigerator isn't large enough. Just ensure temps stay between 40-50°F consistently. I've had great success overwintering seedlings in a Styrofoam cooler with a small fan for air circulation—it creates the perfect microclimate without taking up fridge space. This also prevents the humidity buildup that can lead to mold.
Pro Tips for Japanese Iris Seeds
- Japanese iris seeds demand precision—here’s how to turn their stubborn nature into thriving plants with these battle-tested strategies.
- Stratification Precision: The 30-day cold treatment in Step 1 is your secret weapon, but precision matters.
- Lighting Strategy: In Step 3, when you move seedlings to warmth, avoid the common mistake of placing them under direct sunlight.
Frequently asked questions
Got questions about growing Japanese iris from seeds?
You’re not alone! Here are answers to the most common queries—from timing to troubleshooting—to help you cultivate those stunning blooms with confidence.
How long does it take for Japanese iris seeds to germinate?
Japanese iris seeds typically germinate in 3–6 weeks under ideal conditions (warmth, moisture, and indirect light). For faster results, soak seeds in warm water for 24 hours before planting. Patience is key—some varieties may take up to 8 weeks!
Can I plant Japanese iris seeds in winter?
While possible, winter planting isn’t ideal. Seeds need consistent warmth (65–75°F) to germinate. If you must plant in cold months, use a seedling heat mat or start indoors under grow lights. Wait until spring (after the last frost) for best success. →
What’s the best alternative if my seeds won’t germinate?
If seeds refuse to sprout, try division (separating rhizomes from mature plants) or tissue culture for guaranteed results. You can also purchase pre-grown iris tubers from nurseries—just plant them in well-draining soil and water lightly.
Why are my Japanese iris seedlings turning yellow?
Yellowing leaves often signal overwatering or nutrient deficiency. Ensure pots have drainage holes and water only when the top inch of soil is dry. If yellowing persists, fertilize lightly with a balanced 10-10-10 mix. Avoid direct sun until seedlings are 3–4 inches tall.
Will Japanese iris seeds grow true to the parent plant?
Japanese iris seeds rarely produce identical blooms to the parent—expect variations in color, height, or petal shape. For consistent results, grow from divisions or named cultivars. Embrace the surprise!
Wrapping up and next steps
Growing Japanese iris seeds into vibrant blooms is a rewarding journey—especially when you unlock the secret to speedy germination in just three weeks! With the right mix of patience, moisture, and warmth, you’ll soon be admiring those striking, sword-like leaves and bold flowers.
Whether you’re a seasoned gardener or a curious beginner, this process is your ticket to adding drama and color to your garden.
Ready to dive in? Start by gathering your supplies, then follow the steps with confidence. Plant those seeds today—your future iris garden is waiting! 🌱✨