Vegetables
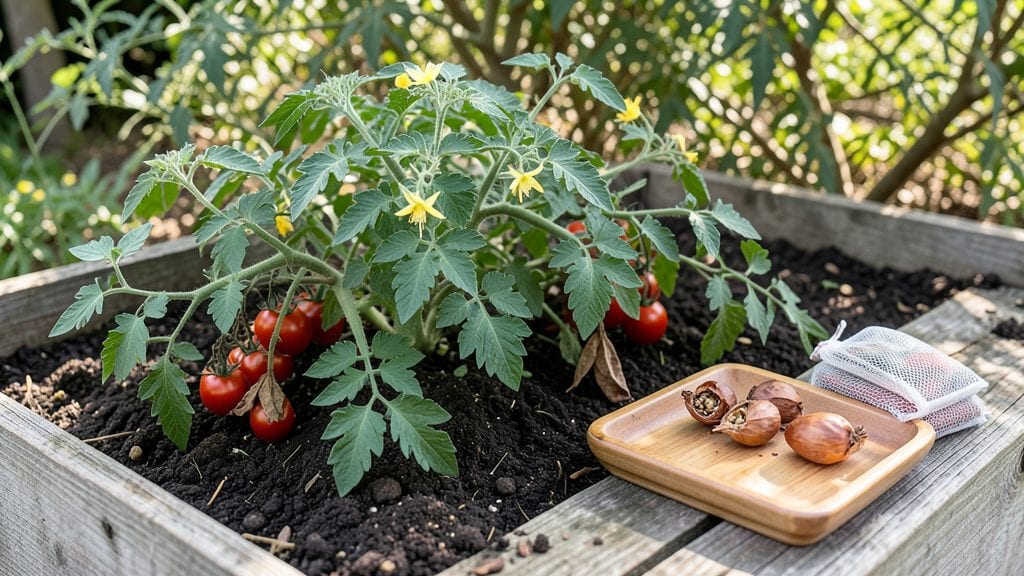
Saving tomato seeds from your garden means next year’s harvest starts with the exact flavors you love. 🌱 I’ve dried seeds from my heirloom tomatoes for years, and the difference between store-bought and homegrown is like comparing a photocopy to an original painting.
The process is simpler than it sounds: scoop out the jelly-like seed gel, rinse away the pulp, and let the seeds dry on a screen or paper towel. Temperature matters—aim for 70-80°F with good airflow to prevent mold.
I’ve ruined batches by rushing, but once you get the timing right, you’ll have clean, viable seeds ready for planting.
By summer’s end, you’ll have a stash of seeds that produce plants true to their parents—no hybrid surprises. Store them in a cool, dry place, and they’ll last 3-5 years. The first time I grew from my own saved seeds, the tomatoes tasted like summer itself, even in winter.
This method works for all tomato types, from slicers to cherry varieties. Just avoid cross-pollination if saving heirlooms—keep different types at least 10 feet apart. Ready to turn this year’s harvest into next year’s plants?
📚 In This Guide
- What you need
- Instructions
- Tips and common mistakes
- Wrapping up and next steps
What you need
- ● Mature tomato seeds: Harvest seeds from fully ripened, healthy tomatoes (about 1-2 cups of pulp per batch).
- ● Water: Enough to create a saltwater solution (1 part seeds to 2 parts water, plus 1-2 tbsp of non-iodized salt per quart).
- ● Fine-mesh strainer or cheesecloth: For separating seeds from pulp.
- ● Paper towels or coffee filters: To spread seeds for drying (use 2-3 sheets per batch).
- ● Small containers or envelopes: For seed storage (e.g., paper envelopes, glass jars, or labeled plastic bags).
- ● Pencil or marker: To label seeds with the tomato variety and date.
- ● Plastic or ceramic bowl: For fermenting seeds (avoid metal).
- ● Funnel: Helps transfer seeds into storage containers.
- ○ Desiccant packets: (Optional) Place in storage containers to absorb moisture.
- ● Seed catalog or notebook: To track varieties and germination notes.
- ○ Hair dryer (low heat) or dehydrator: (Optional) Speeds up drying for impatient gardeners!
Step-by-Step instructions for drying tomato seeds
Here’s how to save seeds from your best heirloom tomatoes—simple, reliable, and ready for next season.
🌱 Step 1: Select and Extract Ripe Tomatoes
Pick fully ripe tomatoes that are disease-free and show no signs of cracking or bruising. Slice them open and scoop out the gel-filled cavities where seeds cluster. I like to use a spoon to scrape every last bit—those seeds are precious, and even a few left behind add up.
Place the seed gel and pulp into a clean jar or bowl. Add twice the volume of water (for example, if you have 1 cup of pulp, use 2 cups of water). Stir gently to break up the gel. Let the mixture sit at room temperature for 2-3 days. You’ll see a scum layer form on top—this is normal and can be skimmed off daily.
💧 Step 2: Ferment and Separate Viable Seeds
During fermentation, viable seeds will sink to the bottom while empty or weak seeds float to the surface. After 2-3 days, drain the water through a fine-mesh strainer, leaving the seeds in the strainer. Rinse them gently under cool water to remove any remaining gel.
Spread the seeds on a clean paper towel or screen to air-dry slightly for 30 minutes. This step prevents mold during the drying process. If you notice any foul smells or slimy residue, discard the batch—it’s likely contaminated. Fresh seeds should smell clean and look plump, not shriveled.
☀️ Step 3: Dry Seeds Thoroughly in a Controlled Environment
Transfer the seeds to a paper envelope or small mesh bag (like a coffee filter or breathable fabric). Place them in a warm, dry spot with good airflow—think 70-80°F and low humidity. A sunny windowsill or a well-ventilated shelf works perfectly. Avoid direct sunlight, which can overheat and damage the seeds.
Stir the seeds gently every 2-3 days to ensure even drying. They’re ready when completely dry and brittle—snap a few between your fingers. If they crumble easily, they’re done. If they still feel damp or sticky, give them another 2-3 days. Properly dried seeds should look like tiny, hard beads.
🪴 Step 4: Store Seeds for Long-Term Viability
Label your seed envelope with the tomato variety and the year. Store it in a cool, dark place like a sealed jar in the refrigerator or a sealed container in a pantry. Under ideal conditions, tomato seeds stay viable for 4-5 years, though germination rates drop after 2 years. I like to test a few seeds annually to check viability—just plant a small batch and see what sprouts.
For extra protection, place a small packet of silica gel or a moisture absorber in the storage container. Check for moisture or pests every 6 months. If you notice any musty smells or signs of mold, discard the seeds immediately—contamination spreads fast in stored seeds.
Tips & tricks for perfect tomato seed drying
Avoid common pitfalls and maximize seed viability with these trusted strategies for your heirloom tomato harvest.
Fermentation Time Matters: The 2-3 day fermentation period in Step 1 is crucial for separating viable seeds from empty ones. If your kitchen is cooler than 70°F, extend fermentation to 3-4 days—viable seeds will still sink, but the process may take longer. I’ve found that warmer temperatures (around 75°F) speed up fermentation, so place your jar in a slightly warm spot if needed. The scum layer that forms is normal—just skim it off daily to keep your seeds clean.
Mold Prevention: In Step 2, that 30-minute air-drying on a paper towel is your first line of defense against mold. If you notice any foul odors or slimy residue after this step, don’t risk it—discard the entire batch immediately. Mold spores can ruin your seeds, and once contamination starts, it spreads quickly. For extra precaution, work in a clean area and use sterilized tools like a fine-mesh strainer and paper towels.
Drying Environment: The controlled environment in Step 3 between 70-80°F is ideal, but don’t overlook airflow. A sunny windowsill works, but avoid direct sunlight—it can overheat and damage the seeds. If your home is particularly humid, consider placing a small fan nearby to improve air circulation. Stirring seeds every 2-3 days ensures even drying, and the brittle test is foolproof—if they snap like tiny beads, they’re ready for storage.
Storage Wisdom: For long-term viability, store seeds in a cool, dark place like the refrigerator or pantry. I’ve had success using small glass jars with tight-sealing lids, but any airtight container works. Labeling with the variety and year is a game-changer—next year’s you won’t have to guess which seeds are which! Test a few seeds annually to check viability, and if you notice any musty smells during your 6-month checks, discard those seeds right away.
Pro Tips for Drying Tomato Seeds
- Avoid common pitfalls and maximize seed viability with these trusted strategies for your heirloom tomato harvest.
- Fermentation Time Matters: The 2-3 day fermentation period in Step 1 is crucial for separating viable seeds from empty ones.
- Mold Prevention: In Step 2, that 30-minute air-drying on a paper towel is your first line of defense against mold.
Frequently asked questions
Got questions about drying tomato seeds? You’re not alone! Here are answers to the most common concerns—from timing to troubleshooting—to help you save those seeds like a pro.
How long does it take to dry tomato seeds completely?
Drying tomato seeds properly takes 7–14 days at room temperature (60–80°F). Spread seeds on a paper towel or screen in a warm, dry spot with good airflow. Test readiness by gently pressing a seed—if it crumbles, it’s dry! Pro tip: Humidity slows drying; use a fan if your space feels damp.
Can I dry seeds straight from the tomato, or do I need to ferment them first?
Fermenting seeds for 2–4 days in water removes gelatin (which inhibits germination), but it’s optional for heirloom tomatoes. If you skip fermentation, rinse seeds thoroughly to remove pulp, then dry. Hybrid tomatoes must ferment—otherwise, seeds may not grow true!
What’s the best way to store dried tomato seeds long-term?
Store seeds in a cool, dark, dry place (like a sealed envelope or airtight container) at 32–41°F. Label with the variety and date—seeds stay viable for 2–5 years. Freezing (below 0°F) extends viability to 10+ years! Warning: Moisture is the enemy; use silica gel packets if needed.
Why are my seeds moldy or smelly after drying?
Mold or odors mean excess moisture during drying. Fix it by:
- Moving seeds to a warmer, drier spot (e.g., near a sunny window with a fan).
- Spreading seeds thinner** on a fresh paper towel.
- Skipping fermentation if pulp was left on—rinse seeds first!
What if I don’t have time to dry seeds naturally?
No problem! Use a food dehydrator (115–135°F for 2–4 hours) or oven (150°F for 1–2 hours). Monitor closely to avoid overheating. For extra speed, place seeds in a single layer on a wire rack in a well-ventilated room. Just ensure they’re bone-dry before storing!
Bonus Tip:
Test a few seeds before storing—plant them in soil to check germination. If 80%+ sprout, your batch is ready for next year’s garden!
Wrapping up and next steps
Drying tomato seeds is a simple yet rewarding way to preserve your favorite varieties and ensure a bountiful harvest next season! By following these steps—fermenting, rinsing, drying, and storing—you’ll safeguard both flavor and viability while reducing waste. 🌱
Now that you’re equipped with the know-how, why not give it a try? Grab those ripe tomatoes, gather your supplies, and start your seed-saving journey today. Your future garden (and taste buds!) will thank you—plus, you’ll save money and support sustainable growing. Happy seed drying! 🌿