
Propagation
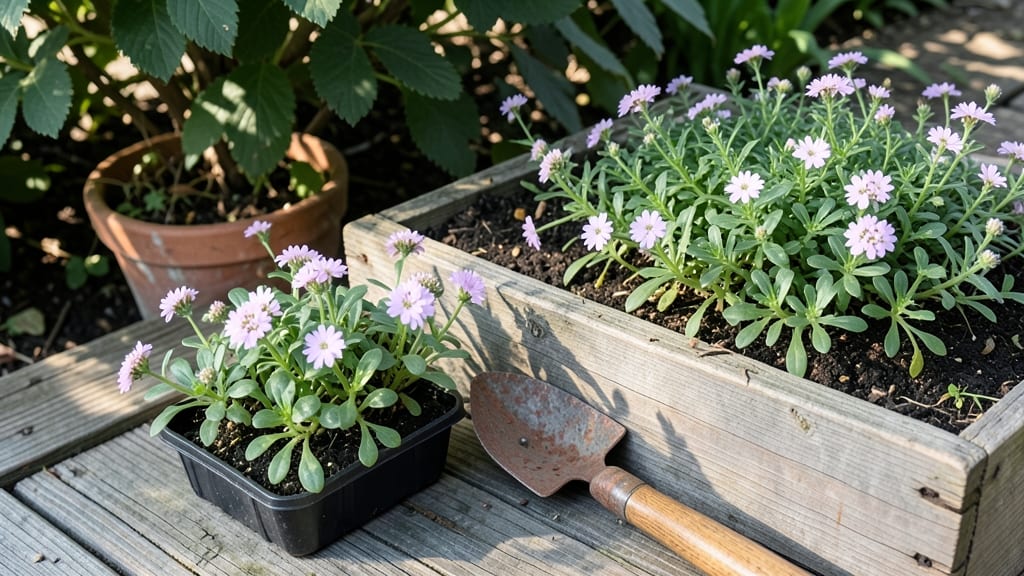
Sweet alyssum seedlings pop up in just 5-7 days—faster than most annuals—if you nail the soil and moisture right. I’ve grown thousands of these tiny white blooms, and the secret isn’t fancy equipment but getting the seedbed just damp enough to trick them into germinating.
Too dry, and they sulk; too wet, and they rot before they even stretch toward the light. The payoff? Clouds of fragrant flowers that attract bees and butterflies like a five-star hotel.
Start with a shallow tray or flat filled with sterile seed-starting mix—no compost chunks, no peat-free blends that hold too much moisture. Sprinkle seeds on top (they need light to germinate) and press them in just enough to make contact.
A spray bottle keeps things consistently damp without drowning them. Place the tray in a warm spot—70-75°F—and cover it with plastic wrap until you see those first pale green spikes. That’s when the magic really begins.
Leggy seedlings? You’re not alone—most growers face this when light is weak. Move them under grow lights within days of germination, or they’ll stretch like teenagers reaching for the fridge. Once they’ve got a few true leaves, thin them to 2 inches apart so they don’t compete for space.
Sweet alyssum thrives in cool weather, so if your spring is still chilly, don’t rush to transplant. Patience here means stronger plants that bloom nonstop from early spring until frost.
Here’s the kicker: these little seedlings don’t just tolerate neglect—they bounce back from it. Even if you forget to water for a day or two, they’ll perk up faster than most annuals. Once established, they self-seed like crazy, giving you free plants for years.
The key is starting them right, and I’ll walk you through every step—from the first sprout to those pollinators swarming your garden.
📚 In This Guide
- What you need
- Instructions
- Tips and common mistakes
- Wrapping up and next steps
What you need
- ● Sweet Alyssum Seeds: 1 packet (5,000–10,000 seeds, depending on variety). Opt for Lobularia maritima for best results!
- ● Seed Trays or Pots: 2–4 shallow containers (3–4 inches deep) with drainage holes. Cell packs (72–200 cells) work great for precision!
- ● Seed Starting Mix: 2–3 cups of high-quality, sterile potting mix (look for peat-based or coco coir blends). Avoid garden soil—it’s too dense!
- ● Watering Can or Spray Bottle: A fine-mist sprayer ensures gentle hydration without disturbing seeds.
- ● Plastic Wrap or Clear Lid: To create a humidity dome (keep seeds moist until germination).
- ● Grow Lights or Sunny Windowsill: A full-spectrum LED grow light (12–16 hours/day) or a south-facing window (60°F+).
- ○ Seedling Heat Mat: (Optional) Speeds up germination (70–75°F ideal).
- ● Fertilizer: A balanced liquid fertilizer (5-5-5 or 10-10-10) for post-germination feeding.
- ● Tweezers: For delicate seed placement (if not sowing directly into trays).
- ● Fan: A small oscillating fan (on low) to strengthen seedlings after sprouting.
Step-by-Step instructions for growing sweet alyssum seedlings
Sweet alyssum thrives when you follow these simple steps—you'll see those cheerful blooms in just weeks.
Prepare Containers and Soil for Germination
Sweet alyssum germinates quickly, so start with clean 4-inch pots or a shallow tray filled with seed-starting mix. Fill each container to about ½ inch below the rim—this gives seedlings room to grow without crowding. Press the mix down lightly so it's firm but not compacted. The goal is a fine, airy texture that holds moisture without becoming soggy.
Moisten the soil with a spray bottle until it's evenly damp. You'll know it's ready when a handful clumps together but doesn't drip water. Avoid oversaturating—excess moisture can cause seeds to rot before they sprout. Place the pots in a warm spot, ideally between 65-75°F, to encourage fast germination.
Sow Seeds Lightly and Keep Moist
Sweet alyssum seeds are tiny, so I use a toothpick to gently place them on the soil surface. Scatter them ¼ inch apart—they don’t need deep planting, just a light press to ensure contact with the soil. Cover them with a thin layer of vermiculite or perlite no more than ⅛ inch deep to protect them while they sprout.
Mist the surface with water until the top layer is damp but not wet. Place a clear plastic dome or plastic wrap over the tray to retain humidity. Check daily—condensation should form on the underside of the cover. Remove the cover as soon as you see the first sprouts, usually within 5-7 days, to prevent fungal issues.
Provide Bright Light for Strong Seedlings
Once seedlings emerge, move them to a south-facing window or under grow lights for 12-14 hours of light daily. Sweet alyssum grows best with bright, indirect light—direct sun can scorch the delicate leaves. If using a grow light, keep it 2-3 inches above the seedlings and adjust as they grow to maintain that distance.
You’ll know they’re getting enough light when the leaves are dark green and compact, not stretched or pale. Thin seedlings to 2 inches apart if they become crowded. This prevents competition for nutrients and encourages bushier growth. Water from the bottom to avoid disturbing the tiny plants—just place the tray in ½ inch of water for 10 minutes every 2-3 days.
Harden Off and Transplant Outdoors
When seedlings develop 2-3 sets of true leaves, usually after 3-4 weeks, they’re ready for outdoor life. Start by placing them in a shaded, sheltered spot for 1-2 hours the first day. Gradually increase their time outside over 5-7 days, moving them to morning sun before bringing them back indoors at night.
Transplant after the last frost when nighttime temperatures stay above 50°F. Space seedlings 6-8 inches apart in well-draining soil. Water deeply after planting to settle the roots. Sweet alyssum thrives in full sun to partial shade, so choose a spot with at least 4-6 hours of sunlight daily. Mulch with 1 inch of organic mulch to retain moisture and suppress weeds.
Maintain for Continuous Blooms
Water sweet alyssum 1-2 times weekly, depending on rainfall, keeping the soil evenly moist but not waterlogged. Deadhead spent blooms by pinching them off with your fingers—this encourages nonstop flowering from spring until frost. Fertilize lightly every 4-6 weeks with a balanced, water-soluble fertilizer diluted to half strength.
Watch for pests like aphids or whiteflies. If you spot them, spray plants with neem oil or a soapy water solution to keep them at bay. Sweet alyssum’s sweet scent naturally deters many pests, but early intervention ensures your pollinators stay happy. With proper care, your seedlings will reward you with fragrant, long-lasting blooms in just a few short weeks.
Tips & tricks for perfect sweet alyssum seedlings
Sweet alyssum grows fast when you nail these simple but crucial steps—here's how to avoid common pitfalls and get those blooms in record time.
Soil Preparation Secret: The key to fast germination in Step 1 is that fine, airy texture in your seed-starting mix. I like to sift it through a mesh screen to break up any clumps before filling your containers. This ensures even moisture distribution and prevents waterlogged spots where seeds might rot. After moistening, let the soil sit for 10 minutes before planting—this gives excess water time to drain, creating the perfect environment for those tiny seeds to sprout quickly within 5-7 days.
Lighting Hack for Step 3: If you don't have a south-facing window, grow lights are your best friend for those crucial 12-14 hours of light. I use a simple LED clip light on a timer—just place it 2-3 inches above the seedlings and set it to turn on at sunrise and off at sunset. The light should be bright enough to cast minimal shadow when you hold your hand underneath. Watch for dark green, compact leaves as your signal that they're getting exactly what they need to grow strong.
Harden Off Gradually: The 1-2 hour to 5-7 day hardening process in Step 4 might seem tedious, but it's absolutely critical for transplant shock. I start by placing my seedlings on a shaded patio table in the morning, then bring them back indoors by early afternoon. This mimics natural sunlight patterns and gives their delicate leaves time to adjust. By day 5, they'll be ready for full morning sun exposure—just watch for any wilting, which means they need one more day of gradual adjustment.
Watering Wisdom: Bottom-watering your seedlings in Step 3 is a game-changer for preventing fungal issues. That 10-minute soak every 2-3 days gives roots exactly what they need without disturbing the fragile seedlings. For outdoor plants in Step 5, I water in the morning so any excess moisture evaporates during the day, keeping roots healthy and preventing waterlogged soil that can invite pests.
Pro Tips for Sweet Alyssum Seedling
- Sweet alyssum grows fast when you nail these simple but crucial steps—here's how to avoid common pitfalls and get those blooms in record time.
- Soil Preparation Secret: The key to fast germination in Step 1 is that fine, airy texture in your seed-starting mix.
- Lighting Hack for Step 3: If you don't have a south-facing window, grow lights are your best friend for those crucial 12-14 hours of light.
Frequently asked questions
Got questions about growing sweet alyssum seedlings? You’re not alone! Here are answers to the most common queries to help you cultivate happy, thriving blooms for your pollinator garden.
How long does it take for sweet alyssum seeds to germinate?
Sweet alyssum seeds typically sprout in 7–14 days under ideal conditions—consistent moisture, warm soil (60–70°F), and indirect light. For faster results, pre-soak seeds for 24 hours or use a heat mat. Patience pays off, but don’t wait longer than 3 weeks before troubleshooting!
Can sweet alyssum seedlings handle cold weather?
Yes! Sweet alyssum is cold-hardy and can tolerate light frosts (down to 20°F). Start seeds indoors 4–6 weeks before the last frost or sow directly outdoors in early spring or fall. Just avoid heavy frost or snow-covered seedlings, which may delay growth. A light row cover helps in chilly climates.
What’s the best way to transplant sweet alyssum seedlings without shocking them?
Hardening off seedlings for 5–7 days is key! Gradually expose them to outdoor conditions (sun, wind, and cooler temps) for a few hours daily. Water thoroughly before and after transplanting, and choose a cloudy day to minimize stress. Space seedlings 6–12 inches apart for optimal airflow and blooms.
Are there any alternatives to sweet alyssum for pollinator gardens?
Try these fast-growing, pollinator-friendly alternatives:
- Lavender – Drought-tolerant and fragrant.
- Cosmos – Easy to grow, self-seeds readily.
- Calendula – Edible, bright blooms, and pest-repellent.
- Borage – Self-sows aggressively and attracts bees.
Why aren’t my sweet alyssum seedlings sprouting?
Common culprits include:
- Too cold – Seeds need warmth (60–70°F) to germinate.
- Inconsistent moisture – Keep soil damp (not soggy) until sprouts appear.
- Poor light – Place trays in bright, indirect light or use grow lights.
- Old seeds – Sweet alyssum seeds lose viability after 1–2 years.
Wrapping up and next steps
Growing sweet alyssum seedlings is a rewarding way to add fragrant, fast-blooming beauty to your pollinator garden! With minimal effort, you’ll enjoy vibrant flowers that attract bees, butterflies, and beneficial insects—while keeping maintenance simple.
Whether you’re a beginner or a seasoned gardener, these cheerful blooms are a perfect addition to containers, borders, or edging.
Ready to level up your garden? 🌱 Start by gathering your supplies, follow the steps above, and soon you’ll be surrounded by sweet-scented, pollinator-friendly blooms. Happy planting!