Picking
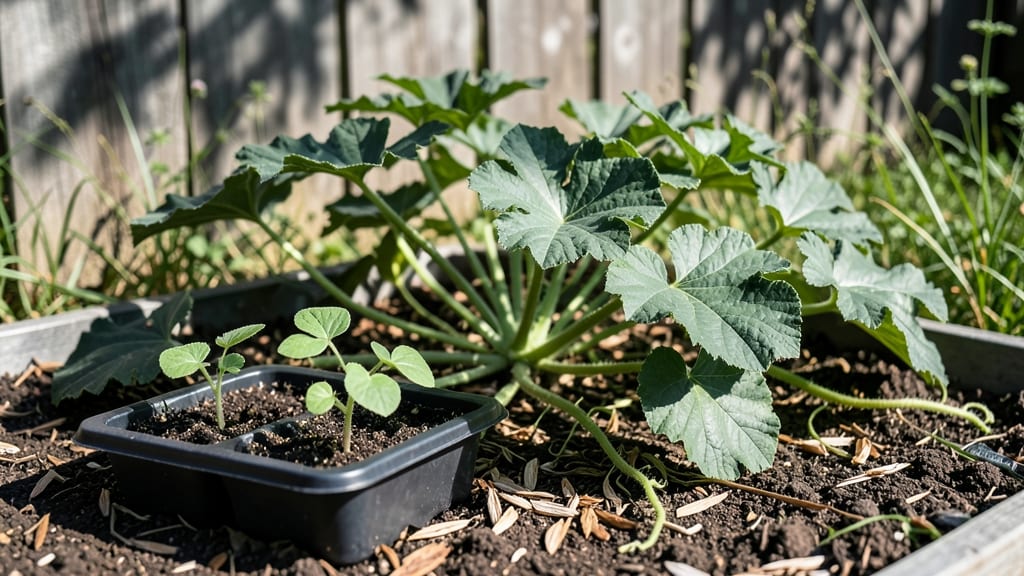
Sprouting watermelon seeds in just 3-5 days—instead of the usual two weeks—is the secret to jump-starting those bushy vines you dream about. I learned this trick after struggling with slow germination in my first attempt, and now my seedlings pop up like clockwork.
The key lies in prepping the seeds and soil just right, then keeping everything cozy until those first green leaves appear. No more waiting weeks to see progress—just fast, reliable starts that turn into productive plants.
You’ll need warm soil, a shallow tray, and a spray bottle—basically, the same tools you probably have around. The soil should stay between 85-95°F for those seeds to wake up quickly, and a clear plastic dome or plastic wrap keeps humidity high while they germinate.
Most people overlook how critical warmth is, but this small step makes all the difference. Once those sprouts break through, you’ll have sturdy seedlings ready for transplanting in about two weeks total.
What you end up with is a head start on the season—plants that outpace neighbors who started from store-bought seedlings. The vines grow thick and vigorous, and you avoid the leggy, weak plants that happen when seeds take too long to sprout.
By mid-summer, you’ll be harvesting sweet, homegrown watermelons that taste nothing like the grocery store versions. The best part? This method works just as well in containers as it does in the ground.
Fair warning: Overwatering at this stage is the fastest way to kill your progress. Keep the soil moist but not soggy, and avoid moving the tray once the seeds are planted.
The payoff is worth the patience—imagine those first tendrils reaching for the sun, knowing they’ve got a strong foundation to grow into a full, productive vine. Let’s get those seeds sprouting fast!
📚 In This Guide
- What you need
- Instructions
- Tips and common mistakes
- Wrapping up and next steps
What you need
- ● Watermelon seeds: 3–5 seeds per pot (or 1–2 seeds if planting directly in the ground). Opt for small-seeded varieties like 'Sugar Baby' or 'Black Diamond' for easier sprouting.
- ● Paper towels or coffee filters: 2–3 sheets per batch of seeds (for pre-sprouting).
- ● Spray bottle: 1 (with water) for gentle misting.
- ● Plastic zip-top bags: 1–2 (quart-sized) to create a humid sprouting chamber.
- ● Small pots or biodegradable seedling cups: 3–5 (3–4 inches deep) for transplanting sprouted seeds.
- ● Potting mix: 1 bag (well-draining, seedling-specific blend). Avoid garden soil—it’s too dense!
- ○ Fertilizer (optional but recommended): A balanced liquid fertilizer (e.g., 10-10-10) or fish emulsion for post-transplant boost.
- ● Scissors or knife: For cutting paper towels/bags if needed.
- ● Measuring cup: To monitor soil moisture (aim for consistently damp, not soggy soil).
- ● Sunny location: A south-facing window or grow light for seedlings (6–8 hours of light/day).
- ○ Heat mat (optional): Speeds germination if temps dip below 70°F (21°C).
- ● Garden space or large container: Watermelons need 10+ square feet per vine and warm soil (75°F+/24°C+).
Instructions for sprouting watermelon seeds quickly
Here’s how to jumpstart your watermelon vines with a germination trick that cuts waiting time in half.
Soak Seeds to Kickstart Germination
Place your watermelon seeds in a small bowl and cover them with warm water—about 80°F—for 8-12 hours. This softens the tough outer shell and speeds up the sprouting process. I like to use a mesh bag or strainer so the seeds stay contained while soaking.
After soaking, drain the water and let the seeds sit on a damp paper towel for another 4-6 hours. This keeps them hydrated without overwatering. You’ll see tiny white roots peeking out within this time—this is your signal they’re ready for planting.
Plant Pre-Sprouted Seeds in Warm Soil
Fill your planting area with well-draining soil warmed to at least 75°F. Watermelons love heat, and cooler soil slows germination. If your garden bed isn’t naturally warm, consider using a black plastic mulch or a seedling heat mat to maintain the right temperature.
Plant the sprouted seeds 1 inch deep, spacing them 6 inches apart in rows that are 3 feet apart. Gently press the soil around them to ensure good contact, but don’t pack it down too tightly. This ensures the roots can easily push through without resistance.
Cover for Humidity and Warmth
Create a mini greenhouse effect by placing a clear plastic dome or row cover over the planted seeds. This traps warmth and moisture, which watermelon seeds crave to germinate quickly. Check daily to make sure the soil stays moist but not soggy—you’ll want it to feel like a damp sponge.
Within 3-5 days, you should see the first true leaves emerge. If the soil dries out or cools below 65°F, germination slows dramatically. Keep an eye on the weather—if rain is forecasted, remove the cover temporarily to prevent waterlogging.
Thin Seedlings for Strong Vines
Once the seedlings reach 2-3 inches tall, thin them so only the strongest plant remains in each spot. Watermelons need space to sprawl, so don’t rush this step. Use a small trowel to carefully dig up weaker seedlings and transplant them to another area if desired.
After thinning, water deeply at the base of the remaining plants. Avoid wetting the leaves to prevent disease. You’ll notice the vines thicken and grow more vigorously within a week—this is your sign the plants are off to a great start.
Provide Support for Bushy Growth
Watermelons thrive with a little encouragement to spread out. Install trellises or stakes early to guide the vines as they grow. This not only saves space but also improves airflow, reducing the risk of fungal issues. I like to use strong bamboo stakes or a wire trellis for support.
Keep the soil consistently moist but not waterlogged, especially during flowering. You’ll know your plants are happy when they produce large, yellow blossoms and eventually, those iconic watermelon tendrils. With this fast-start method, you could be harvesting in as little as 70 days!
Tips & tricks for sprouting watermelon seeds quickly
This fast germination method isn't just about speed—it's about setting your watermelon vines up for success from day one. Here's what I've learned to make the process even more reliable.
Temperature Control: The 80°F water temperature in Step 1 is crucial—any cooler and the seeds won't soften properly, while warmer water can damage the delicate seed coats. I use a thermometer to check my water temperature, especially if I'm working in a cooler kitchen. For the soil in Step 2, if your outdoor temperatures drop below 75°F at night, consider using a small greenhouse or cold frame to maintain that warmth during the critical germination period.
Hydration Strategy: During the 4-6 hour damp paper towel phase, I place the towel inside a sealed plastic bag with a few drops of water. This creates a humid microclimate that encourages faster root development. Just be sure to check the seeds periodically—they shouldn't feel soggy, just consistently moist. This extra humidity can cut your germination time by nearly 24 hours compared to just using a towel.
Planting Depth Tip: The 1-inch planting depth in Step 2 might seem shallow, but watermelon seeds need that proximity to warmth and moisture to germinate quickly. If you're working with heavy clay soil, consider mixing in some compost to improve drainage while maintaining that warm soil temperature. I've found that pre-warming the planting area with black plastic mulch for a day before planting gives the seeds an even faster start.
Covering Technique: For Step 3, I recommend using a clear plastic dome rather than a row cover if you have one. The dome creates a more controlled environment where you can monitor humidity levels more precisely. If you notice condensation forming on the inside of the dome, that's a good sign—it means the humidity is perfect for germination. Just be sure to ventilate briefly each day to prevent mold growth.
Pro Tips for Sprouts Seeded Watermelon
- This fast germination method isn't just about speed—it's about setting your watermelon vines up for success from day ...
- Temperature Control: The 80°F water temperature in Step 1 is crucial—any cooler and the seeds won't soften properly, ...
- Hydration Strategy: During the 4-6 hour damp paper towel phase, I place the towel inside a sealed plastic bag with a ...
Frequently asked questions
Got questions about sprouting watermelon seeds for faster, bushier vines?
Here are answers to the most common ones—so you can skip the guesswork and get growing!
How long does it take for watermelon seeds to sprout using this method?
With the sprouting hack, you’ll see tiny sprouts (about 1/4-inch tall) in just 2–4 days if kept warm (70–85°F) and moist. Transplant them into soil within 5–7 days for best results. Patience pays off—waiting ensures stronger seedlings!
What if my seeds don’t sprout? What’s the fix?
Don’t panic! First, check moisture—seeds need consistent dampness (not soggy). If they’re still dry after 5 days, try soaking them in warm water for 4–6 hours before retrying. Old seeds (2+ years) or poor storage can also kill germination. For stubborn seeds, swap in fresh ones from a trusted brand.
Can I use this method for other melons (like cantaloupe or honeydew)?
The sprouting hack works for any large-seeded melon, including cantaloupe, honeydew, and even cucumbers. Just adjust the sprouting time slightly—some varieties may take 3–5 days to crack open. Pro tip: Test a few seeds first to gauge timing!
When’s the best time to transplant sprouted seeds outdoors?
Wait until nighttime temps stay above 55°F (usually after the last frost) and soil is at least 70°F. Sprouted seeds are delicate—harden them off for 3–5 days by placing them in shade outdoors before full sun. Plant them deeply (1–2 inches below soil) to support their long roots.
Are sprouted watermelon seeds edible if they don’t grow?
Yes! If your sprouts fail to thrive, you can eat them raw—they’re packed with nutrients like protein, fiber, and vitamin C. Rinse them well, chop finely, and add to salads, smoothies, or sandwiches. Just avoid seeds from treated/pesticide-coated packets unless labeled organic.
Wrapping up and next steps
Growing sprouts-seeded watermelon is a game-changer for gardeners eager to kickstart their vines early and maximize yields! 🌱 With just a few simple steps—like soaking seeds, using damp paper towels, and transplanting with care—you’ll enjoy bushier plants and sweeter fruit sooner than ever.
This method isn’t just efficient; it’s also a fun way to connect with nature and experiment with your harvest.
Ready to sprout your success? Grab those seeds, follow the steps, and watch your watermelon patch thrive! For even better results, document your progress or share tips with fellow gardeners—your journey might inspire others to try this fast germination hack too.