Planting
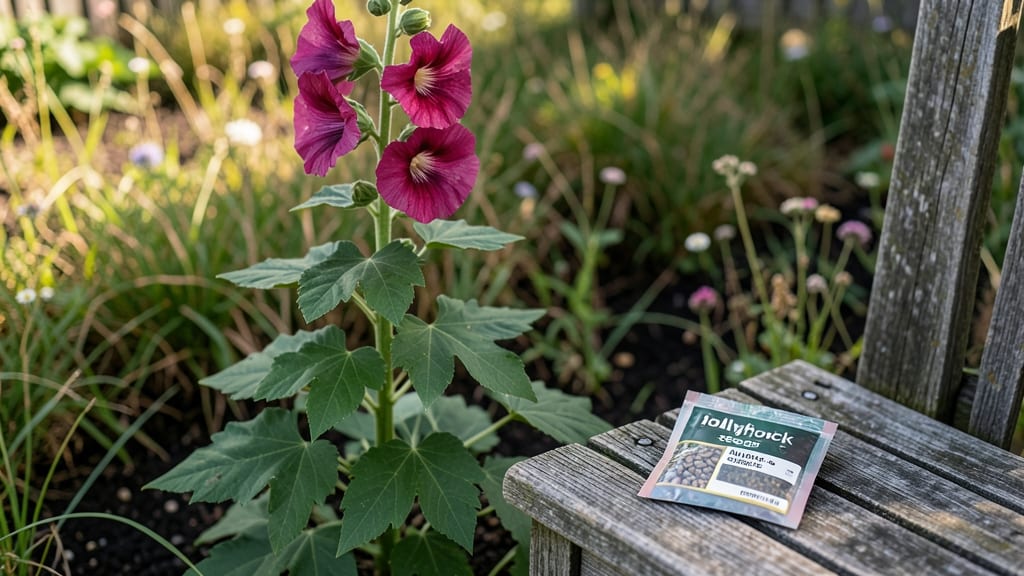
Sowing hollyhock seeds deep is the secret to those dreamy, towering blooms that turn your garden into a storybook scene—just like the first time I saw my seedlings burst through soil buried twice as deep as their length. the packet said—those stems grew strong enough to support blooms taller than me.
The trick is patience and the right timing. Start seeds indoors 8-10 weeks before your last frost, or sow directly outside in early spring when soil reaches 50°F. Hollyhocks love well-draining soil, so mix in compost before planting.
The deeper you bury those tiny seeds—up to 1/2 inch—the better the germination rate, and the seedlings will emerge with sturdy stems ready for action.
Once sprouted, keep the soil consistently moist but not soggy. Thin seedlings to 12-18 inches apart when they’re a few inches tall—this prevents overcrowding and gives each plant room to grow into its full, majestic height.
By midsummer, you’ll have a border of blooms that hummingbirds and bees can’t resist, and your neighbors will ask how you did it.
For those who worry about weak stems or flopping blooms, I’ve got a secret: stake them early. Drive a 3-foot stake beside each plant at planting time, and tie stems loosely as they grow.
It’s the difference between a garden center display and a showstopper that lasts all summer. Let’s get those seeds in the ground!
📚 In This Guide
- What you need
- Instructions
- Tips and common mistakes
- Wrapping up and next steps
What you need
- ● Hollyhock seeds: Choose heirloom or hybrid varieties (e.g., Alcea rosea). Buy 5–10 seeds per plant (they have low germination rates). Opt for organic or untreated seeds if possible.
- ● Garden soil or potting mix: Well-draining, loamy soil with a pH of 6.0–7.5. Mix in compost (1 part compost to 3 parts soil) for nutrients.
- ● Planting containers or seed trays: For direct sowing: A 6-inch-deep trench in a sunny garden bed (full sun, 6+ hours/day).
- ● For indoor starts: 2–3 inch deep cells or small pots (biodegradable pots work too!).
- ● Planting tools: Trowel or small hand shovel for digging trenches.
- ● Measuring tape or ruler (to ensure 1–2 inch deep planting).
- ● Watering can or hose with a gentle spray nozzle.
- ○ Mulch (optional but recommended): Straw or shredded leaves to retain moisture and suppress weeds.
- ● Timing: Sow seeds 6–8 weeks before your last frost date (indoors) or directly in spring after soil warms to 50°F+.
- ● Sunlight: Hollyhocks thrive in full sun—mark your spot if shade is nearby!
- ● Spacing: Leave 12–18 inches between plants (they’ll grow 3–6 feet tall!).
- ● Disease resistance: If rust or powdery mildew is common in your area, choose resistant varieties (e.g., ‘Chater’s Double’).
- ● Seedling heat mat ($10–$20) to speed up germination indoors.
- ● Plant labels or stakes to track varieties.
- ● Fertilizer (balanced 10-10-10 or compost tea) for established plants.
- ● Row cover or cloches to protect young seedlings from pests.
Instructions for sowing hollyhock seeds
Hollyhocks thrive when planted deep and direct—here's how to get those towering stems off to the best start.
Prepare the Soil for Direct Sowing
Choose a sunny spot with well-draining soil—hollyhocks despise soggy roots. Work in a 2-inch layer of compost into the top 12 inches of soil to loosen it and improve fertility. Hollyhocks grow best in slightly alkaline soil, so if yours tests acidic, add 1 pound of garden lime per 100 square feet and mix it in thoroughly.
Rake the area smooth to create a fine seedbed. Hollyhock seeds are tiny, so you want a firm, even surface to prevent them from washing away during watering. Press down lightly with your hands or a board to eliminate air pockets. This ensures good seed-to-soil contact, which is crucial for germination.
Plant Seeds Deeply and Spaced Correctly
Hollyhock seeds need deep planting—about ½ inch below the soil surface. Use a stick or your finger to make small holes 1 inch apart in rows 18 inches apart. This spacing prevents overcrowding as plants mature into towering giants. Drop 2-3 seeds per hole and cover them lightly with soil.
Don’t press the soil too firmly over the seeds—just enough to hold them in place. Hollyhocks self-thin naturally, so you won’t need to worry about removing excess seedlings later. Water gently but thoroughly after planting to settle the soil around the seeds.
Provide Consistent Moisture Until Germination
Keep the soil evenly moist (not soggy) until germination, which typically takes 10-21 days depending on temperature. Hollyhocks prefer 60-70°F soil temperatures for best results. Use a fine mist spray bottle to water daily if the weather is dry, ensuring the soil surface stays damp but not wet.
Once seedlings emerge, reduce watering slightly but keep the soil moist. Overwatering at this stage can cause seedlings to rot, while underwatering leads to weak, leggy growth. You’ll know moisture is right when the soil feels like a damp sponge—squeeze a handful to test.
Thin Seedlings for Stronger Stems
When seedlings reach 2-3 inches tall, thin them to 1 plant every 12-18 inches to give roots room to grow. Use scissors to snip unwanted seedlings at soil level—this prevents disturbing the roots of remaining plants. Hollyhocks develop deep taproots, so avoid pulling seedlings to avoid damaging the roots of those left behind.
Thinning now ensures your hollyhocks won’t compete for nutrients, leading to taller, sturdier stems next season. Watch for the strongest, most upright seedlings—these are the ones that will thrive. After thinning, water deeply to help the remaining plants establish.
Maintain Through the First Growing Season
Hollyhocks are low-maintenance once established, but they appreciate regular watering during dry spells—about 1 inch of water per week. Mulch with 2-3 inches of organic mulch (like straw or shredded leaves) to retain moisture and suppress weeds. Keep mulch 2 inches away from stems to prevent rot.
Fertilize lightly in early spring with a balanced, slow-release fertilizer (like 10-10-10) at half-strength. Hollyhocks don’t need heavy feeding—too much nitrogen produces leafy growth at the expense of flowers. By next year, you’ll be rewarded with 6-foot-tall blooms if you’ve given them the right start.
Tips & tricks for sowing hollyhock seeds
These simple strategies will help you avoid common pitfalls and give your hollyhocks the best possible start for those dramatic, towering blooms next year.
Soil Preparation Secret: The key to successful germination lies in that firm, even seedbed you create in Step 1. I've found that using a wooden board to press down the soil creates a more consistent surface than just using your hands. This prevents seeds from washing away during your first watering and ensures better soil-to-seed contact. For even better results, consider adding a thin layer of horticultural sand to your seedbed—it improves drainage while keeping the soil structure just right for those tiny seeds.
Planting Depth Matters: That ½-inch planting depth in Step 2 might seem shallow, but hollyhock seeds need darkness to germinate properly. If you plant them too deep (more than ½ inch), they may never sprout. I like to use a toothpick to make precise holes—it gives me better control than my finger. After planting, give the soil a very gentle pat with your hand to secure the seeds without compacting them too much.
Germination Timing: The 10-21 day germination window in Step 3 can feel like an eternity, especially when you're eagerly checking every day. To speed things along slightly, place a clear plastic dome or plastic wrap over your newly planted seeds—this creates a mini greenhouse effect. Just remember to remove it once you see the first sprouts to prevent mold. Keep in mind that soil temperatures between 60-70°F are ideal, so if your spring is particularly cool, you might want to consider starting seeds indoors under grow lights for a few weeks before transplanting.
Thinning Technique: When it comes time to thin in Step 4, I've learned the hard way that pulling seedlings can damage the delicate taproots of the remaining plants. Instead, use sharp scissors or pruning shears to cut seedlings at soil level. This method is quicker and cleaner, and it prevents disturbing the roots of your keepers. After thinning, I always give the remaining plants a good drink of water to help them recover from the stress.
Pro Tips for Sowing Hollyhock Seeds
- These simple strategies will help you avoid common pitfalls and give your hollyhocks the best possible start for those dramatic, towering blooms next year.
- Soil Preparation Secret: The key to successful germination lies in that firm, even seedbed you create in Step 1.
- Planting Depth Matters: That ½-inch planting depth in Step 2 might seem shallow, but hollyhock seeds need darkness to germinate properly.
Frequently asked questions
Got questions about sowing hollyhock seeds? You’re not alone—these striking flowers can be tricky for beginners! Below, we’ve rounded up the most common queries to help you grow confidently.
When is the best time to sow hollyhock seeds?
Hollyhocks thrive when sown directly in the garden in early spring (as soon as the soil is workable) or late summer (8–10 weeks before your first frost). Avoid sowing too early—cold, wet soil can cause rot. For cooler climates, start seeds indoors 6–8 weeks before last frost if you prefer early blooms.
How long does it take for hollyhock seeds to germinate?
Germination can take 10–21 days, depending on temperature and moisture. Keep seeds consistently moist (not soggy) and in warm soil (60–70°F). If seeds don’t sprout within 3 weeks, they may need light to germinate—try pressing them lightly into the soil rather than burying them deep.
Do hollyhock seeds need light to germinate?
Yes! Hollyhock seeds are light-dependent. Scatter them on top of the soil (or barely cover with ¼ inch of soil) and keep them in a bright, warm spot. If sowing indoors, place trays under grow lights until seedlings emerge. Over-burying seeds often results in poor or no germination.
Can I grow hollyhocks from store-bought seeds, or should I collect my own?
Store-bought seeds are perfectly fine—just check for heirloom or open-pollinated varieties if you want to save seeds later. If collecting your own, let seed pods dry on the plant, then harvest and store in a cool, dry place. Seeds lose viability after 1–2 years, so freshness matters!
Why aren’t my hollyhock seedlings growing tall?
Leggy seedlings often mean too much shade or heat stress. Thin seedlings to 12–18 inches apart and ensure they get 6+ hours of sunlight daily. If grown indoors, transplant outdoors gradually to harden them off. Overcrowding or poor soil can also stunt growth—amend soil with compost for better nutrition.
How do I overwinter hollyhock seeds for next year?
Hollyhocks are perennial in zones 3–9, but if you want to save seeds, let them dry on the plant, then store in a paper envelope in a cool, dark place (like a fridge). Label seeds with the variety and date—most stay viable for 1–2 years. For cuttings, dig up roots in fall and store in dry peat moss until spring.
Wrapping up and next steps
Sowing hollyhock seeds is a rewarding way to grow tall, vibrant blooms that will brighten your garden next year! With the right deep planting technique and a little patience, you’ll enjoy stunning flowers that attract pollinators and add vertical interest to your space. 🌸
Now that you’re ready to plant, take the next step by marking your garden beds or containers and preparing the soil. Once your seeds are in the ground, water gently and watch as your hollyhocks grow into a breathtaking centerpiece. Happy gardening!