Planting
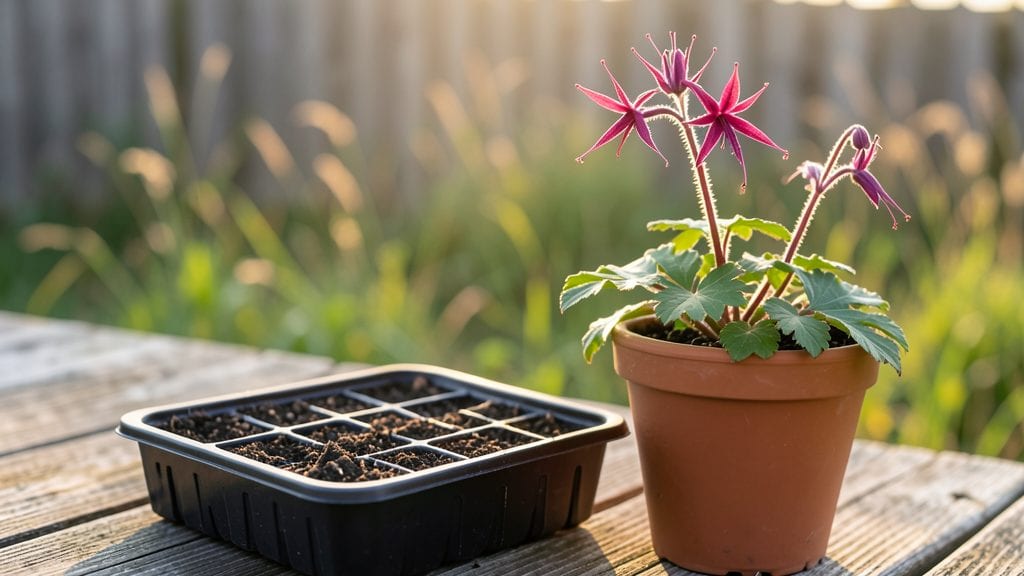
Sowing cleome seeds unlocks a dazzling display—bare soil becomes a sky-high sea of blooms in just 6-8 weeks, effortless and breathtaking. I’ve sown these seeds for years, and they’re the only annual that reliably delivers drama with almost no effort.
The key is getting them started right, whether you’re popping them outdoors in spring or giving them a head start indoors.
You’ll need a sunny spot, loose soil, and a handful of patience—though the waiting pays off. Cleome thrives in well-draining soil and full sun, so avoid heavy clay or shady corners.
Plant seeds just ¼-inch deep, spacing them 12-18 inches apart if you want those signature balloon-like blooms to spread. Water gently after planting, but don’t drown them; these seeds hate soggy soil.
Germination happens fast—often within 7-14 days—and seedlings pop up like magic. Thin them to your strongest plants, and watch them shoot up 6 feet tall by summer.
The blooms attract hummingbirds and butterflies, making your garden feel alive with movement. Once established, they’re nearly indestructible, handling heat and occasional neglect like pros.
Here’s the secret: cleome doesn’t need coddling. Skip the fertilizers, ignore the weeds, and let them grow wild—just give them space and sunlight. By midsummer, you’ll have a vertical explosion of color that outshines anything from a nursery. Ready to try it?
📚 In This Guide
- What you need
- Instructions
- Tips and common mistakes
- Wrapping up and next steps
What you need
- ● Cleome seeds: 1–5 seeds per pod (or a packet of 10–50 seeds for bulk planting). Opt for Cleome hassleriana for classic spider flowers or Cleome spinosa for a wild, drought-tolerant variety.
- ● Seed-starting mix: 1–2 gallons of sterile, well-draining potting soil (avoid garden soil—it’s too dense!). Look for a mix labeled "seed-starting" or "cactus/succulent blend."
- ● Containers: For direct sowing: 6-inch pots or biodegradable peat pellets (1–2 per seed).
- ● For indoor starts: 4–6 inch pots or a seed tray with individual cells.
- ● Watering can or spray bottle: With a fine mist nozzle to keep seeds moist without drowning them.
- ○ Gloves (optional): Cleome seeds have a sticky coating—gloves make handling easier!
- ● Plant labels: Small stakes or markers to track varieties (cleome seeds are tiny and easy to mix up).
- ○ Heat mat (optional): For indoor starts—keeps soil at 70–75°F (21–24°C) to speed germination.
- ● Clear plastic wrap or dome: To create a mini greenhouse effect (remove once sprouts appear).
- ○ Fertilizer (optional): A balanced, water-soluble fertilizer (5-10-5 or 10-10-10) diluted to half-strength for transplanting.
- ● A sunny spot! Cleome thrives in full sun (6+ hours daily)—indoors or outdoors.
- ● Patience (but not much—these seeds germinate in 5–14 days!).
- ● Knowledge of your last frost date (cleome is frost-sensitive; wait until soil is warm).
Instructions for sowing cleome seeds
Cleome seeds germinate quickly and thrive with minimal effort—here’s how to get vibrant blooms in record time.
Prepare the Seed Starting Mix
Fill your seed-starting containers with the sterile seed-starting mix until they’re about ½ inch from the top. Cleome seeds need loose, well-draining soil to prevent damping-off, so avoid compacting the mix. I like to tap the containers gently on the counter to settle the soil evenly without packing it down too tightly.
Moisten the mix lightly with warm water until it’s damp to the touch but not soggy. Overwatering now can cause the seeds to rot before they even sprout. A spray bottle works best—it delivers even moisture without displacing the soil. Let the excess water drain completely before planting.
Sow the Seeds at the Right Depth
Cleome seeds are large and easy to handle, so I plant them ¼ inch deep—just enough to cover them lightly. Press each seed gently into the soil to ensure good contact, but don’t bury them too deep. Deeper planting slows germination, and cleome seeds don’t need extra encouragement to sprout.
Space the seeds 1 inch apart in the container, as they’ll germinate quickly and grow fast. If you’re sowing directly outdoors, plant them ½ inch deep and 6 inches apart in well-drained soil. Cleome thrives in poor soil, so don’t fuss over fertility—just ensure the ground isn’t waterlogged.
Provide Warmth and Moisture for Fast Germination
Cleome seeds germinate fastest in warm soil (70–80°F). If your outdoor temperatures are cooler, start them indoors under a grow light or on a seedling heat mat to speed up the process. You’ll see sprouts in as little as 3–7 days—sometimes even faster if conditions are ideal.
Keep the soil consistently moist but not wet. I use a spray bottle to mist the surface daily until germination occurs. Once the first green shoots appear, reduce watering slightly to prevent fungal issues. Cleome seedlings are tough, but they’ll struggle if the soil stays soggy.
Thin Seedlings for Stronger Growth
When seedlings reach 2 inches tall, thin them to 3–4 inches apart in the container or 12 inches apart in the garden. Use scissors to snip unwanted seedlings at soil level—this prevents disturbing the roots of the remaining plants. Cleome doesn’t mind being crowded at first, but giving them space ensures bigger, healthier blooms later.
After thinning, water deeply to help the remaining seedlings establish. Cleome is drought-tolerant once established, but young plants benefit from 1 inch of water per week during dry spells. Avoid overhead watering after thinning to prevent disease, and always water at the base.
Transplant or Harden Off for Outdoor Success
If you started seeds indoors, wait until nighttime temperatures stay above 50°F before transplanting. Cleome handles heat and humidity well, making it a great choice for warm climates. Harden off seedlings by placing them outdoors in partial shade for 2–3 hours daily, gradually increasing their exposure over 5–7 days. This prepares them for full sun without shock.
Transplant seedlings into their final location, ensuring they have plenty of space—they’ll grow 3–5 feet tall with sprawling habits. Cleome doesn’t need rich soil, but it does appreciate well-draining conditions. Once planted, water deeply to settle the roots, and watch for quick growth in just a few weeks.
Tips & tricks for perfectly sowing cleome seeds
These simple yet game-changing strategies will help you achieve those fast, vibrant cleome blooms with minimal fuss—just like the pros do.
Soil Preparation Secret: The sterile seed-starting mix should be fluffy enough to crumble easily between your fingers when dry. If it feels compacted, aerate it by gently raking the surface with a fork before sowing. This prevents the dreaded damping-off disease while ensuring your cleome seeds have the perfect loose environment they crave. I find using a mix specifically formulated for seed starting—rather than garden soil—makes all the difference in those first critical days.
Germination Speed Hack: Cleome seeds thrive in that 70–80°F soil range, but if your home runs cooler, place your seed trays on a seedling heat mat set to 75°F. You’ll notice sprouts appearing in just 3–4 days instead of the full 7-day window. Pro tip: Group your trays together—their collective warmth helps maintain that ideal temperature without extra equipment. This is especially helpful during cooler spring evenings when germination slows dramatically.
Thinning Technique: When thinning those 2-inch-tall seedlings, I recommend using a pair of clean, sharp scissors instead of pulling by hand. This prevents disturbing the roots of your remaining plants and gives you cleaner cuts that heal faster. After thinning, give the soil a good soaking—this helps the remaining seedlings establish stronger root systems before their next growth spurt. The 3–4 inch spacing in containers might seem generous, but it pays off with sturdier stems and more abundant blooms.
Transplanting Timing: That 50°F nighttime temperature threshold is non-negotiable for cleome. I’ve learned this the hard way—planting too early when nights dip below 50°F can shock delicate seedlings. For extra insurance, I monitor my local weather forecast and only transplant when a 5-day outlook shows consistently warm nights. The gradual 5–7 day hardening process is crucial—it’s the difference between plants that thrive and ones that wilt under sudden full-sun exposure. Trust me, this small investment of time prevents major setbacks later.
Pro Tips for Sowing Cleome Seeds
- These simple yet game-changing strategies will help you achieve those fast, vibrant cleome blooms with minimal fuss—just like the pros do.
- Soil Preparation Secret: The sterile seed-starting mix should be fluffy enough to crumble easily between your fingers when dry.
- Germination Speed Hack: Cleome seeds thrive in that 70–80°F soil range, but if your home runs cooler, place your seed trays on a seedling heat mat set to 75°F.
Frequently asked questions
Got questions about growing cleome from seeds? You’re not alone! Here are some of the most common concerns—plus quick, no-fuss answers to help you succeed.
When is the best time to sow cleome seeds?
Cleome thrives in warm soil, so wait until after the last frost when nighttime temps stay above 50°F (10°C). For a head start, start seeds indoors 4–6 weeks before transplanting (use a heat mat if needed). Direct sowing in spring or late summer works too—just ensure no frost is forecasted!
How long do cleome seeds take to germinate?
One of cleome’s perks? Fast germination! Under ideal conditions (warmth, moisture, and light), seeds sprout in 7–14 days. Keep soil consistently moist but not soggy—a humidity dome or plastic wrap can speed things up if your home is dry. Patience pays off, but don’t worry if it takes a little longer!
Do cleome seeds need light to germinate?
Yes! Unlike some seeds, cleome requires light to germinate. Scatter seeds on the soil surface (they’re tiny—no need to bury them) and press lightly. If starting indoors, place trays under grow lights or in a sunny window. Outdoors, choose a bright, sheltered spot to avoid washing seeds away.
What should I do if my cleome seeds don’t sprout?
Don’t panic—cleome seeds can be finicky! First, check for consistent warmth and moisture. If they’re still dry, try soaking seeds overnight in warm water before replanting. Old seeds (over 2 years) may lose viability, so buy fresh seeds for better results. If all else fails, try again—cleome often rewards persistence with vibrant, low-maintenance blooms!
Can I grow cleome in containers or small spaces?
Cleome’s tall, airy stems make it perfect for containers, balconies, or small gardens. Use pots at least 12–18 inches deep with well-draining soil. Just ensure they get full sun (6+ hours daily) and regular watering. Dwarf varieties (like ‘Pinkie’) are ideal for tight spaces—ask at your local nursery!
Wrapping up and next steps
Sowing cleome seeds is a rewarding way to add vibrant, low-maintenance blooms to your garden with minimal effort! 🌸 These fast-germinating seeds thrive in warm soil, making them perfect for beginners or busy gardeners.
With the right prep—like proper spacing, well-draining soil, and patience—you’ll soon enjoy their striking flowers and whimsical seed pods.
Now that you’re ready to plant, grab your seeds and get growing! Start small in a container or a sunny patch of your yard, and soon you’ll have a burst of color to admire. Happy gardening! 🌱