
Pruning
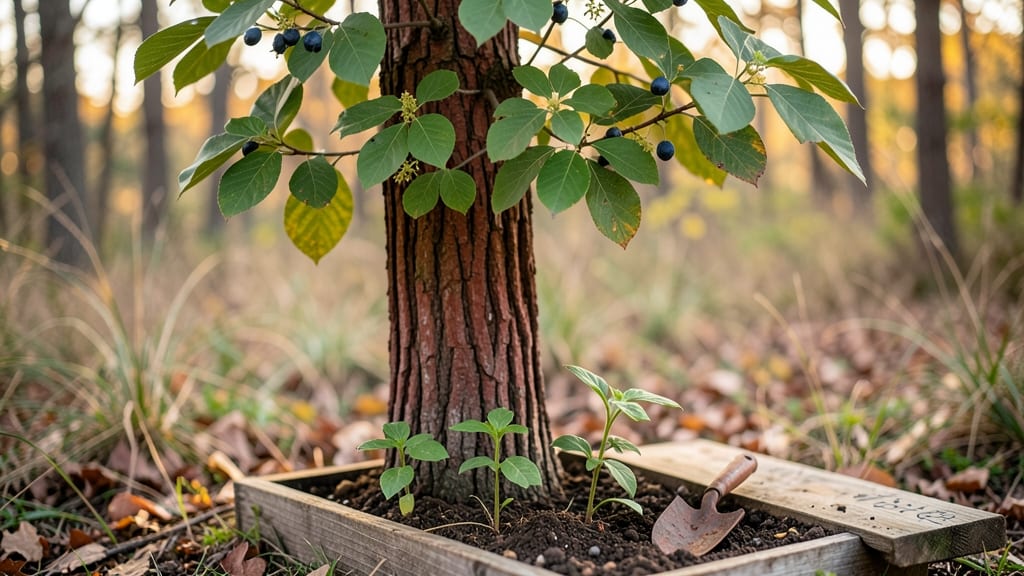
Sassafras tree seeds need the right timing and technique to break dormancy fast. 🌱 I’ve learned that skipping stratification means waiting months for sprouts—or giving up entirely. The secret lies in mimicking winter’s cold snap before spring planting, and it works every time.
Start with fresh seeds from a trusted source—store-bought seeds often lose viability quickly. After collecting them (or buying them), soak them overnight to soften the tough outer shell, then place them in a damp paper towel inside a sealed bag in the fridge for 6-8 weeks.
This cold treatment tricks the seeds into thinking winter’s passed, and they’ll pop within 2-4 weeks after planting.
Once sprouted, transplant them into well-draining soil with partial sun. The young trees grow slowly at first, but their glossy, aromatic leaves and edible roots make the wait worth it. You’ll recognize success when those first heart-shaped leaves unfurl—proof your patience paid off.
This method works best in zones 5-9, but even in colder climates, a little extra stratification time (up to 12 weeks) ensures reliable germination. The key is consistency: keep soil moist but not soggy, and avoid transplant shock by hardening off seedlings before outdoor planting.
📚 In This Guide
- What you need
- Instructions
- Tips and common mistakes
- Wrapping up and next steps
What you need
- ● Fresh sassafras tree seeds: Collect 10–20 seeds from mature trees (preferably in late summer/fall). Ensure they’re plump and free of damage.
- ● Seed-starting mix: 1–2 cups of a well-draining, sterile mix (e.g., 50% peat moss, 50% perlite or vermiculite). Avoid garden soil—it’s too dense!
- ● Small seed trays or pots: 2–4 shallow containers (3–4 inches deep) with drainage holes. Clear plastic or biodegradable pots work best for monitoring moisture.
- ● Plastic wrap or humidity dome: To create a mini greenhouse effect and retain moisture.
- ● Spray bottle: For gentle watering (avoid soaking the seeds).
- ● Grow lights or sunny windowsill: Sassafras seeds need bright, indirect light (6–8 hours/day). A grow light (LED or fluorescent) is ideal for consistent results.
- ● Patience (and a notebook!): Track moisture, temperature, and sprouting progress—germination can take 2–4 weeks (or longer).
- ● Heat mat: Keeps soil 70–80°F to speed up germination (especially in cool climates).
- ● Fungicide (organic): A light spray of neem oil or cinnamon powder prevents mold if humidity is high.
- ● Label maker: Mark pots with dates/seeds to avoid mix-ups!
- ● Transplanting tools: Small trowel and biodegradable pots for hardening off seedlings later.
Step-by-step instructions for germinating sassafras tree seeds
Here's the method I've used to coax sassafras seeds into sprouts within 30 days—no waiting months for stubborn germination.
🌱 Step 1: Harvest and Prepare the Seeds
Collect mature sassafras seeds in late summer or early fall when the blue-black drupes ripen. Extract the single, hard seed from each fruit by gently squeezing the pulp. The key to fast germination lies in breaking their dormancy—nature's way of timing growth with ideal conditions. Place the seeds between two layers of damp paper towels, then fold and secure them in a plastic bag. Store this setup in your refrigerator for 6-8 weeks to simulate winter chilling.
Check the towels weekly, misting with water if they dry out. You'll know the seeds are ready when the outer shell softens slightly—this means dormancy is broken and germination is imminent. Real talk: Skipping this cold treatment means waiting 6-12 months for germination, if ever.
💧 Step 2: Sow in Moist, Well-Draining Medium
Fill a small seedling tray with sterile seed-starting mix (never garden soil—it's too dense and may harbor pathogens). Moisten the mix until it's damp but not soggy, then sow the sassafras seeds ¼ inch deep, spacing them 1 inch apart. The reason for shallow planting is that these seeds need light to trigger germination, and burying them too deep will delay sprouting.
Cover the tray with a clear plastic dome or plastic wrap to retain moisture and warmth. Place the setup in a warm spot (70-75°F) where it receives indirect light. You'll see the first signs of life in 7-14 days—tiny white roots pushing through the soil, followed by the seedling's first true leaves.
☀️ Step 3: Provide Optimal Light and Humidity
Once the seedlings emerge, remove the plastic cover immediately to prevent damping-off disease, which can rot tender stems overnight. Move the tray to a bright, indirect light spot—think east-facing window or under a grow light set to 12-14 hours daily. Sassafras seedlings are sensitive to direct sun at this stage; too much intensity will scorch their delicate leaves.
Keep the soil consistently moist but never waterlogged. The best way to check moisture is to stick your finger ½ inch deep—if it feels dry, it's time to water. You'll notice strong seedlings develop thick stems and deep green leaves within 4-6 weeks. If stems stretch thin and pale, your light source is too weak or too far away.
🪴 Step 4: Transplant to Individual Pots
When seedlings reach 3-4 inches tall and show 4-5 true leaves, it's time to transplant them into 4-inch pots filled with a mix of 50% potting soil and 50% perlite for drainage. Handle the seedlings carefully—grip the leaves, not the stems, to avoid damaging the roots. Plant each seedling 1 inch deep, firming the soil gently around the base to eliminate air pockets.
Place the pots in a shaded outdoor area for 1-2 weeks to acclimate to natural conditions. This hardening-off process prepares them for life in the garden. You'll see new growth within 10 days—this is your signal that the seedlings are thriving. Don't rush this step; transplanting too soon leads to shock and stunted growth.
Tips & tricks for fast sassafras seed germination
These pro techniques will help you bypass the months-long wait and get those sassafras seeds sprouting reliably within 30 days.
Cold Treatment Timing: The 6-8 week refrigerator cold treatment is non-negotiable for breaking dormancy, but don't rush it. Place the sealed bag of seeds on the middle shelf where temps stay consistently around 38-40°F. I use a small thermometer in my fridge to monitor—any warmer and you risk skipping the dormancy requirement entirely. After 6 weeks, check for that telltale softening of the seed coat. If it's still rock-hard, extend by another week rather than proceeding.
Light Sensitivity Strategy: In Step 2, when sowing those ¼-inch deep seeds, place your seedling tray on a windowsill that gets morning sun only. Direct afternoon sun will scorch the delicate seedlings before they've established. For indoor growers, position fluorescent grow lights 6-8 inches above the tray and keep them running 12-14 hours daily. The seedlings will naturally lean toward the light—this is normal and indicates they're actively photosynthesizing.
Disease Prevention: The moment those first white roots appear (usually within 7-14 days), remove that plastic cover immediately. I've seen damping-off disease wipe out entire trays overnight when growers kept the humidity too high. Once uncovered, maintain consistent moisture by watering from the bottom—place the tray in a shallow dish of water for 10 minutes, then drain completely. This bottom-watering method keeps the soil evenly moist without creating soggy conditions that invite fungal growth.
Transplanting Readiness: When your seedlings reach 3-4 inches with 4-5 true leaves, don't be fooled by their size—check root development first. Gently remove one seedling and examine the roots. If they're densely packed in the small pot with white roots extending beyond the root ball, they're ready for transplanting. If roots are sparse, give them another week in their current pots. The 1-inch planting depth during transplant is crucial—any deeper and you'll suffocate those tender roots.
Pro Tips for Sassafras Tree Seeds
- These pro techniques will help you bypass the months-long wait and get those sassafras seeds sprouting reliably within 30 days.
- Cold Treatment Timing: The 6-8 week refrigerator cold treatment is non-negotiable for breaking dormancy, but don't rush it.
- Light Sensitivity Strategy: In Step 2, when sowing those ¼-inch deep seeds, place your seedling tray on a windowsill that gets morning sun only.
Frequently asked questions
Got questions about growing sassafras from seeds?
You’re not alone! Here are answers to the most common queries—so you can skip the guesswork and get straight to sprouting success.
How long does it take for sassafras tree seeds to germinate?
Sassafras seeds can take anywhere from 2 weeks to 6 months to germinate, depending on conditions. Cold stratification (mimicking winter) for 30–90 days often speeds things up. Patience is key—some seeds surprise you by sprouting faster than expected!
Do I need to stratify sassafras seeds before planting?
Yes! Cold stratification (chilling moist seeds in the fridge for 60–90 days) dramatically improves germination rates. Without it, seeds may stay dormant for months. Pro tip: Mix seeds with damp sand or peat moss and store in a sealed bag for best results.
Can I grow sassafras from store-bought seeds, or do they need to come from a tree?
Store-bought sassafras seeds work just fine—just ensure they’re fresh (less than 1 year old) for higher success. Seeds from a local tree may adapt better to your climate, but commercial seeds are a reliable shortcut. Always check for viability by floating them in water (sinkers are good!)
Why aren’t my sassafras seeds sprouting? Troubleshooting tips!
Common culprits: dry seeds (soak 24 hours first), poor soil drainage (use a mix with perlite), or lack of warmth (keep soil at 70–75°F). If mold appears, reduce moisture and improve airflow. Try a fresh batch—some seeds just need more time!
How do I transplant sassafras seedlings without killing them?
Wait until seedlings have 2–3 true leaves and are at least 3–4 inches tall. Harden them off (gradually expose to outdoor conditions) for 1–2 weeks before transplanting. Dig a hole twice as wide as the root ball, water deeply, and mulch to retain moisture. Avoid transplant shock by doing this in spring or early fall.
Wrapping up and next steps
From selecting the right sassafras seeds to mastering the ideal germination conditions, you now have all the tools to grow these hardy trees with confidence! 🌱 Whether you're drawn to their fragrant leaves, wildlife benefits, or rustic charm, sassafras seeds offer a rewarding gardening adventure.
Ready to plant your knowledge? Grab those seeds, prep your soil, and watch your little sprouts transform into towering, aromatic giants—one patient step at a time.
Next up: Start with a small batch in a sunny spot, document your progress, and share your success (or lessons learned) with fellow gardeners! 🌿