
Tools
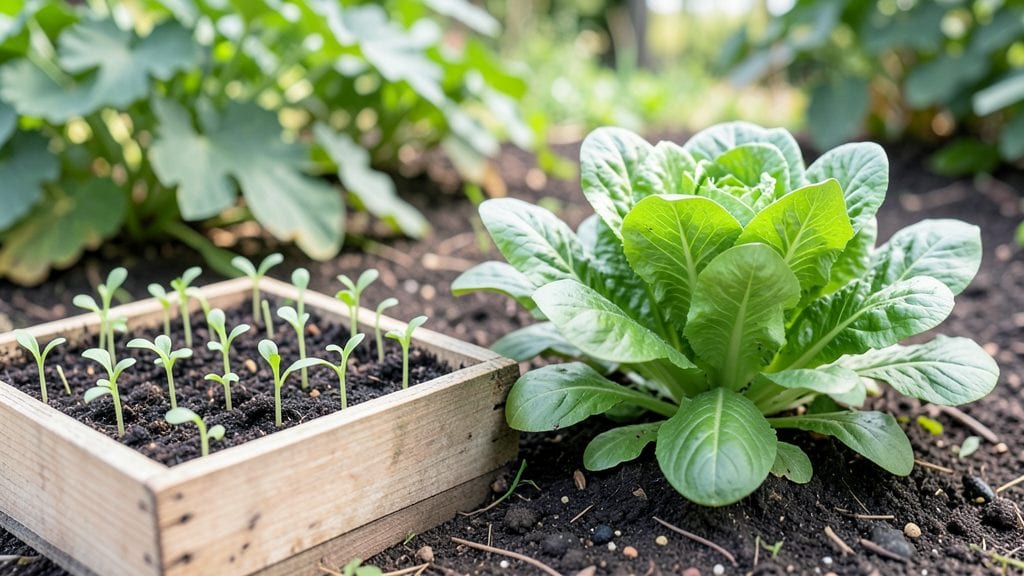
Your garden’s success starts with the right seeds—high-germination varieties that actually sprout when you need them. 🌱 I’ve learned the hard way that cheap seeds from random sources often lead to disappointment, but investing in quality pays off with stronger plants and bigger harvests every time.
The key is knowing what to look for: freshness dates, germination rates, and whether they’re organic or hybrid. Trusted suppliers like Baker Creek Heirloom Seeds, Burpee, or even local seed swaps cut out the guesswork.
I now save my own seeds from the best performers—like heirloom tomatoes and disease-resistant peppers—to ensure the next season’s plants are even stronger.
With the right seeds, you’ll see sprouts within 7-14 days, depending on the plant, and they’ll grow into sturdy seedlings ready for transplanting. No more staring at empty soil, wondering if anything will ever break through.
The difference between mediocre seeds and high-quality ones is like night and day—your garden will thank you.
Whether you’re a beginner or a seasoned gardener, this guide covers everything from storage tips (keep them cool and dry!) to how to test germination before planting. Let’s make sure your seeds are worth the effort they’ll put in for you.
📚 In This Guide
- What you need
- Instructions
- Tips and common mistakes
- Wrapping up and next steps
What you need
- ● High-Germination Seeds: 50–100 seeds per variety (adjust based on planting space)
- ● Certified organic or non-GMO for best quality
- ● Planting Containers: Seed trays (50–100 cells) or biodegradable pots
- ● Garden beds or raised planters (6"–12" deep, depending on plant type)
- ● Soil & Amendments: Potting mix (sterile, well-draining) or garden soil
- ● Compost (1–2 cups per container or per square foot)
- ○ Optional: Perlite or vermiculite (for aeration, 10–20%)
- ● Watering Supplies: Spray bottle (for seedlings) or gentle watering can
- ○ Drip irrigation kit (optional, for larger gardens)
- ● Seedling heat mat ($15–$30) for faster germination
- ● Grow lights (LED, 12–16 hours/day) for indoor starts
- ● Plant labels (wooden or biodegradable) to track varieties
- ● Mulch (straw or shredded leaves) to retain moisture
- ● Fertilizer (balanced 10-10-10 or organic options like fish emulsion)
How to select and store quality garden seeds for maximum germination
Here's how I ensure every seed I plant has the best chance of sprouting strong and healthy.
🌱 Step 1: Choose High-Germination Varieties
Start with seeds labeled "heirloom" or "organic"—these often have better germination rates than conventional varieties. Look for seed packets with a germination percentage above 85% printed on them. I always check the "best by" date too; seeds lose viability over time, so aim for packets dated within the last year.
Some varieties are simply more reliable than others. For example, tomato seeds like 'Cherry Tomato' or bean seeds like 'Blue Lake' consistently sprout well even for beginners. If you're unsure, ask fellow gardeners or check online forums for recommendations tailored to your climate zone. I avoid hybrid seeds unless they're specifically labeled as "open-pollinated"—these won't produce true-to-type plants next year.
📝 Step 2: Test Seed Viability Before Planting
Even the best seeds can fail to sprout if stored improperly. To check viability, place 10 seeds in a damp paper towel, fold it, and seal in a plastic bag. Keep them in a warm spot (70-75°F) for 3-5 days. If 80% or more sprout, your seeds are good to go. If fewer than half sprout, consider buying fresh seeds—it's better than wasting time and soil.
This simple test saves me from disappointment later. I've learned that seeds older than two years often have lower germination rates, especially in dry climates. If your seeds are past their prime, soak them in lukewarm water for 12 hours before planting—this can sometimes revive them. Just don't overdo it; seeds need air to breathe, so never soak them for more than a day.
🪴 Step 3: Store Seeds Properly for Long-Term Freshness
Seeds need cool, dark, and dry conditions to stay viable. I keep mine in airtight containers with a desiccant packet (like those that come with electronics) to absorb moisture. A refrigerator is ideal, but a cool basement or pantry works too—just avoid temperature swings. Label each container with the seed type and date so you can track freshness.
Never store seeds in the freezer unless they're extremely old—rapid temperature changes can damage them. If you live in a humid climate, I recommend adding a small bag of silica gel to the container. Check seeds every 6-12 months and replant them if they're still viable. Proper storage can extend seed life for years, but even the best seeds eventually lose potency.
⏰ Step 4: Plant at the Right Time for Optimal Germination
Timing matters just as much as seed quality. Plant cool-season crops like lettuce and peas 4-6 weeks before the last frost—they germinate best in 50-60°F soil. Warm-season crops like tomatoes and peppers, on the other hand, need soil temperatures above 60°F to sprout. Use a soil thermometer to check—if it's too cold, wait or use a seedling heat mat to warm the soil.
Overwatering at planting can drown seeds before they sprout. Instead, water lightly right after planting, then wait until the top inch of soil feels dry before watering again. I like to use a spray bottle for delicate seeds like petunias—it gives them just enough moisture without disturbing them. Keep the soil consistently moist (not soggy) until germination, which usually takes 7-14 days depending on the plant.
Tips & tricks for perfect seed selection and storage
Here's what nobody tells you about maximizing those germination percentages—these tricks have saved me from countless disappointments in the garden.
Germination Percentage Matters: That 85%+ germination rate on the packet isn't just marketing—it's a real indicator of quality. I've found that seeds with 90%+ germination sprout faster and more uniformly. When comparing varieties, check these percentages side by side before buying. For heirloom seeds, aim for packets dated within the last year—they maintain viability better than conventional seeds over time.
Temperature Control for Viability Testing: The 70-75°F range during your 3-5 day viability test is critical—this mimics the ideal soil temperature for germination. If your home runs cooler, place the bag near a sunny window or use a seedling heat mat. I've seen viability tests fail when kept in cold basements, even though storage conditions were perfect. Pro tip: Use a small thermometer to monitor the temperature during testing.
Storage Container Upgrade: While airtight containers work, I've had the best luck with vacuum-sealed bags for long-term storage. They remove all moisture and oxygen, extending seed life dramatically. For short-term storage (under 6 months), small glass jars with tight lids work perfectly. Just remember to label everything—the excitement of spring planting can make unmarked containers mysterious after a year!
Soil Temperature Secret: That 60°F threshold for warm-season crops isn't just a number—it's when soil enzymes become active enough to support germination. I use a soil thermometer every spring to track temperatures. If you're impatient to plant tomatoes but soil is still cool, try using black plastic mulch to warm the soil faster. For cool-season crops, wait until soil drops to 50-60°F—planting too early in warm soil can actually trigger premature sprouting that gets fried by frost.
Pro Tips for Quality Garden Seeds
- Here's what nobody tells you about maximizing those germination percentages—these tricks have saved me from countless disappointments in the garden.
- Germination Percentage Matters: That 85%+ germination rate on the packet isn't just marketing—it's a real indicator of quality.
- Temperature Control for Viability Testing: The 70-75°F range during your 3-5 day viability test is critical—this mimics the ideal soil temperature for germination.
Frequently asked questions
Got questions about choosing and using quality garden seeds? You’re not alone! Here are some of the most common concerns—plus straightforward answers to help you grow with confidence.
What makes a seed "high-quality" for gardening?
High-quality seeds prioritize germination rates (85%+), purity (free of weeds), and disease resistance. Look for reputable brands, organic certifications, and seed packets labeled with the year—older seeds (over 1–2 years) may have lower viability. Always check the tested germination rate on the packaging!
When is the best time to plant seeds based on my climate?
Timing depends on your hardiness zone and plant type. Cool-season crops (like lettuce or peas) thrive in early spring or fall, while warm-season plants (tomatoes, peppers) need soil temps above 60°F. Use a seed-starting chart or local frost dates as a guide. Pro tip: Start indoors 6–8 weeks before the last frost for tender plants!
Are heirloom seeds worth the extra cost over hybrid varieties?
It depends on your goals! Heirloom seeds offer unique flavors, biodiversity, and save-able seeds, but may require more care (e.g., pest susceptibility). Hybrids often boast higher yields, disease resistance, and uniformity—ideal for beginners. For organic gardens, heirlooms are a favorite, while hybrids shine in commercial or high-maintenance setups.
What should I do if my seeds aren’t germinating?
First, check moisture, temperature, and depth—most seeds need consistent warmth (70–85°F) and gentle light after sprouting. If soil is too dry or compacted, seeds may fail to wake up. Try soaking seeds overnight (especially hard-coated ones like peas) or test a few in a damp paper towel to rule out viability. Old seeds or improper storage (like humidity exposure) are common culprits!
Can I save seeds from my homegrown produce for next year?
Yes! Most open-pollinated or heirloom varieties can be saved, but hybrids (marked "F1") won’t grow true. Let produce fully ripen on the plant, dry seeds completely, and store them in a cool, dark, airtight container (label with the year!). Tomatoes, beans, and cucumbers are easy starters—just avoid saving from cross-pollinated plants (like squash) unless you control pollination.
Wrapping up and next steps
Choosing quality garden seeds with high germination rates is the first step to a thriving, rewarding harvest. 🌱 Whether you're a seasoned gardener or just starting, the right seeds—paired with proper care—can transform your green space into a flourishing oasis.
Now that you’re armed with the best varieties and answers to common questions, it’s time to get growing!
Ready to take the next step? Start small—pick 2-3 high-germination seeds to test in a sunny spot, keep a gardening journal, and watch your confidence (and plants!) bloom. Happy planting! 🌿