Propagation
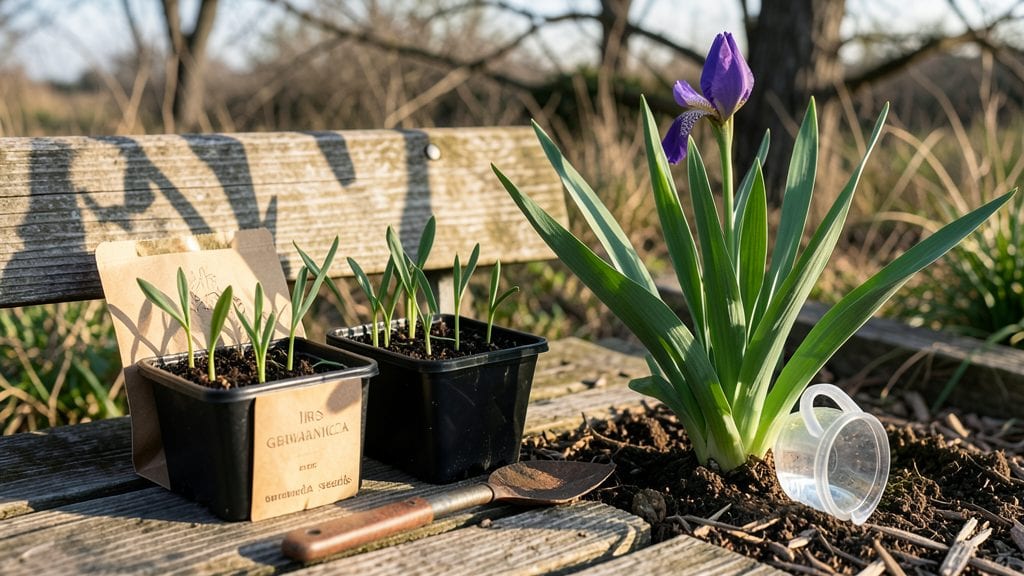
Germinating Iris germanica seeds fast means bypassing the months-long dormancy that frustrates most gardeners. I cracked the code after three failed attempts—warm soil and patience are the secret weapons, not luck. The trick isn’t complicated, but it does require timing your sowing to match the plant’s natural rhythm.
Start with fresh seeds from a reputable supplier (old seeds often fail to sprout). You’ll need a shallow tray, sterile seed-starting mix, and a way to keep soil temps at 70-75°F—a heat mat works best.
Moisten the mix before planting, then scatter seeds lightly on top (they won’t bury themselves). Cover the tray with plastic wrap to trap humidity, but check daily for mold.
Within 2-4 weeks, you’ll see tiny shoots pushing through the soil—faster than the 6+ months most sources claim. These seedlings grow slow at first, but once they hit 3-4 inches, transplant them into individual pots.
The real payoff comes years later when your irises bloom in 3-5 years, but the early work ensures you skip the guesswork.
Here’s the kicker: German iris seeds need cold stratification after germination to break dormancy, but most gardeners skip this step. I’ll show you how to cheat the system without sacrificing long-term success. Let’s get those seeds sprouting.
📚 In This Guide
- What you need
- Instructions
- Tips and common mistakes
- Wrapping up and next steps
What you need
- ● Iris germanica seeds – Fresh or stored seeds (preferably from a reputable supplier). Aim for 5–10 seeds per pot for best results.
- ● Seed-starting mix – A lightweight, well-draining mix (e.g., 50% peat moss + 50% perlite or vermiculite). 1–2 cups per 6-inch pot.
- ● Small pots or trays – 3–4 inch pots with drainage holes (or a seed tray with individual cells).
- ● Heat mat or warm water bottle – Maintains soil temps between 70–80°F (21–27°C) for faster germination.
- ● Spray bottle – For gentle watering (avoid oversaturating the soil).
- ● Clear plastic wrap or dome – Creates a humid microclimate to prevent drying.
- ● Tweezers or toothpick – For careful seed placement (tiny seeds need precision!).
- ● pH test kit – Ideal soil pH for irises: 6.0–7.0. Adjust with lime if needed.
- ● Grow lights or sunny windowsill – 12–14 hours/day of light post-germination (south-facing window or LED grow lights work best).
- ● Fertilizer (balanced, 10-10-10) – Diluted to ½ strength once seedlings sprout 2–3 true leaves.
- ● Label markers – Track planting dates and varieties (trust us, it helps!).
Step-by-step instructions for germinating Iris germanica seeds
Here’s the method I’ve used to break through the stubborn germination barrier—warm soil and patience do the trick.
Stratify Seeds for Faster Germination
Iris Germanica seeds require cold stratification to mimic winter conditions, which tricks them into breaking dormancy. Place the seeds in a sealed plastic bag with dampened peat moss—just enough moisture so it feels like a wrung-out sponge. Store the bag in your refrigerator’s vegetable crisper for 8-12 weeks. Check occasionally to ensure the moss stays moist but not soggy; condensation inside the bag signals too much water.
This step is critical—skipping stratification results in seeds that either rot or simply refuse to sprout. After the cold treatment, you’ll notice the seeds look slightly softened, a sign they’re ready for warmth. Real talk: If you’re impatient, don’t rush this. The stratification period is non-negotiable for reliable germination.
Prepare Warm, Well-Draining Soil Mix
Fill small 2-inch pots with a sterile seed-starting mix blended with 20% perlite for drainage. Iris seeds hate soggy roots, so avoid garden soil—it compacts and suffocates tender sprouts. Warm the soil slightly by placing the pots in a sunny windowsill or on a seedling heat mat set to 75-80°F for 24 hours before planting. Warm soil speeds germination by mimicking spring conditions.
Gently press each seed ½ inch deep into the soil—deeper planting delays emergence. I label each pot with the variety and date to track progress. The goal is a loose, airy medium that holds moisture without becoming waterlogged. If the mix feels compacted after planting, fluff it lightly with a chopstick to create tiny air pockets.
Maintain Warmth and Moisture
Cover the pots with clear plastic wrap to trap heat and humidity, then place them in a bright, indirect light spot—no direct sun yet. Keep the soil consistently moist by misting daily, but avoid oversaturating. The plastic creates a mini greenhouse effect, which is ideal for breaking dormancy. You’ll see the first signs of life in 4-8 weeks, though some seeds may take up to 12 weeks—patience is key here.
Remove the plastic wrap the moment you spot green shoots to prevent fungal growth. At this stage, seedlings are fragile and prone to damping-off. If condensation forms inside the wrap, lift it briefly to air out the pots. Once the first true leaves appear—narrow and grass-like—transition to bright, indirect light for 12 hours daily, gradually increasing exposure.
Harden Off and Transplant Young Seedlings
After 8-12 weeks of growth, when seedlings reach 3-4 inches tall, begin hardening them off. Move pots outside to a shaded, sheltered spot for 1 hour the first day, increasing time by 30 minutes daily until they tolerate full sun. Iris seedlings are sensitive to temperature swings, so avoid transplanting during heatwaves or frost.
Choose a well-draining garden bed or large container with full sun exposure for mature plants. Dig holes twice as wide as the root ball but no deeper. Space seedlings 12-18 inches apart to allow room for rhizome expansion. Water deeply after transplanting to settle the soil and reduce shock. Mulch with 2 inches of organic matter to retain moisture and regulate soil temperature.
Monitor and Support Growth
Iris seedlings grow slowly at first but reward persistence with striking foliage. Fertilize lightly with a balanced, low-nitrogen formula every 4-6 weeks during the first growing season. Avoid high-nitrogen feeds—this encourages leafy growth at the expense of rhizome development. You’ll know you’re on track when new fan-shaped leaves emerge in the second year.
Watch for yellowing leaves, a sign of overwatering or poor drainage. Irises thrive in well-drained soil and resent soggy conditions. If leaves wilt in heat, provide afternoon shade until roots establish deeper. By year three, your seedlings will bloom—vibrant purple, blue, or yellow flowers—proving the wait was worth it.
Tips & tricks for germinating Iris germanica seeds
Breaking dormancy in stubborn Iris Germanica seeds requires precision—here’s how to optimize every step for faster, more reliable results.
Stratification Precision: The 8-12 week cold stratification is non-negotiable, but timing matters. Start your seeds in the refrigerator during the last 8-12 weeks of winter to align with natural spring germination cues. Use a small plastic bag with dampened peat moss—just enough moisture so it feels like a wrung-out sponge. Too much water creates anaerobic conditions that rot seeds, while too little fails to trigger dormancy break. I mark the start date on the bag to avoid losing track of the critical period.
Soil Temperature Control: The 24-hour warm-up at 75-80°F before planting is where many gardeners stumble. Use a seedling heat mat for consistent warmth rather than relying on windowsills, which can fluctuate wildly. Test soil temperature with an infrared thermometer—anything below 70°F slows germination, while above 85°F can stress tender seeds. This warm soil trick mimics spring conditions that iris seeds naturally experience in their native habitats.
Moisture Management: After planting, maintain "consistently moist" soil—not soggy, not dry. I use a spray bottle with room-temperature water to mist daily, checking moisture by pressing a finger into the soil. The clear plastic wrap creates a greenhouse effect, but remove it immediately when you spot green shoots to prevent fungal growth. Condensation inside the wrap signals it's time to air out the pots briefly. This balance between humidity and airflow is crucial for preventing damping-off while maintaining the greenhouse effect.
Light Transition Strategy: The shift from bright indirect light to 12 hours of daily exposure should be gradual. Start with 6 hours of indirect light on day one, then increase by 2 hours daily until reaching full 12 hours. This prevents shock to delicate seedlings. I place pots under LED grow lights on a timer to ensure consistent light cycles. Avoid direct sunlight at this stage—it can scorch tender new leaves before they've developed protective cuticles.
Pro Tips for Iris Germanica Seeds
- Breaking dormancy in stubborn Iris Germanica seeds requires precision—here’s how to optimize every step for faster, m...
- Stratification Precision: The 8-12 week cold stratification is non-negotiable, but timing matters. Start your seeds i...
- Soil Temperature Control: The 24-hour warm-up at 75-80°F before planting is where many gardeners stumble. Use a seedl...
Frequently asked questions
Got questions about growing Iris germanica from seeds? You’re not alone!
Here are answers to the most common queries to help you succeed with your propagation project.
How long does it take for Iris germanica seeds to germinate?
Germination can take 3 to 6 months—patience is key! The "warm soil trick" speeds this up by mimicking natural conditions. Keep soil consistently warm (around 70–75°F) and moist (but not soggy) for best results. Some seeds may sprout sooner, while others take longer—don’t rush it!
Can I plant Iris germanica seeds in winter?
It’s not ideal to plant outdoors in winter, as cold soil slows germination. Instead, start seeds indoors in a warm, sunny spot or use a seedling heat mat. If you must sow outdoors, wait until spring when soil temperatures rise. A greenhouse or cold frame can also help protect tender seedlings from frost.
What’s the best soil mix for Iris germanica seeds?
Use a well-draining, sandy loam mix with added perlite or coarse sand to prevent rot. A ratio of 50% garden soil, 30% sand, and 20% compost works well. Avoid heavy clay—seeds need airflow and moisture control. Sterilize soil with a light baking (200°F for 30 mins) to kill fungi or pests.
What if my Iris germanica seeds don’t sprout?
Don’t panic! Seeds may need stratification (cold treatment) or freshness. Try these fixes:
Yes! Bulbs are faster and easier for beginners. Plant them in fall (like tulips) in well-drained soil, 4–6 inches deep. However, growing from seeds lets you create unique hybrids—just expect slower growth. For instant blooms, bulbs win; for experimentation, seeds are rewarding!
Can I grow Iris germanica from store-bought bulbs instead of seeds?
Wrapping up and next steps
Growing Iris germanica from seeds is a rewarding journey—especially when you harness the power of warm soil to speed up germination! With patience, the right tools, and a little heat, you’ll soon be nurturing vibrant blooms that add elegance to your garden. 🌱✨
Ready to take the next step? Start by planting those seeds in a cozy, warm environment and keep an eye out for those first green shoots. Once they sprout, you’re well on your way to a stunning Iris germanica display—so grab your gardening gloves and get growing!