Propagation
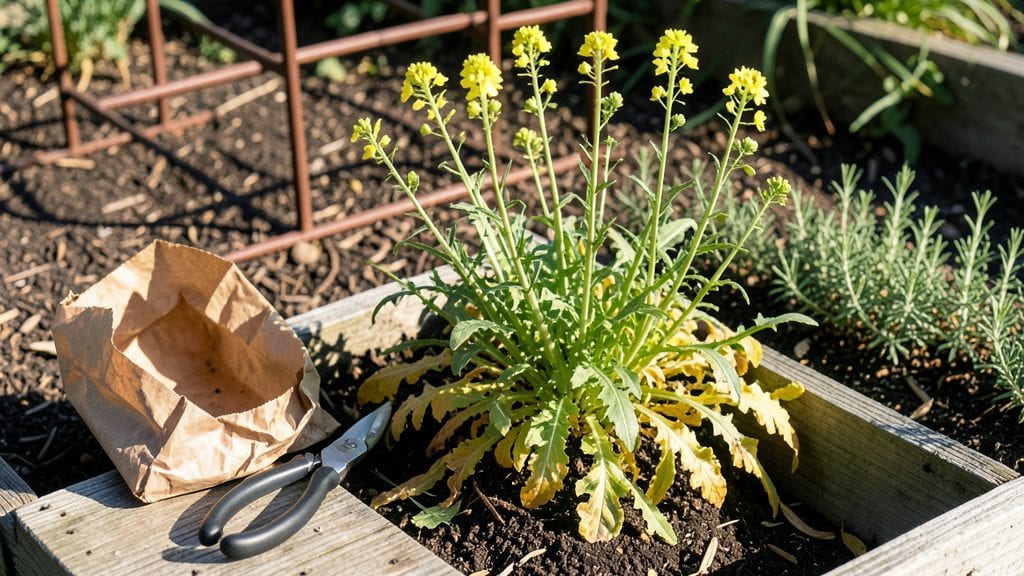
Harvesting arugula seeds 🌱 from your garden is like unlocking a freezer full of peppery greens for next year—if you time it right.
Did you know arugula can self-seed prolifically—if you know the right timing and techniques? Learning how to harvest arugula seeds can slash your seed costs by half while ensuring a fresh supply of this peppery green for years to come.
Most gardeners skip this step, assuming it’s too tricky or that store-bought seeds are just as good. But there’s nothing like the satisfaction of saving seeds from your own thriving plants, especially when you’re staring at 50% lower costs and a garden that keeps giving.
Below, I’ll walk you through the exact moment to pick those seeds, how to dry them without losing viability, and the best way to store them so they’re ready to plant when spring rolls around again.
When and how to identify mature arugula plants for seed harvesting
Harvesting arugula seeds is easier than you think—once you know what to look for! The key is recognizing when your plants shift from leaf production to seed development. This transition happens naturally as daylight hours shorten and temperatures cool in late summer or fall.
If you miss this window, your plants may bolt too early or produce low-quality seeds.
Start by observing your arugula plants for flower stalks, which emerge from the leaf rosettes. These stalks typically appear 45-60 days after sowing, signaling the plant’s shift toward reproduction.
Early varieties may bolt faster, while heat-tolerant types like 'Astro' or 'Sylvetta' take longer. Pay attention to these visual cues to avoid harvesting seeds too soon.
| Stage | Visual Cues | Ideal Harvest Window | Environmental Factors |
|---|---|---|---|
| Early Flowering | Small white flowers appear on stalks | Not ready; wait 3-4 weeks | Daylight: 12+ hours, Temp: 60-75°F |
| Seed Pod Formation | Pods swell, turn yellowish-brown | Harvest in 2-3 weeks | Daylight: 10-12 hours, Temp: 50-65°F |
| Mature Seed Pods | Pods brown, rattle when shaken | Ready now; harvest immediately | Daylight: <8 hours, Temp: 40-55°F |
| Overripe Seeds | Pods split open, seeds scatter | Too late; discard or compost | Daylight: <6 hours, Temp: <40°F |
For early-season harvests, focus on plants grown in spring (March-April). These will bolt faster due to longer daylight, so monitor them closely. In contrast, fall-planted arugula (August-September) often produces higher-quality seeds because cooler temps slow bolting.
Aim to harvest seeds when nighttime temperatures drop below 60°F, as this triggers optimal seed maturation.
One of the easiest ways to confirm readiness is the "rattle test". Gently shake a mature seed pod—if it sounds like dry beans inside, the seeds are ready. You’ll also notice the leaves yellowing and dying back as the plant redirects energy to seed production.
This is a clear sign it’s time to act before the pods split open and scatter seeds prematurely.
If you’re growing arugula in containers or small gardens, isolate seed-producing plants to avoid cross-pollination with other varieties. Arugula is an open-pollinated plant, meaning its seeds will true-to-type (reproduce the same traits) only if pollinated by the same variety.
Keep at least 10 feet of separation from other arugula types to maintain seed purity.
Watch for environmental stress signs like stunted growth or pale leaves, which can delay seed maturation. Overcrowding or nutrient deficiencies (especially nitrogen) may also slow the process. If your plants look stressed, reduce watering slightly and avoid fertilizing—this helps shift their focus to seed production rather than leaf growth.
In USDA Zone 6a or warmer, aim to harvest seeds by late October to avoid early frost damage. If frost threatens before pods mature, cover plants with a frost cloth to extend the season.
Alternatively, transplant seed-bearing plants to a protected indoor space (like a garage or basement) with indirect light to finish drying.
Pro tip: Label your seed plants with variety names and harvest dates to track performance. Over time, you’ll notice patterns—like which varieties bolt fastest or produce the most seeds. This knowledge helps you plan future plantings for optimal seed yields and saves time in subsequent seasons.
Remember, patience is key! Harvesting arugula seeds too early results in low germination rates, while waiting too long means lost seeds. By mastering these visual and environmental cues, you’ll consistently collect high-quality seeds for years to come. Happy harvesting! 🌱
Step-by-step method for collecting and storing arugula seeds
Once your arugula plants develop brown, dry seed pods, it’s time to harvest and store those seeds for next year’s garden. Proper drying and storage ensure high germination rates and prevent mold or moisture damage.
I’ve saved seeds from my own garden this way for three years—here’s exactly how I do it.
Gather your supplies first: paper bags (to avoid moisture), scissors or pruners, and a cool, dry space for drying. Avoid plastic bags—they trap humidity and ruin seeds. I use brown kraft paper bags because they’re breathable and inexpensive. Let’s get started with the step-by-step process.
How to Harvest and Store Arugula Seeds
-
Step 1: Harvest the Seed Pods
Snip the dry, brown pods from the plant using clean scissors. Leave a small stem attached to help with handling. Collect pods in a paper bag immediately to prevent seed loss. -
Step 2: Dry the Pods Indoors
Spread the pods on a clean, dry surface like a baking sheet or newspaper in a warm, dry location (70°F is ideal). Avoid direct sunlight, which can overheat the pods and reduce viability. -
Step 3: Shake Out the Seeds
Once the pods are completely dry and brittle (usually 7-10 days), place a paper bag under them and gently crush the pods with your fingers or a rolling pin to release the seeds. -
Step 4: Clean the Seeds
Remove any debris, stems, or chaff by winnowing—hold the bag and shake it gently in a light breeze or use a fan to blow away lighter particles. This ensures pure, viable seeds. -
Step 5: Store the Seeds Properly
Transfer the cleaned seeds into a labeled paper envelope or airtight container. Store in a cool, dark place (like a fridge) with a silica gel packet to absorb moisture. Label with the harvest year and variety.
For long-term storage, I keep my arugula seeds in the fridge for up to 3 years, though viability drops slightly after 2 years. Always test a few seeds in moist paper towels before planting to confirm germination.
If they sprout within 7-10 days, your seeds are still good to go!
One pro tip: Avoid storing seeds in the freezer unless you’re using vacuum-sealed containers. Freezing can cause condensation, leading to mold. And remember, moisture is the enemy—always double-check your storage containers for leaks or dampness.
With these steps, you’ll have a reliable seed supply for next season’s arugula, saving money and ensuring the best possible germination. Happy seed-saving!