Picking
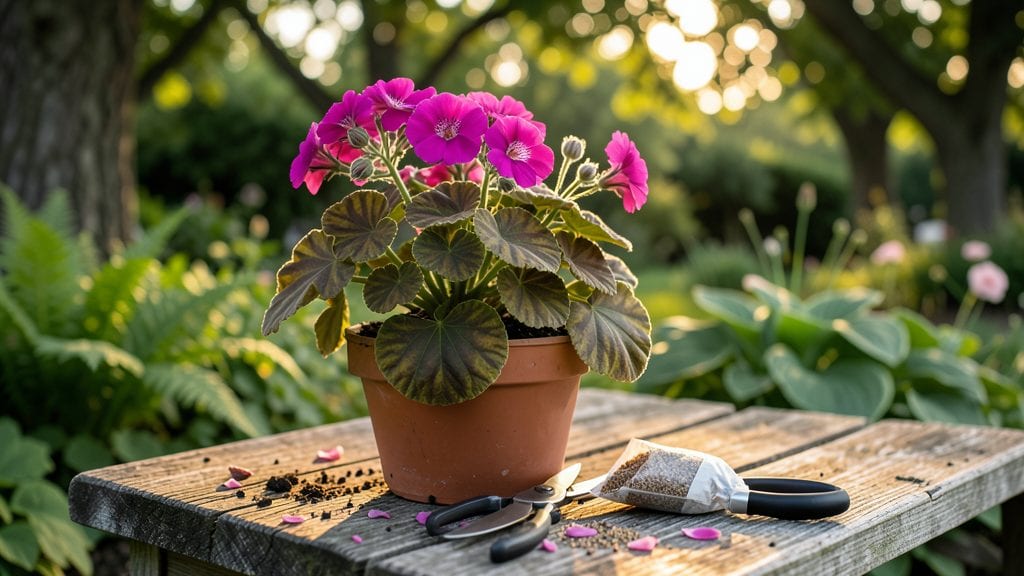
Harvesting geranium seeds at the right moment turns last year’s blooms into next season’s vibrant plants in just three weeks—and I’ve perfected the timing after years of impatiently digging up seeds too early.
The key isn’t just waiting for the seed pods to form; it’s knowing when they’re ready to release their tiny, wrinkled treasures. Too soon, and you’ll end up with shriveled, nonviable seeds. Too late, and the pods might burst open on their own, scattering seeds everywhere.
You’ll need just three simple tools: a pair of clean scissors or pruning shears, a small paper bag for collection, and a dry, dark spot for storage. The process moves fast once you spot those plump, brown seed pods—usually in late summer or early fall, depending on your climate.
Once collected, let the pods dry completely before cracking them open to reveal the seeds inside. This step alone makes the difference between seeds that sprout and ones that don’t.
Three weeks after planting those freshly harvested seeds, you’ll watch tiny green shoots push through the soil, signaling success. The seedlings grow quickly, and with proper light and warmth, you’ll have sturdy young geraniums ready for transplanting by spring.
The satisfaction of growing plants from seeds you saved yourself? It’s a feeling that makes every late-summer harvest worth the effort.
This method works for both pelargoniums (the classic bedding geraniums) and cranesbill geraniums, though timing varies slightly between types. Whether you’re a first-timer or a seasoned gardener, these steps ensure your seeds stay viable and your future garden stays colorful.
Ready to turn those spent blooms into next year’s star plants?
📚 In This Guide
- What you need
- Instructions
- Tips and common mistakes
- Wrapping up and next steps
What you need
- ● Mature geranium plants: Choose healthy, blooming plants (preferably Pelargonium species) with fully developed seed pods.
- ● Scissors or pruning shears: Sharp, clean tools for harvesting seed pods (sterilize with rubbing alcohol if reusing).
- ● Paper bags or envelopes: Brown paper bags (1–2 per plant) or seed envelopes to collect seeds and prevent moisture loss.
- ● Seed-starting mix: Lightweight, sterile potting mix (e.g., Pro-Mix or coco coir blend) with perlite or vermiculite for drainage.
- ● Seed trays or small pots: 2–4 inch pots or cell trays (1–2 seeds per cell/pot).
- ● Spray bottle: Filled with room-temperature water for gentle misting.
- ● Clear plastic wrap or humidity dome: To retain moisture during germination.
- ● Grow lights or sunny windowsill: A south-facing window or LED grow light (12–16 hours/day) for optimal light.
- ○ Thermometer (optional but helpful): To monitor soil temperature (ideal: 65–75°F for germination).
- ● Labeling tags: To track seed varieties and planting dates.
- ● Heat mat: For faster germination (keeps soil at 70–75°F).
- ● Fungicide (e.g., Mycorrhizal inoculant): Prevents damping-off in seedlings.
- ● Seedling heaters: Small, portable units to maintain consistent warmth.
- ● Journal or app: To log germination progress and care notes.
Step-by-Step instructions for harvesting geranium seeds
Here's how to collect and prepare geranium seeds for quick germination in just three weeks.
Identify and Select Mature Seed Pods
Wait until late summer or early fall when geranium seed pods turn from green to brown and papery. These pods will eventually split open on their own, releasing seeds. To ensure you capture viable seeds, harvest them just before they crack—when they feel dry but haven't burst yet. Gently twist the pods from the stems or snip them with clean scissors.
Real talk: If you wait too long, the seeds scatter everywhere, and you lose your chance for fresh starts. I like to check my plants every few days in late August to catch the pods at the perfect moment. Place the harvested pods in a paper bag (not plastic) to dry completely indoors for 5-7 days—this prevents mold and ensures seeds are fully mature.
Extract Seeds from Dry Pods
Once the pods are completely dry, crush them gently between your fingers or tap them lightly on a clean surface. The seeds will pop out easily, while the empty pod husks remain behind. Sift the mixture through a fine mesh screen or strainer to separate seeds from debris. Geranium seeds are tiny but easy to spot—they look like tiny, oval-shaped brown specks about the size of a pinhead.
Don't skip sifting! Leftover pod fragments can harbor mold and rot your seeds during storage. I spread the seeds out on a white plate to inspect under bright light—this helps me spot any damaged or discolored seeds to discard. Store the good seeds in a small envelope labeled with the variety and harvest date.
Stratify Seeds for Faster Germination
Geranium seeds germinate best after a short cold treatment, called stratification. Place the seeds in a ziplock bag with a lightly dampened paper towel—just enough moisture to keep the towel damp but not soaked. Seal the bag and refrigerate for 2-3 weeks. This mimics winter conditions and breaks seed dormancy, ensuring faster sprouts once you plant.
Check the towel weekly—if it dries out, add a drop of water and reseal. After 2 weeks, remove the bag and let the seeds sit at room temperature for 3-5 days before sowing. This final warm-up period primes the seeds for germination. I promise you'll see those first green shoots in just 10-14 days—way faster than skipping stratification!
Sow Seeds for Fast Germination
Fill small seed trays or 2-inch pots with sterile seed-starting mix and moisten it until damp but not soggy. Sprinkle seeds lightly on the surface—geranium seeds don't need deep planting. Press them gently into the mix so they make contact with the soil but don't bury them. Cover the tray with clear plastic wrap or a humidity dome to retain moisture and warmth.
Place the tray in a bright, warm spot (around 65-70°F)—a sunny windowsill or under a grow light works perfectly. Keep the soil consistently moist by misting lightly every 2-3 days—never let it dry out completely. You'll see the first tiny sprouts in 7-10 days, and they'll grow into sturdy seedlings ready for transplanting in 3-4 weeks.
Transplant Seedlings Carefully
When seedlings develop 2-3 sets of true leaves, they're ready to move to 3-inch pots filled with well-draining potting mix. Handle them gently by their leaves (not stems) to avoid damage. Water lightly after transplanting to help them settle in. Keep the young plants in bright, indirect light for the first week to reduce stress.
Here's the thing—geranium seedlings grow fast, but they're sensitive to cold drafts. If your home runs chilly, use a seedling heat mat to keep roots cozy. Once they're 4-6 inches tall, you can harden them off outdoors before the first frost. With this method, you'll have blooming geraniums by next summer—all from seeds you harvested in just a few weeks!
Tips & tricks for perfect geranium seed harvesting
Here's what I learned after harvesting seeds from my own geranium plants—these little tricks make all the difference for fast germination.
Timing is Everything: The 5-7 day drying period in Step 1 is crucial for seed viability. I learned this the hard way after storing freshly harvested pods that still contained moisture. Place your paper bag in a well-ventilated spot away from direct sunlight—this prevents mold while ensuring complete dryness. If your climate is humid, you might need to extend the drying time to 10 days. The seeds should feel completely dry to the touch, with no moisture visible inside the pod.
Stratification Shortcut: When refrigerating seeds for the 2-3 week cold treatment in Step 3, I recommend placing the ziplock bag in a sealed container with a small packet of silica gel. This prevents condensation buildup inside the bag, which can lead to mold. After the 2-week cold period, don't rush to plant immediately—let the seeds sit at room temperature for the full 3-5 days. This warm-up period is what triggers germination hormones in the seeds.
Lighting Matters: For Step 4, if you're using a sunny windowsill, position your seed trays on the south-facing side for maximum light exposure. I've found that geranium seedlings grow leggy when they don't get enough light. If natural light is limited, supplement with a grow light for 12-14 hours per day. The ideal temperature range of 65-70°F is just as important as light—too cold and germination slows, too hot and seeds may dry out.
Transplanting Tip: When moving seedlings to 3-inch pots in Step 5, I've discovered that using a pencil to make small holes in the potting mix helps prevent root circling. Gently tease the roots apart before placing them in the holes. After transplanting, place the pots on a tray of damp pebbles to maintain humidity around the seedlings. This method creates a natural humidity dome without needing plastic wrap, which can trap too much moisture.
Pro Tips for Harvest Geranium Seeds
- Here's what I learned after harvesting seeds from my own geranium plants—these little tricks make all the difference for fast germination.
- Timing is Everything: The 5-7 day drying period in Step 1 is crucial for seed viability.
- Stratification Shortcut: When refrigerating seeds for the 2-3 week cold treatment in Step 3, I recommend placing the ziplock bag in a sealed container with a small packet of silica gel.
Frequently asked questions
Got questions about harvesting geranium seeds?
You’re not alone! Here are answers to the most common queries to help you grow vibrant geraniums from seed with confidence.
When is the best time to harvest geranium seeds?
Harvest geranium seeds once the seed pods turn light brown and begin to split open—usually 6–8 weeks after flowering. Wait too long, and the seeds may scatter or lose viability. Aim for late summer to early fall for the best results!
How do I know if my geranium seeds are ready to collect?
Check for these signs:
- Dry, papery pods (no green flesh inside).
- Cracked or open seams—this means seeds are nearly ready.
- Brown seeds inside (not green or white).
Can I harvest seeds from store-bought geraniums?
Yes, but with a caveat: Many commercial geraniums are hybrids and may not produce true-to-type seeds. For consistent results, opt for heirloom or open-pollinated varieties. If you’re experimenting, label seeds clearly—some may surprise you with unexpected colors!
What if my seeds don’t germinate after harvesting?
Try these fixes:
- Freshness check: Geranium seeds lose viability quickly—plant them within 1–2 weeks of harvest.
- Stratification: Some varieties need a cold period (place seeds in the fridge for 2–4 weeks before sowing).
- Light requirement: Keep soil moist but not soggy and place trays in bright, indirect light.
Can I save geranium seeds for next year?
Store seeds in a cool, dry place (like a sealed envelope or jar) for up to 1 year. Label them with the variety and harvest date. For best results, replant within 6 months—freshness = higher germination rates.
Wrapping up and next steps
Harvesting geranium seeds is a rewarding way to grow vibrant, fragrant plants—and you’ve got this! 🌱 With the right timing, tools, and a little patience, you’ll have fast germination in just three weeks.
Whether you’re a seasoned gardener or a curious beginner, these tips ensure success while keeping the process simple and fun.
Now that you’re armed with knowledge, take the next step: grab your pruners, mark your calendar, and start collecting those seeds! Soon, you’ll be enjoying a burst of color and life from your very own homegrown geraniums. Happy harvesting! 🌸