Lawn
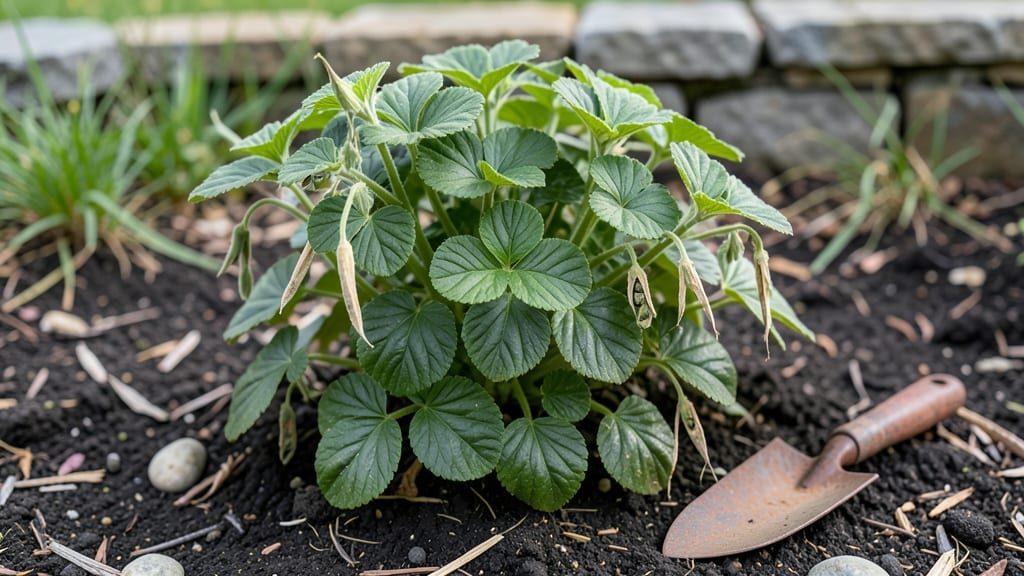
"Geranium seed pods are nature’s tiny time capsules for next year’s vibrant blooms. ✨ I’ve saved seeds from my hardy geraniums for years, and the process is simpler than you’d think—just timing and a little patience.
The key is knowing when those papery pods turn from green to brown, signaling it’s time to collect.
You’ll need a pair of scissors, a paper bag, and a dry spot to store them. Most geranium varieties produce viable seeds, though hybrids might not always come true—expect some surprises in the flower colors!
Hardy geraniums (like those that survive winter) are the easiest to save, while tender types need extra care to break dormancy.
Once harvested, let the pods dry completely before cracking them open to release the seeds. Store them in an envelope or jar in a cool, dark place until spring. With the right conditions, you’ll see those first tender sprouts in just 2-4 weeks, ready to bloom again next season.
Even if not every seed germinates, you’ll still save money and grow plants perfectly suited to your garden. Here’s how to make it work—no fancy equipment needed!"
📚 In This Guide
- What you need
- Instructions
- Tips and common mistakes
- Wrapping up and next steps
What you need
- ● Geranium plants – Healthy, mature plants with seed pods (preferably Pelargonium species, like zonal or ivy geraniums).
- ● Sharp scissors or pruning shears – Clean, sterilized tools to avoid spreading disease.
- ● Paper bags or breathable seed-saving envelopes – Brown paper bags (1 per plant) or kraft paper envelopes (5–10, depending on yield).
- ● Drying rack or mesh screen – A cool, dry, well-ventilated space (like a porch or basement) to air-dry pods.
- ● Permanent marker – For labeling pods with plant variety and date.
- ● Small plastic bags or airtight containers – For long-term storage (e.g., ziplock bags or mason jars).
- ○ Desiccant packets (optional but helpful) – To absorb moisture and extend seed viability.
- ● Seed catalog or notebook – To track geranium varieties and germination notes.
- ● Fine mesh sieve – For separating seeds from chaff after drying.
- ● Humidity indicator card – To monitor drying conditions (ideal: 30–50% humidity).
- ● Heat mat or seedling tray – For accelerated germination testing (if unsure about seed viability).
Step-by-Step instructions for harvesting and saving geranium seed pods
Here’s how to collect and store geranium seeds so you’ll have fresh plants blooming next spring.
🌿 Step 1: Identify Mature Seed Pods
Wait until the seed pods turn brown and papery—they’ll look dry and crinkly compared to the green, plump pods earlier in the season. These pods are ready for harvest when they split open naturally or when you gently squeeze them and feel seeds rattling inside.
Pick pods from healthy plants that thrived all season. Avoid pods from diseased or weak stems, as those seeds may not grow strong plants. Use clean, sharp scissors or fingers to snip pods from the stem, leaving a small portion attached to make handling easier.
🌱 Step 2: Dry and Extract the Seeds
Spread the harvested pods on a clean, dry paper towel in a single layer. Place them in a warm, dry spot (around 70-75°F) for 1-2 weeks to fully dry. This step is critical—moisture will cause mold or rot before you can save the seeds.
Once completely dry, open the pods carefully. You’ll see tiny, dark brown seeds inside. I like to use a small bowl and gently crush the pods between my fingers over it to release the seeds. Avoid shaking too hard—some seeds are delicate and may scatter.
⏰ Step 3: Store Seeds Properly for Next Year
Transfer the dried seeds into a small envelope or airtight container (like a glass jar with a lid). Label it with the geranium variety and the date—seeds stay viable for 2-3 years if stored correctly. Place the container in a cool, dark place, like a pantry or refrigerator drawer.
Check the seeds occasionally for moisture or pests. If you notice any dampness, spread them out to dry again. Proper storage ensures high germination rates when you’re ready to plant next spring.
🌱 Step 4: Test Germination Before Planting
Before sowing, do a quick germination test: place 10-15 seeds on a damp paper towel in a sealed plastic bag. Keep them in a warm spot (around 70°F) and check daily. If 50% or more sprout within 7-14 days, your seeds are good to go.
If germination is slow or weak, store the remaining seeds for another year. This test saves you from planting poor-quality seeds and ensures you’ll have strong, healthy starts for your garden.
Tips & tricks for perfect geranium seed pod harvesting
Here's what I've learned after saving geranium seeds for years—these little tricks make all the difference in getting strong, viable seeds ready for next spring.
Timing is Everything: The 1-2 week drying period in Step 2 is non-negotiable, but here's the thing: if your kitchen stays consistently around 75°F, you might get away with just 7-10 days. However, if it's cooler (around 70°F), give it the full 2 weeks to prevent mold. I've ruined batches by rushing this step—don't make my mistake!
Harvesting Strategy: In Step 1, I recommend harvesting pods on a dry morning after the dew has evaporated. This prevents moisture from getting trapped in the pods during drying. Also, harvest when the pods are completely dry and papery—if they still feel slightly plump, give them another day or two on the plant.
Seed Extraction Hack: When opening the pods in Step 2, lay a clean white paper towel underneath your bowl. The tiny seeds will scatter, but the white background makes them easy to spot and sweep back into your collection. I've lost count of how many seeds I've missed without this trick!
Storage Wisdom: For long-term storage in Step 3, I add a small packet of silica gel (the kind that comes with electronics) to my seed containers. This extra moisture absorber helps maintain viability for the full 2-3 years. Just make sure the seeds aren't touching the silica directly.
Pro Tips for Geranium Seed Pods
- Here's what I've learned after saving geranium seeds for years—these little tricks make all the difference in getting...
- Timing is Everything: The 1-2 week drying period in Step 2 is non-negotiable, but here's the thing: if your kitchen s...
- Harvesting Strategy: In Step 1, I recommend harvesting pods on a dry morning after the dew has evaporated. This preve...
Frequently asked questions
Got questions about geranium seed pods? You’re not alone! Here are answers to the most common queries—from harvesting tips to troubleshooting—so you can save those seeds like a pro.
Why do my geraniums have seed pods instead of flowers?
Seed pods appear when geraniums finish blooming for the season. Once flowers fade, the plant shifts energy to producing seed pods (those dry, papery structures). If you want more blooms, prune spent flowers regularly to encourage new growth.
When is the best time to harvest geranium seed pods?
Harvest pods when they’re dry and brown but before they split open (usually late summer to early fall). Wait too long, and seeds scatter everywhere! Use clean scissors to snip pods—avoid touching wet pods, as moisture can cause mold.
How do I store geranium seeds for next year?
Once harvested, let pods dry completely (1–2 weeks in a paper bag), then crack them open to release seeds. Store seeds in a cool, dry place (like an envelope in the fridge) for up to 2 years. Label them! Geranium varieties can vary, and you’ll forget which is which otherwise.
What if my geranium seed pods won’t open on their own?
If pods stay stubbornly closed, try these tricks:
- Gently crush them with a hammer (wear gloves!)
- Place them in a paper bag and shake daily for a week
- Use a hair dryer on low heat to dry them out faster
Can I grow geraniums from seed pods, or should I buy new plants?
Seeds from pods are free and viable, though store-bought plants may bloom faster. Seed-grown geraniums can take 3–6 months to flower but are hardier and often more disease-resistant. Start indoors in early spring for best results.
Wrapping up and next steps
Geranium seed pods are nature’s way of ensuring your garden keeps blooming year after year—with a little patience and care! By mastering the art of harvesting, drying, and storing these delicate pods, you’re not just saving seeds; you’re investing in future seasons of vibrant color and fragrance. 🌸
Ready to put your newfound knowledge to work? Start by selecting a few healthy geranium plants this season, and soon you’ll be sharing your homegrown seeds with fellow gardeners—or simply enjoying the satisfaction of growing from your own harvest. Happy gardening!