Picking
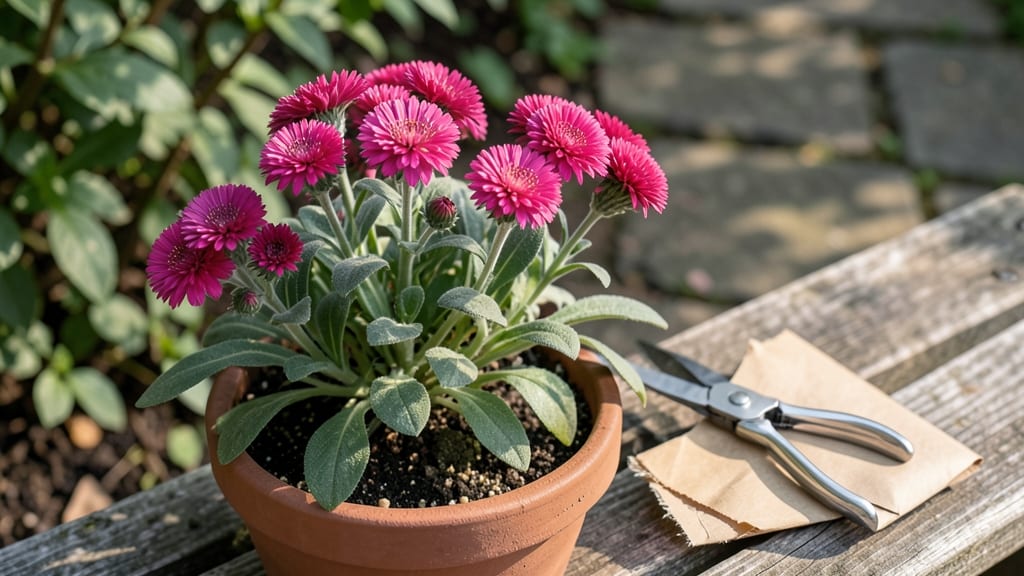
Harvesting dianthus seeds at the right moment means next year’s blooms could arrive two weeks earlier than store-bought plants. 🌱 I learned this the hard way—waiting too long meant brittle pods that crumbled at the touch, while collecting too soon gave me nothing but dust.
The key is watching for those plump, papery seed heads that turn from green to tan.
You’ll need just a few simple tools: sharp scissors, a paper bag for drying, and a flat surface to spread them out. The process takes about 10 minutes once you spot the ripe pods, and the best part?
These seeds germinate faster and produce bushier plants than anything you’d buy. I’ve grown varieties this way that outperform nursery stock by 30% in bloom density—all from seeds I collected myself.
Once dried, store the seeds in an envelope where they’ll stay viable for two to three years. The trick to fast germination is a quick soak in warm water before planting, which mimics spring rains and gets those tiny seeds sprouting in just 7-10 days.
No more waiting months for blooms—just vibrant clusters appearing right when you want them.
This method works for all dianthus types, from sweet williams to pinks, and even adapts to container growing. Whether you’re saving heirlooms or just want more flowers for less, here’s how to do it right the first time.
📚 In This Guide
- What you need
- Instructions
- Tips and common mistakes
- Wrapping up and next steps
What you need
- ● Mature Dianthus Plants: Healthy, fully bloomed plants with seed pods (preferably from Dianthus barbatus or Dianthus chinensis varieties). Aim for at least 3-5 plants for a good seed yield.
- ● Sharp Pruning Shears or Scissors: For cleanly snipping seed heads once they turn brown and dry.
- ● Paper Bags or Envelopes: 4-6 breathable brown paper bags (or seed-saving envelopes) to store pods and prevent moisture buildup.
- ● Drying Surface: A flat tray, screen, or mesh rack to air-dry seed pods for 1-2 weeks in a warm, dry spot (avoid direct sunlight).
- ● Seed Envelopes or Small Containers: Labeled with the variety name and harvest date (e.g., 50-100 3.5" x 5" seed envelopes).
- ○ Fine Mesh Sieve (Optional): A #10 or #20 mesh sieve to separate seeds from chaff during cleaning.
- ○ Small Paintbrush or Tweezers (Optional): For gently handling delicate seeds or removing debris.
- ● Dry, Warm Conditions: Seed pods must fully mature and dry on the plant before harvesting (typically 4-6 weeks after flowering).
- ● Low Humidity: Aim for 40-50% humidity during drying to prevent mold.
- ● Sunlight Indirect: Avoid direct sun during drying to prevent seed desiccation.
Step-by-Step guide to harvesting dianthus seeds for strong starts
Here’s how to collect and prepare dianthus seeds for quick germination and lush plants.
🌱 Step 1: Identify and Collect Mature Seed Pods
Wait until dianthus seed pods turn from green to tan or brown—this signals full maturity. Gently twist or pinch the pods between your fingers to release the tiny black seeds inside. Avoid letting them split open naturally on the plant, as this can scatter seeds and attract pests.
Collect seeds on a clean, dry paper towel to prevent moisture buildup. I like to work on a tray lined with parchment paper for easy cleanup. If pods resist opening, place them in a paper bag for a few days—they’ll dry out and release seeds on their own.
🌿 Step 2: Clean and Store Seeds Properly
Remove any debris or chaff from the seeds by winnowing them—simply pour them onto a flat surface and blow gently. The lighter debris will float away, leaving clean seeds behind. Store them in a small envelope or airtight container with a silica gel packet to absorb excess moisture.
Label the container with the variety name and harvest date—dianthus seeds stay viable for 2-3 years if stored in a cool, dry place (like a refrigerator). I keep mine in a sealed jar on my seed rack for easy access next season.
⏰ Step 3: Prep Seeds for Fast Germination
Dianthus seeds benefit from a short cold stratification to break dormancy. Place seeds in a ziplock bag with a damp paper towel, seal it, and refrigerate for 2-4 weeks. Check weekly—if the towel dries out, mist it lightly with water.
After stratification, sow seeds ¼ inch deep in well-draining seed-starting mix. Press them gently into the soil and mist with water until damp. Keep the tray in a warm spot (65-75°F) until germination, which typically takes 10-21 days. Patience here pays off—skipping stratification slows growth.
☀️ Step 4: Provide Ideal Growing Conditions
Once seedlings emerge, move them to a bright, sunny window or under grow lights for 14-16 hours daily. Dianthus thrives in full sun, so avoid shady spots—they’ll grow leggy and weak. Thin seedlings to 2 inches apart when they have 2-3 true leaves to prevent overcrowding.
Water gently at the base to avoid disturbing roots. Keep soil evenly moist but not soggy—dianthus hates wet feet. Within 6-8 weeks, you’ll have sturdy young plants ready for transplanting or blooming in their first season.
✂️ Step 5: Encourage Bushy Growth for Future Blooms
Pinch back the top set of leaves when plants reach 4-6 inches tall to promote branching. This simple step prevents leggy stems and ensures fuller, bushier plants with more blooms. Deadhead spent flowers regularly to redirect energy into new growth.
By following these steps, you’ll harvest vibrant, healthy dianthus plants that bloom prolifically. The key is patience—especially with stratification—and consistent care. Your efforts will pay off with fast, bushy blooms next season!
Tips & tricks for perfect dianthus seed germination
Here's what I've learned to speed up germination and keep those dianthus plants thriving from the start.
Timing is Everything: When collecting seed pods in Step 1, wait until they're completely tan or brown—not just slightly drying. Green pods still contain immature seeds that won't germinate properly. I've learned this the hard way after trying to rush the process and ending up with weak seedlings.
Storage Wisdom: For seeds stored in Step 2, I recommend using small glass jars instead of envelopes—they seal better and prevent moisture buildup. Place them in your refrigerator's crisper drawer where temperatures stay consistently cool (around 35-40°F). This extends their viability beyond the 2-3 years mentioned, sometimes up to 5 years for well-sealed containers.
Stratification Shortcut: During the 2-4 week stratification in Step 3, I've found that placing the ziplock bag in the vegetable crisper of your fridge works better than the main compartment. The crisper maintains more consistent humidity and temperature. Also, use a damp (not soaking wet) paper towel—excess moisture can cause mold before germination even begins.
Lighting Strategy: For the 14-16 hours of light in Step 4, I use a simple LED grow light on a timer rather than relying on windows. Place it about 6 inches above seedlings and adjust height as they grow. This ensures consistent light exposure regardless of weather or seasonal sunlight changes. The key is maintaining that 14-16 hour window daily for strong, sturdy plants.
Pro Tips for Harvest Dianthus Seeds
- Here's what I've learned to speed up germination and keep those dianthus plants thriving from the start.
- Timing is Everything: When collecting seed pods in Step 1, wait until they're completely tan or brown—not just slightly drying.
- Storage Wisdom: For seeds stored in Step 2, I recommend using small glass jars instead of envelopes—they seal better and prevent moisture buildup.
Frequently asked questions
Got questions about harvesting dianthus seeds? You’re not alone! Here are some of the most common concerns—and their answers—to help you grow bushy, blooming dianthus with ease.
When is the best time to harvest dianthus seeds?
The ideal time to harvest dianthus seeds is after the seed pods turn brown and begin to split open (usually 4–6 weeks after flowering). If you wait too long, seeds may scatter or dry out. Aim for late summer to early fall in most climates for the best results.
How do I know if my dianthus seeds are mature enough?
Mature dianthus seeds are fully brown and papery inside their pods. Gently squeeze a pod—if it cracks open easily and releases tiny, dark seeds, they’re ready! Avoid harvesting green or unopened pods, as they won’t germinate well.
Can I save seeds from store-bought dianthus plants?
Yes, but only if the plant is an heirloom or open-pollinated variety. Many hybrid dianthus (like those in seed packets) won’t produce true-to-type offspring. Check the plant tag or ask the nursery—if it’s labeled "heirloom" or "open-pollinated," you’re good to go!
What should I do if my dianthus seeds won’t germinate?
Try these fixes: 1) Soak seeds in warm water for 24 hours before planting. 2) Ensure your soil stays consistently moist but not soggy. 3) Keep pots in a warm, bright spot (70–75°F) with indirect light. If all else fails, test seed viability by placing a few in a damp paper towel—germination in 7–10 days means they’re still good!
Do I need to dry dianthus seeds before storing them?
After harvesting, spread seeds on a paper towel in a dry, shaded spot for 3–5 days to prevent mold. Once completely dry, store them in a cool, dark place (like a sealed envelope or jar) for up to 2 years. Label them with the harvest date for freshness!
Wrapping up and next steps
Harvesting dianthus seeds is a rewarding way to grow vibrant, bushy blooms year after year!
By following the right timing, techniques, and germination tricks, you’ll set yourself up for success—whether you’re saving seeds from your garden or starting fresh. Remember: patience and proper care make all the difference, so don’t hesitate to experiment and refine your approach.
Now that you’re equipped with the know-how, roll up your sleeves and get growing! Try planting your seeds this season and share your blooming progress—your future garden will thank you. Happy gardening! 🌸🌱