
Transplanting
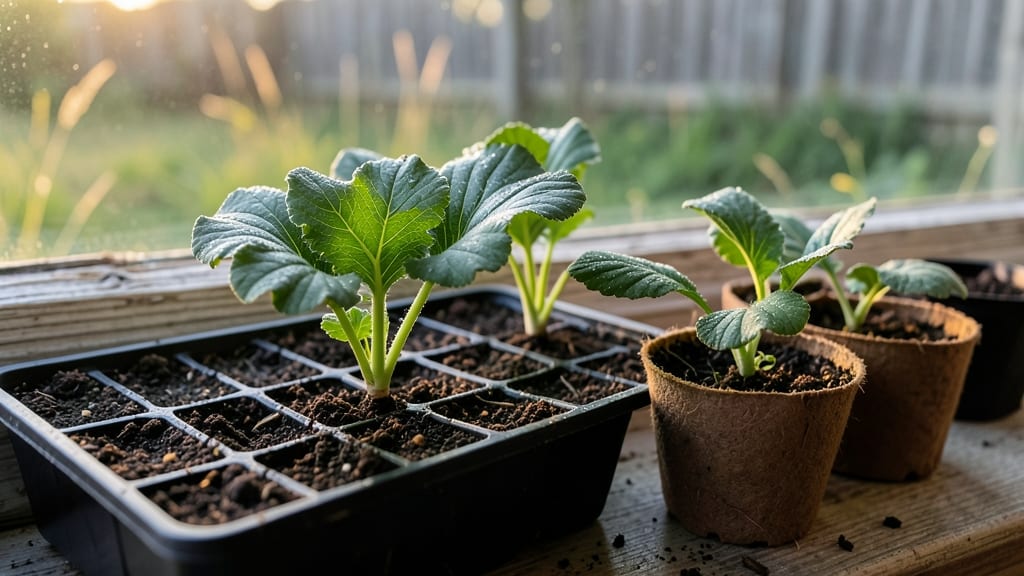
Growing daikon radish seedlings that actually thrive starts with the right soil and spacing—no more leggy, weak plants that flop by harvest time. ✨ I’ve grown daikon for years, and the difference between a crisp, 2-foot radish and a sad, stunted one comes down to these three early steps.
The secret isn’t complicated: it’s about moisture, light, and giving those tiny roots room to breathe.
You’ll need a shallow tray or individual pots, a mix of 50% potting soil and 50% compost, and a sunny windowsill or grow light. Plant seeds just ½-inch deep, space them 1-inch apart, and keep the soil damp—not soggy—until sprouts appear in about 5-7 days.
Most people overwater here, and that’s when damping-off strikes. A spray bottle keeps things gentle.
Once those first true leaves unfurl, you’ll see the payoff: sturdy seedlings with thick stems ready for transplanting in 3-4 weeks. They’ll handle the move without shock, and your garden soil will thank you for not crowding them.
The key is thinning early—pull weak sprouts when they’re still tiny so the strong ones get the nutrients they need.
This method works for both spring and fall planting, and even in containers. The only real mistakes are overwatering or letting soil dry out completely. Trust the process, and you’ll be harvesting radishes that put store-bought to shame. Let’s get those seeds going!
📚 In This Guide
- What you need
- Instructions
- Tips and common mistakes
- Wrapping up and next steps
What you need
- ● Daikon radish seeds: Choose a fast-maturing variety (e.g., Sakurajima or White Icicle) for seedlings. Quantity: 10–20 seeds (or 1–2 per 2-inch pot if starting indoors).
- ● Seed-starting mix: Lightweight, sterile, and well-draining (e.g., Pro-Mix or coco coir). Quantity: 1–2 gallons (enough for 6–12 small pots or a seed tray).
- ● Containers: Option 1: 2–3 inch biodegradable pots or cell packs (10–20 units).
- ● Option 2: A seed tray with drainage holes (10x20 inch).
- ● Option 3: Yogurt cups or egg cartons (DIY-friendly!).
- ● Grow lights or sunny windowsill: 6–8 hours of bright, indirect light daily (or a LED grow bulb if indoors).
- ● Watering can or spray bottle: With a fine mist nozzle for gentle hydration.
- ● Plant labels: Small sticks or plant markers to track varieties (e.g., daikon vs. carrot seedlings).
- ○ Fertilizer (optional): Fish emulsion (1:10 dilution) or seaweed extract for a nutrient boost.
- ● Balanced liquid fertilizer (5-5-5 or 10-10-10) for later growth stages.
- ○ Heat mat (optional): If starting in cool climates (seedling heat mat to speed germination.
- ○ Humidity dome (optional): A clear plastic cover or humidity tent to retain moisture during germination.
- ○ Pruning shears (optional): For trimming leggy seedlings later.
- ● Temperature: Ideal germination range is 60–70°F (15–21°C). Avoid drafts or cold windowsills!
- ● Patience: Daikon seeds germinate in 5–10 days—stay consistent with moisture!
- ● Space: Seedlings need 1–2 inches apart once they sprout (thin or transplant as needed).
Step-by-step instructions for growing healthy daikon radish seedlings
Here's how to raise sturdy daikon seedlings that'll reward you with crisp, sweet roots.
🌱 Step 1: Prepare Containers and Planting Mix
Start with 4-inch deep containers—daikon roots need room to develop. Fill each with 1 cup of sterile seed-starting mix (never garden soil—it's too dense). I press the mix down lightly with my fingers until it's firm but not compacted, creating a smooth surface for seeds.
Moisten the mix until it feels like a wrung-out sponge—damp but not dripping. The key here is even moisture without waterlogging. Place the containers in a warm spot (70-75°F) since daikon seeds germinate best in consistent warmth. I use a seedling heat mat for reliable results, especially in cooler climates.
🌱 Step 2: Sow Seeds at Proper Depth and Spacing
Plant 2-3 seeds per container at a depth of just ¼ inch. Daikon seeds are small, so I use a toothpick to create tiny holes for precision. Cover them with a light dusting of additional mix—don't press down, just let gravity settle them gently.
Space seeds 1 inch apart to prevent overcrowding. Once they germinate, you'll thin to the strongest seedling. Water gently with a spray bottle until the soil surface looks uniformly damp. Place a humidity dome or plastic wrap over the containers to retain moisture—daikon seeds need consistent dampness to sprout.
☀️ Step 3: Provide Light and Care for Strong Starts
Move seedlings to bright, indirect light immediately after germination—daikon seedlings stretch toward any light source. I use a grow light on a timer for 12-14 hours daily, keeping it 3-4 inches above the plants. Watch for leggy growth (thin stems with widely spaced leaves)—this means your light is too far or weak.
Water when the top inch of soil feels dry, using room-temperature water to avoid shocking the roots. Once the first true leaves appear (about 7-10 days), remove the humidity dome. Thin to the strongest seedling per container by snipping the weaker ones at soil level with clean scissors—this prevents disturbing the roots of the remaining plant.
⏰ Step 4: Harden Off Before Transplanting
Two weeks before your last frost date, begin hardening off. Place seedlings outside in a sheltered spot for 1-2 hours the first day, gradually increasing exposure over 7-10 days. Daikon seedlings are sensitive to temperature swings, so I avoid transplanting on days above 85°F—they'll bolt prematurely.
Transplant on a cool, overcast afternoon when soil is 55-65°F. Dig holes slightly deeper than the root ball and space plants 2-3 inches apart in rows. Water deeply after planting to settle the soil around the roots. Mulch with 1 inch of straw to retain moisture and prevent soil crusting, which daikon roots hate.
Tips & tricks for perfect daikon radish seedlings
Between us, daikon seedlings can be finicky—but these small adjustments make all the difference between floppy, leggy sprouts and robust, transplant-ready plants.
Warmth is Everything: That 70-75°F germination temperature range isn't just ideal—it's non-negotiable for daikon. If your kitchen runs cooler, invest in a seedling heat mat ($15 at garden centers) rather than relying on your oven. I learned this the hard way after waiting two weeks for germination in a chilly basement. Pro tip: Place containers on top of your fridge (not inside) for consistent warmth without risking overheating.
The Light Factor: Those 12-14 hours of daily light require precise positioning. I position my grow light 3-4 inches above the seedlings and adjust weekly as they grow. Leggy seedlings mean your light's too far away—watch for stems stretching toward the light source like tiny sun-worshippers. For natural light, place containers on an east-facing windowsill (morning sun is gentler than afternoon intensity) and supplement with a reflector board to maximize brightness.
Thinning Technique: When thinning to your strongest seedling, snip at soil level with clean scissors rather than pulling—this prevents disturbing the roots of your remaining plant. I time this for late afternoon when temperatures drop slightly, which reduces transplant shock. The key is patience: Wait until you see the first true leaves (around 7-10 days) before thinning, as early thinning can stress delicate seedlings.
Harden Off Strategically: The 1-2 hour outdoor exposure is just the beginning. I gradually increase time by 30 minutes daily until reaching full sun tolerance. For extra protection, place seedlings in a shaded area under a tree or use a lightweight row cover. On days approaching 85°F, I bring them back inside—daikon seedlings bolt when stressed by heat, and you'll lose your investment in minutes.
Pro Tips for Daikon Radish Seedlings
- Between us, daikon seedlings can be finicky—but these small adjustments make all the difference between floppy, leggy sprouts and robust, transplant-ready plants.
- Warmth is Everything: That 70-75°F germination temperature range isn't just ideal—it's non-negotiable for daikon.
- The Light Factor: Those 12-14 hours of daily light require precise positioning.
Frequently asked questions
Got questions about growing daikon radish seedlings? You’re not alone! Here are answers to the most common concerns—from timing to troubleshooting—to help you grow thriving transplants with confidence.
How long does it take for daikon radish seedlings to be ready for transplanting?
Daikon radish seedlings are typically ready for transplanting 3–4 weeks after sowing, once they’ve developed 2–3 true leaves and a sturdy stem. Avoid letting them grow too tall (over 6 inches) before transplanting, as this can stress the roots. Harden off seedlings for 5–7 days before moving them outdoors for best results.
Can I transplant daikon radish seedlings directly into the garden, or should I start them indoors first?
Daikon radishes thrive when sown directly outdoors—they dislike being transplanted due to their delicate roots. However, if you’re in a short-season climate, you can start seeds indoors 4–6 weeks before the last frost and transplant seedlings carefully, ensuring minimal root disturbance. For most gardeners, direct sowing is the easiest and most successful method.
What’s the best temperature range for growing daikon radish seedlings?
Daikon radishes prefer cool temperatures (60–70°F during the day). Seedlings can handle light frosts (25–30°F), but avoid planting when soil temps exceed 75°F, as this causes bolting (premature flowering). For fall crops, aim to sow 6–8 weeks before the first frost for a second harvest.
Why are my daikon radish seedlings turning yellow or wilting?
Yellowing leaves often signal overwatering or poor drainage, while wilting can mean underwatering or heat stress. Check soil moisture—daikon prefers consistently moist (not soggy) soil. Yellowing lower leaves may also indicate nitrogen deficiency; add a balanced fertilizer or compost. If seedlings collapse suddenly, pests (like flea beetles) or disease (damping off) could be the culprit—inspect roots and adjust care accordingly.
Are there any alternatives to daikon radish seedlings if I can’t find them locally?
If you can’t source daikon seedlings, try growing from seed (they germinate quickly in 5–10 days) or opt for similar fast-growing greens like mizuna, turnip greens, or baby bok choy. For root crops, carrots or small radishes (like ‘Cherry Belle’) are easier to transplant if needed. Just note that daikon’s long, tapered shape makes it unique—substitutes won’t offer the same texture or flavor!
Wrapping up and next steps
Growing daikon radish seedlings into thriving transplants is a rewarding journey—one that sets you up for a bountiful harvest with minimal fuss! By following these three simple steps, you’ve mastered the art of nurturing sturdy, healthy seedlings ready for the garden.
The key lies in patience, proper spacing, and a little TLC to keep them strong until transplanting day.
Now that you’re armed with the know-how, roll up your sleeves and get planting! 🌱 Start with your seedlings today, and soon you’ll be enjoying crisp, homegrown daikon radishes. Need a little extra confidence? Try experimenting with different soil mixes or light schedules—every gardener’s touch makes a difference.