
Lawn
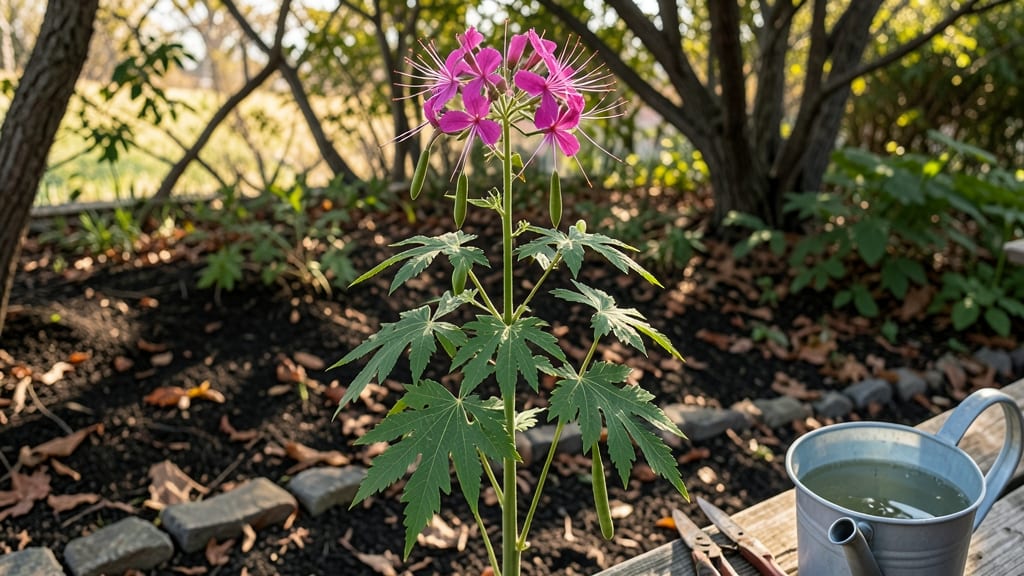
Those cleome seed pods are nature's own vertical art installations—spiky, sculptural, and buzzing with pollinators all season long. 🌿 I used to just let them go to seed naturally, but after seeing how they dry into striking textures, I started harvesting them for both garden and craft projects.
The key is knowing exactly when to collect them before the seeds scatter or sprout too early.
You'll need a sharp pair of pruners, a breathable paper bag for each plant, and a dry, dark spot to cure the pods.
The best time to harvest is when the pods turn from green to tan but before they split open—usually in late summer or early fall, depending on your climate.
Cleome seeds stay viable for years if stored properly, so this is a great way to save money and expand your garden next season.
Once dried, these pods become stunning vertical accents in arrangements or dried flower displays. Their unique shape adds drama to any pollinator garden, and the seeds inside will grow into those same striking plants if you sow them properly.
The trick is to keep them cool and dry until planting time—no more than 40°F and under 30% humidity for long-term storage.
Between you and me, I've turned my cleome harvest into everything from rustic centerpieces to seed packets for friends. The pods even make great natural bird feeders if you leave them intact.
Here's how to get the most out of your cleome seed collection this year—without losing a single seed to premature germination.
📚 In This Guide
- What you need
- Instructions
- Tips and common mistakes
- Wrapping up and next steps
What you need
- ● Cleome seeds: 10–20 seeds (varies by desired density; Cleome hassleriana is the most common variety). Choose organic or heirloom seeds for best results.
- ● Well-draining potting mix: 5–10 gallons (sterilized to prevent disease). A blend of 50% peat moss or coco coir, 30% perlite or vermiculite, and 20% compost works perfectly.
- ● Containers or garden beds: Containers: 5–10-inch pots (1–2 plants per pot) with drainage holes. Terracotta or fabric pots are ideal for airflow.
- ● Garden beds: Full sun (6+ hours/day) and loose, well-amended soil. Avoid waterlogged areas.
- ● Watering can or hose: With a gentle spray nozzle to avoid disturbing seeds.
- ○ Garden gloves: (Optional but recommended—cleome leaves can be prickly!)
- ● Slow-release fertilizer: 5–10-5 or 10-10-10 blend (follow package instructions for pollinator-friendly use).
- ● Mulch: Straw or shredded bark to retain moisture and suppress weeds.
- ● Trellis or stakes: (For taller varieties) 3–4 ft bamboo stakes or a lightweight trellis to support vertical growth.
- ● Pollinator-friendly companions: Marigolds, sunflowers, or lavender to attract bees, butterflies, and hummingbirds.
- ● Seed-starting kit: If sowing indoors (includes heat mat for faster germination).
- ● Sunlight: Confirm your garden spot gets full sun (6+ hours/day)—cleome thrives in warmth!
- ● Climate: Ideal for USDA zones 7–11. In cooler zones, start seeds indoors 6–8 weeks before the last frost.
- ● Patience: Germination takes 7–14 days; seedlings grow 2–4 ft tall with dramatic seed pods.
Step-by-step guide to growing cleome for showy seed pods
Here’s how to grow cleome from seed to those iconic, spider-like blooms and architectural seed pods.
🌱 Step 1: Start Seeds Indoors for Early Blooms
Sow cleome seeds indoors 6-8 weeks before your last frost date. These seeds need warmth to germinate—place them on a seedling heat mat set to 75-80°F. Fill biodegradable seedling pots with sterile seed-starting mix and press one seed ¼ inch deep per pot. Cleome seeds are large, so spacing isn’t critical yet.
Keep the soil consistently moist but not soggy. A spray bottle works best—overwatering can cause damping-off. Place the pots in a bright, indirect light spot (like a south-facing window) and cover loosely with plastic wrap to retain humidity. You’ll see sprouts in 7-14 days, though some seeds may take longer.
☀️ Step 2: Harden Off and Transplant Seedlings
Once seedlings have 2-3 true leaves (about 4-6 weeks after sowing), start hardening them off. Move pots outside to a sheltered spot for 1-2 hours the first day, gradually increasing time over 7-10 days. Cleome thrives in full sun, so choose a location with 6+ hours of direct sunlight daily.
Transplant seedlings outdoors after the last frost when soil is at least 60°F. Space them 18-24 inches apart—cleome grows tall and needs room to avoid flopping. Dig holes slightly deeper than the root ball and water deeply to settle the soil. Avoid disturbing roots; cleome establishes quickly but dislikes being moved once settled.
💧 Step 3: Water and Fertilize for Strong Growth
Water cleome at the base (not overhead) to prevent fungal issues. Let the top 1-2 inches of soil dry out between waterings—overwatering causes yellowing leaves. Once established, cleome is drought-tolerant, but consistent moisture encourages those bold, vertical seed pods you’re after.
Fertilize lightly with a balanced, water-soluble fertilizer (10-10-10) every 4-6 weeks during the growing season. Too much nitrogen promotes leafy growth at the expense of flowers and seed pods. Watch for purple-tinged leaves—a sign of phosphorus deficiency—and adjust fertilizer if needed.
✂️ Step 4: Deadhead and Support for Dramatic Seed Pods
Remove spent blooms regularly to redirect energy into new flowers and seed pods. Cleome’s unique pods form after blooms fade—leave them on the plant for the dramatic vertical accents they’re known for. If stems get leggy, pinch back the tips to encourage bushier growth.
Tall cleome varieties may need staking or trellising to prevent flopping, especially in windy areas. Use bamboo stakes or a lightweight wire cage to support stems without restricting airflow. You’ll notice pods forming 6-8 weeks after flowering, starting as green and maturing to brown or tan as they dry.
🪴 Step 5: Collect and Store Seed Pods
Harvest seed pods when they’re fully dry and brown but before they split open. Twist pods gently to remove them—some varieties release seeds easily, while others need a little coaxing. Store seeds in a cool, dry place in a paper envelope for 1-2 years without losing viability.
For a continuous display, stagger plantings every 2 weeks—cleome blooms profusely for 8-10 weeks, and new pods will form as old ones mature. The more you grow, the more pollinators (like bees and hummingbirds) will visit your garden!
Tips & tricks for growing stunning cleome seed pods
These gardening secrets will help you coax those iconic spider-like blooms and architectural seed pods from your cleome plants.
Heat Mat Hack: That 75-80°F heat mat temperature is non-negotiable for germination. I learned this the hard way—seeds left at room temperature (around 68°F) took twice as long to sprout, and some never made it. If you don't have a heat mat, place your seed pots on top of your refrigerator for consistent warmth. The key is maintaining that steady temperature during those first critical days.
Lighting Secret: Cleome seedlings need bright light from day one, but direct sun can scorch them. I use a combination of a south-facing window and a simple LED grow light on a timer for 12 hours daily. Watch for seedlings leaning toward the light—this means they're stretching and need more illumination. Rotate your pots every few days to encourage even growth.
Transplanting Timing: The 6-8 week indoor growing period might seem long, but it's worth it for those dramatic seed pods. I always check my local frost dates and mark the 6-week point on my calendar. Transplanting too early can shock seedlings, while waiting too long means smaller plants that may not handle outdoor conditions well. A soil thermometer helps confirm that 60°F minimum—cold soil stresses young roots.
Fertilizer Strategy: That 4-6 week fertilizer schedule is perfect for cleome's needs. I use a liquid fertilizer diluted to half-strength to avoid overfeeding. Too much nitrogen will give you lush leaves but few flowers and seed pods. Look for those purple-tinged leaves as an early warning sign—it's your plant's way of saying "I need phosphorus!" A quick boost with bone meal can help correct this before it becomes a bigger issue.
Pro Tips for Cleome Seed Pods
- These gardening secrets will help you coax those iconic spider-like blooms and architectural seed pods from your cleome plants.
- Heat Mat Hack: That 75-80°F heat mat temperature is non-negotiable for germination.
- Lighting Secret: Cleome seedlings need bright light from day one, but direct sun can scorch them.
Frequently asked questions
Got questions about growing and enjoying cleome seed pods? You’re not alone! Here are some of the most common queries gardeners have—plus quick, practical answers to keep your pollinator-friendly garden thriving.
Are cleome seed pods easy to grow from seed?
These plants are super beginner-friendly. Simply scatter seeds on well-draining soil after the last frost, press them lightly into the ground, and water gently. They sprout quickly (in 7–14 days) and grow fast—no fuss required! Just give them full sun and space to stretch their dramatic spikes.
How long does it take for cleome seed pods to mature?
From seed to showstopper, cleome pods typically take 90–120 days to mature. You’ll see those iconic exploding seed pods forming in late summer or early fall, depending on your climate. Pro tip: Deadhead spent blooms to encourage more flowers (and pods!) all season.
Do cleome seed pods attract pests?
Not usually! Cleome is a pollinator magnet (bees, hummingbirds, and butterflies love them), but it’s not a pest magnet. However, watch for aphids on new growth—spray with water or use insecticidal soap if needed. The trade-off? The pollinators far outweigh the tiny pests!
Can I use cleome seed pods in dried arrangements?
Yes! Once the pods turn brown and crispy (usually in fall), they make stunning dried decor. Hang them upside down in a dry, dark place for 2–3 weeks, then pop them into arrangements. Their unique texture and color add wow to winter bouquets—just avoid touching the seeds (they do explode!).
What if my cleome plants flop over or look leggy?
Leggy growth happens when plants don’t get enough light or are overcrowded. To fix it:
- Move them to a sunnier spot (cleome needs 6+ hours of sun daily).
- Thin seedlings to 12–18 inches apart for better airflow.
- Use a cage or stake for support if needed (though cleome often self-supports).
Bonus: Prune back leggy stems to encourage bushier growth!
Wrapping up and next steps
Cleome seed pods bring a touch of whimsical beauty to pollinator gardens with their striking, vertical forms and vibrant colors.
These low-maintenance plants not only enhance your outdoor space but also support bees, butterflies, and hummingbirds—making them a win-win for both aesthetics and ecology. Ready to transform your garden? Start by selecting the right variety, prepping your soil, and planting with confidence. Your pollinator paradise awaits!
- 🌱 Next Step: Grab your seeds, follow the planting tips, and watch your garden bloom into a buzzing ecosystem.