Vegetables
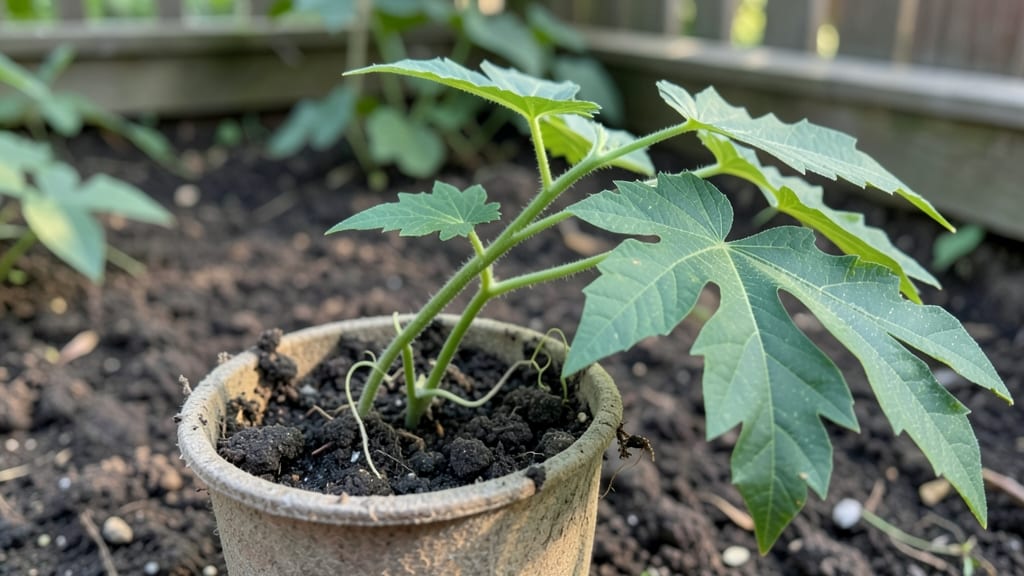
Bitter gourd seedlings grow like weeds when you nail these fast-start tricks—I’ve gone from leggy failures to stocky, vine-ready plants in just three weeks. The secret isn’t fancy equipment but getting the soil warmth, light, and humidity just right from day one.
Most beginners overwater or crowd them, which guarantees weak stems. My first batch flopped until I switched to a 50/50 peat-perlite mix and kept the soil at 85°F—now they shoot up like bamboo.
You’ll need biodegradable pots (no transplant shock), a grow light or sunny windowsill, and a humidity dome to prevent damping-off. Water only when the top inch feels dry—overwatering drowns those delicate roots faster than you can say "bitter melon."
Within 10 days, you’ll spot true leaves (not the initial seed leaves), and by week three, they’ll be ready for stakes or trellises. The vines grow aggressively, so plan for 6-inch spacing between plants.
By week four, your seedlings will be thick-stemmed and vibrant green, not the pale, spindly things you see at nurseries. The key is morning sun exposure (6+ hours) and weekly foliar feeding with diluted fish emulsion—this boosts growth without burning tender leaves.
Once they hit 12 inches tall, they’ll start climbing anything you give them, and that’s when the real fun begins: heavy yields of those signature bumpy fruits.
This method works in containers or garden beds, whether you’re in Zone 8-11 or a greenhouse setup. The only real mistake? Waiting too long to transplant—do it when seedlings have 4-5 leaves and nights stay above 60°F.
Now let’s get those seeds sprouting like they’re in a tropical jungle.
📚 In This Guide
- What you need
- Instructions
- Tips and common mistakes
- Wrapping up and next steps
What you need
- ● Bitter gourd seeds: 10–20 fresh, high-quality seeds (ensure they’re from a reputable supplier for best germination rates).
- ● Seedling trays or small pots: 2–4 inch pots (biodegradable or plastic) or a seedling tray with drainage holes. Quantity: 1 tray or 10–20 pots.
- ● Well-draining potting mix: 5–10 lbs of a light, airy mix (e.g., 60% coco coir, 30% perlite, 10% vermiculite). Avoid heavy garden soil.
- ● Watering can or spray bottle: With a fine nozzle for gentle watering.
- ● Plastic wrap or humidity dome: To retain moisture during germination.
- ○ Grow lights or sunny windowsill: A full-spectrum LED grow light (optional but helpful for indoor setups) or a south-facing window.
- ○ Seedling heat mat: (Optional) To maintain soil temperature at 75–85°F (24–29°C) for faster germination.
- ● Fertilizer: A balanced, water-soluble fertilizer (e.g., 10-10-10 NPK) for early feeding once seedlings sprout.
- ● Pruning shears or scissors: For trimming excess growth or transplanting.
- ● pH testing kit: To ensure your soil pH is between 6.0–6.8 (ideal for bitter gourd).
- ● Support stakes or trellis: (For later stages) To train vining plants as they grow.
Instructions for fast bitter gourd seedling growth
Here’s how I accelerate bitter gourd seedlings from sprouts to sturdy plants ready for transplanting in just 4-6 weeks.
Pre-Soak Seeds for Faster Germination
Bitter gourd seeds have a tough outer coating that slows germination. To bypass this, place the seeds in a bowl of lukewarm water for 12-24 hours before planting. You’ll notice the water cloud slightly as the seed coats soften—this is your signal they’re ready. After soaking, drain the water and let the seeds air-dry for 10 minutes to prevent mold.
I like to wrap the soaked seeds in a damp paper towel and place them in a warm spot (80-85°F) overnight. This extra step cuts germination time from 10-14 days to just 3-5 days. If your home runs cooler, use a seedling heat mat to maintain consistent warmth.
Plant in Light, Well-Draining Soil Mix
Bitter gourd seedlings thrive in a loose, fertile mix that drains quickly but retains moisture. Fill your containers with a blend of 50% potting mix and 50% perlite or coconut coir to improve aeration. Press the mix lightly to remove air pockets, then create ¼-inch-deep furrows spaced 2 inches apart—this spacing prevents overcrowding as seedlings emerge.
Plant 2-3 seeds per furrow at a depth of ½ inch, then cover lightly with soil. Water gently until the surface feels damp but not soggy. Avoid compacting the soil around the seeds—you’ll see better root development if the mix stays fluffy. Place the containers in a bright, indirect light spot (no direct sun yet) and maintain 75-80°F soil temperature for optimal germination.
Provide High Humidity and Controlled Light
Bitter gourd seedlings need high humidity (70-80%) to prevent wilting during their first 2 weeks. Cover the containers with a clear plastic dome or plastic wrap, propping it slightly above the seedlings to allow airflow. Check daily for condensation—mist the inside of the dome with water if it fogs up. Once 50% of seedlings emerge, remove the cover immediately to avoid fungal issues like damping-off.
After germination, move seedlings to a south-facing window or under grow lights (14-16 hours/day). Bitter gourds grow fast but need bright, indirect light initially to avoid leggy stems. If leaves appear pale or stems stretch toward the light, raise the grow lights to 3-4 inches above the seedlings. You’ll see compact, dark green growth within 7-10 days—this is your cue to start hardening them off.
Harden Off and Transplant Early
Begin hardening off 2 weeks before your last frost date by placing seedlings outside in a sheltered spot for 1-2 hours the first day. Gradually increase exposure over 7-10 days, ending with a full day in partial shade. Watch for wilting—if leaves droop, they’re not ready for longer outdoor time. Bitter gourds are tropical and sensitive to cold, so never let temperatures drop below 55°F during this process.
Transplant seedlings into the garden or larger containers when they reach 4-6 inches tall and have 4-5 true leaves. Dig holes twice as wide as the root ball and mix in compost to enrich the soil. Space plants 3-4 feet apart—this gives them room to vine and produce fruit without competition. Water deeply at transplanting to settle the roots, then mulch with 2-3 inches of organic mulch to retain moisture and regulate soil temperature.
Fertilize and Train for Fast Vines
Bitter gourds are heavy feeders, so fertilize 2 weeks after transplanting with a balanced 10-10-10 fertilizer diluted to half strength. Apply every 4-6 weeks during the growing season, focusing on root development in the early stages. You’ll notice new leaves emerging within 7-10 days of fertilizing—this is your signal the plants are thriving.
Train vines early by installing trellises or stakes at transplanting. Gently weave the main stem around the support as it grows—bitter gourds climb aggressively and need guidance to avoid sprawling. Prune side shoots that form below the first 3 leaves to encourage upward growth. By 6-8 weeks, you’ll have strong, vine-ready plants with multiple flowering nodes, setting the stage for a bountiful harvest.
Tips & tricks for perfect bitter gourd seedling growth
Speeding up bitter gourd seedling growth requires precision—these insider strategies will help you maximize your plants' potential within the critical 4-6 week window.
Soaking Strategy: The 12-24 hour soak in lukewarm water isn't just about softening the seed coat—it's about creating the perfect hydration balance. I've found that adding a pinch of compost tea to the soaking water boosts microbial activity, which can further reduce germination time to just 2-3 days. After soaking, the 10-minute air-dry period is crucial: it prevents mold while maintaining seed viability. For best results, use distilled water rather than tap water, as chlorine can inhibit germination.
Temperature Precision: Maintaining the 80-85°F range during germination is non-negotiable for fast growth. I recommend using a seedling heat mat under your containers during the 12-24 hour soak period—this creates an ideal environment right from the start. After planting, keep soil temperatures between 75-80°F for optimal root development. A simple way to monitor this is to use an infrared thermometer; the ideal planting mix should read 78°F at the root level during germination.
Light Management: The transition from high humidity dome to grow lights at 14-16 hours/day requires careful timing. I've observed that seedlings exposed to grow lights too early (before true leaves emerge) develop leggy stems. Wait until you see the first true leaves before introducing artificial light. Position your grow lights 3-4 inches above seedlings and adjust as they grow—this prevents light burn while ensuring adequate photosynthesis. For maximum efficiency, use full-spectrum LED grow lights which provide the complete light spectrum bitter gourds need for fast growth.
Transplanting Timing: The 2-week hardening off period before transplanting is your opportunity to prepare seedlings for outdoor conditions. I recommend starting with just 1-2 hours of sheltered exposure on the first day, then gradually increasing by 30 minutes each subsequent day. Pay close attention to leaf color—healthy seedlings should maintain vibrant green leaves throughout the process. When transplanting, choose a cloudy day if possible; this reduces transplant shock and allows seedlings to acclimate more quickly to their new environment.
Pro Tips for Bitter Gourd Seedling
- Speeding up bitter gourd seedling growth requires precision—these insider strategies will help you maximize your plan...
- Soaking Strategy: The 12-24 hour soak in lukewarm water isn't just about softening the seed coat—it's about creating ...
- Temperature Precision: Maintaining the 80-85°F range during germination is non-negotiable for fast growth. I recommen...
Frequently asked questions
Got questions about growing bitter gourd seedlings? You're not alone! Here are some of the most common concerns—and their solutions—to help you cultivate healthy, thriving plants.
How long does it take for bitter gourd seedlings to germinate?
Bitter gourd seeds typically sprout within 7 to 14 days if planted in warm, moist soil (ideal temperature: 70–90°F). For faster results, soak seeds in warm water for 4–6 hours before planting. Patience is key—some varieties may take up to 3 weeks, especially in cooler conditions. Pro tip: Use a heat mat if your climate is chilly!
When is the best time to transplant bitter gourd seedlings outdoors?
Transplant seedlings outdoors 2–3 weeks after germination, once they’ve developed 2–3 true leaves and nighttime temps stay above 55°F. Wait until all frost risk has passed—bitter gourds hate cold! Harden off seedlings by exposing them to sunlight gradually over 5–7 days before moving them to their permanent spot.
What if my bitter gourd seedlings look weak or yellow?
Weak or yellow seedlings often signal overwatering, poor drainage, or nutrient deficiency. Check soil moisture—it should be damp but not soggy. Yellow leaves? Boost nitrogen with a balanced fertilizer (like 10-10-10) or compost. Pests like aphids can also stress seedlings—spray with neem oil if you spot them. Pro tip: Ensure pots have drainage holes to prevent root rot!
Can I grow bitter gourd from store-bought bitter gourd?
Yes! Save seeds from a fully ripe, organic bitter gourd (let it soften and split open naturally). Rinse seeds thoroughly, dry them, and store in a cool place. However, store-bought seeds may have lower viability due to processing. For guaranteed results, opt for fresh seeds from a nursery or trusted supplier.
What’s the ideal temperature for bitter gourd seedling growth?
Bitter gourds thrive in warmth—ideal daytime temps are 75–95°F, with nights above 60°F. If temps drop below 50°F, growth slows or stops. Use row covers or grow seedlings indoors under grow lights until conditions improve. Pro tip: Place seedlings near a sunny window or use a heat lamp for extra warmth!
Wrapping up and next steps
Growing bitter gourd seedlings into thriving plants is totally within your reach—with the right knowledge and a little patience! 🌱 By following these fast growth hacks, you’ll enjoy a bountiful harvest of this nutrient-packed vegetable.
Whether you’re a beginner or a seasoned gardener, the key is consistency in care and attention to detail.
Now that you’re armed with tips on soil prep, sunlight, watering, and troubleshooting, it’s time to roll up your sleeves and start planting. Watch your seedlings transform into lush vines, and soon, you’ll be reaping the rewards of your hard work. Happy gardening! 🌿