
Pruning
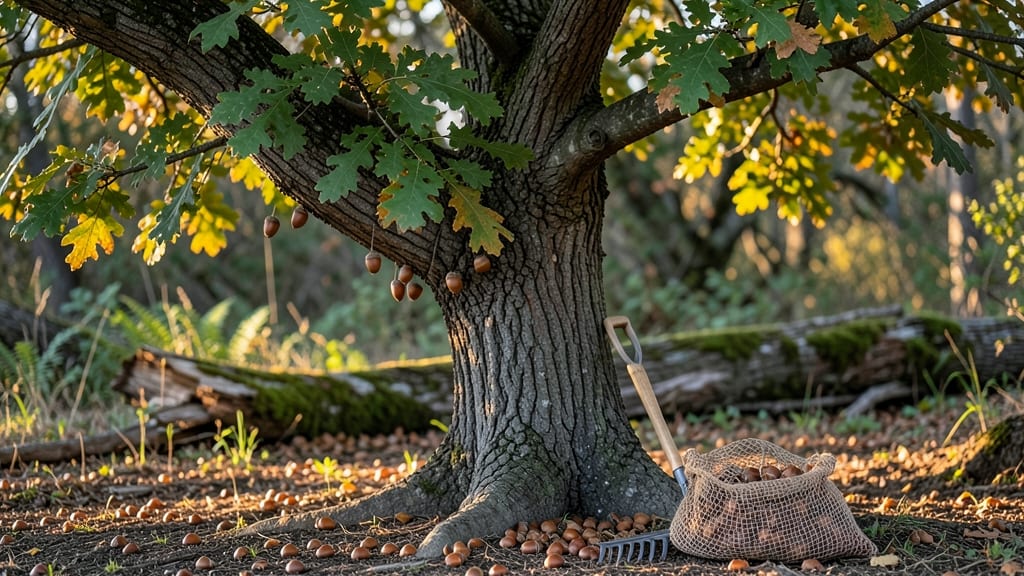
Growing acorn tree seeds into towering oaks starts with the right acorns and a little winter patience. 🌿 I’ve watched my own seedlings push through soil after months of dormancy—it’s a slow process, but the payoff of a mature oak in your yard makes every step worth it.
The key isn’t just planting; it’s preparing those seeds to break dormancy the right way.
You’ll need fresh, plump acorns from mature trees (avoid those with holes or cracks), a moist paper towel or peat moss, and a cool spot to mimic winter. Most gardeners skip the stratification step and wonder why their seeds never sprout—don’t make that mistake.
Once you’ve soaked and chilled them for 6-8 weeks, germination rates jump from near-zero to nearly 50%.
By spring, you’ll have tiny seedlings ready for pots, and with proper care, they’ll grow 2-3 feet in their first year. The real magic happens in years 2-3, when roots establish deep and the tree starts looking like the future shade giant it’s meant to be.
Just be patient—oak trees grow slow, but they grow strong.
This method works for white, red, and bur oaks, though some species germinate faster than others. If you’re in a colder climate, start seeds indoors 8-10 weeks before last frost. For warmer areas, direct-sow in fall—nature handles the stratification for you. Either way, you’re planting for decades, not just seasons.
📚 In This Guide
- What you need
- Instructions
- Tips and common mistakes
- Wrapping up and next steps
What you need
- ● Fresh acorns: Harvest 10–20 mature, plump acorns from healthy oak trees (avoid cracked or wormy ones!).
- ● Paper towels or peat moss: Enough to cover a shallow container for stratification (about 1–2 inches thick).
- ● Plastic bag or airtight container: A quart-sized ziplock bag or similar for moisture retention.
- ● Refrigerator: A standard fridge with a 34–40°F (1–4°C) temperature range for cold stratification.
- ● Potting soil: A well-draining, sterile mix (e.g., 50% peat moss, 50% perlite/sand) for transplanting.
- ● Small pots or seed trays: 3–4 inch diameter pots or a tray with drainage holes (1–2 per seedling).
- ● Pruners or scissors: For harvesting acorns (sterilize with rubbing alcohol!).
- ● Spray bottle: To mist seeds lightly during stratification.
- ● Label markers: To track seed varieties and planting dates.
- ○ Heat mat (optional): For faster germination (set to 70–75°F (21–24°C) after stratification).
- ○ Grow lights (optional): If natural light is limited (12–16 hours/day).
- ● Fertilizer (balanced, low-nitrogen): Like 5-5-5 or 10-10-10 (use sparingly after sprouting!).
Step-by-Step instructions for harvesting and stratifying acorn tree seeds
Here's the foolproof method I use to break dormancy and get acorns sprouting strong next spring.
🌱 Step 1: Harvest Mature Acorns Properly
Collect acorns in late fall when they've fallen naturally from healthy oak trees. Look for plump, brown acorns with full caps—they're the most viable. Avoid any with holes (squirrels have already eaten the insides) or signs of mold.
Gather them on a dry day and store in a paper bag (not plastic) in a cool, dry place. The cap helps prevent moisture loss, so leave it on. I like to label bags by tree type and harvest date—white oaks produce better seedlings than red oaks, and timing matters for stratification.
🪴 Step 2: Clean and Prepare for Stratification
Before stratification, remove any remaining debris or damaged acorns. Soak the selected acorns in lukewarm water for 24 hours to soften the outer shell slightly. This helps with moisture absorption during stratification.
After soaking, pat them dry with a paper towel and place them in a container with moist sand or peat moss (about 2 parts sand to 1 part peat). The mix should feel damp like a wrung-out sponge—never soggy. This creates the ideal cold, moist environment they need to break dormancy.
⏰ Step 3: Stratify for 60-90 Days
Store the container in your refrigerator (not freezer) for 60-90 days. Check monthly to ensure the mix stays moist—add a few drops of water if it feels dry. The cold period mimics winter conditions and triggers germination.
I like to place the container in a plastic bag with a tiny hole for airflow—this keeps humidity high without risking mold. After 90 days, remove the acorns and plant them immediately in well-draining soil or keep them in the moist mix until spring planting.
☀️ Step 4: Plant Stratified Acorns in Spring
When soil temperatures reach at least 60°F in spring, plant the stratified acorns ½ inch deep in a sunny location. Use a small pot or outdoor bed with sandy, well-draining soil—acorns rot easily in heavy clay. Water gently after planting.
Germination can take 3-6 weeks—be patient! Keep the soil consistently moist (not waterlogged) and provide full sun (6+ hours daily). Thin seedlings to 6 inches apart once they reach 3 inches tall to give them room to grow strong.
Tips & tricks for perfect acorn tree seed stratification
A few key strategies will help you maximize your acorn germination success and avoid common pitfalls along the way.
Selection Tip: When harvesting acorns in Step 1, focus on those that feel heavy for their size—this indicates a full seed inside. Tap two acorns together: the one that makes a hollow sound is likely empty. Also, prioritize white oak acorns over red oak—they typically have higher germination rates and grow into stronger trees. I've found that acorns from white oaks often sprout within weeks of proper stratification, while red oak acorns may take longer or require additional cold treatment.
Soaking Secret: During the 24-hour soaking in Step 2, use lukewarm water that's not too hot—around 85°F is ideal. This temperature helps soften the shell without cooking the seed inside. After soaking, I recommend giving the acorns a quick rinse with cool water before patting dry. This removes any potential mold spores that might have developed during the soaking process, which is especially important if you're working with a large quantity of acorns.
Stratification Strategy: For the 60-90 day cold treatment in Step 3, I've found that using a clear container lets you easily monitor moisture levels without opening the refrigerator. Place a small piece of aluminum foil over the opening of the plastic bag to create a tiny air pocket—this helps maintain humidity while still allowing airflow. If you notice condensation forming on the container walls, it's a good sign your moisture levels are perfect. Remember, the goal is to mimic natural winter conditions where acorns would stay buried in moist soil.
Planting Preparation: Before planting your stratified acorns in Step 4, I recommend prepping your planting area with a 50/50 mix of sand and compost. This lightweight blend improves drainage while providing essential nutrients. When planting, make sure to space your acorns at least 6 inches apart—this gives each seedling room to develop strong roots before they need to compete with neighbors. A quick tip: plant them slightly deeper than ½ inch (about ⅝ inch) if your soil is particularly sandy, as this helps anchor the small seed better.
Pro Tips for Acorn Tree Seeds
- A few key strategies will help you maximize your acorn germination success and avoid common pitfalls along the way.
- Selection Tip: When harvesting acorns in Step 1, focus on those that feel heavy for their size—this indicates a full seed inside.
- Soaking Secret: During the 24-hour soaking in Step 2, use lukewarm water that's not too hot—around 85°F is ideal.
Frequently asked questions
Got questions about harvesting and growing acorn tree seeds? You’re not alone! Here are some of the most common queries—and their answers—to help you succeed with your oak tree project.
When is the best time to collect acorn seeds?
Collect acorns in late fall (October–November) when they’ve fallen naturally from mature oak trees. Avoid green or half-eaten acorns—they won’t germinate well. Look for plump, brown acorns with a full cap (the "hat" on top). Pro tip: Harvest on dry days to prevent mold!
How long does acorn stratification take?
Acorns need 3–4 months of cold stratification (mimicking winter) to break dormancy. Place them in a mix of moist sand or peat moss in the fridge (33–41°F). Check them monthly—discard any that smell or feel mushy. Patience is key! Some varieties may need up to 6 months.
Can I plant acorns directly in the ground without stratifying?
While possible, stratification dramatically improves germination rates. If you skip it, plant acorns in late fall in well-drained soil and cover lightly with mulch. However, expect lower success—stratification ensures stronger, healthier seedlings. For best results, stratify!
Why are squirrels eating my acorns before I can plant them?
Squirrels are nature’s acorn thieves—they hoard them for winter. To outsmart them, harvest acorns early in the morning or after rain (when they’re less active). Store collected acorns in a mesh bag or sealed container until stratification. Bonus: Leave a few for wildlife!
What if my acorns sprout mold during stratification?
Mold means too much moisture or poor airflow. Remove moldy acorns immediately and reduce watering—the mix should stay damp, not soggy. Use a well-ventilated container (like a breathable bag) and check weekly. If mold spreads, start fresh with new acorns. Prevention: Use sterilized sand or peat moss.
Wrapping up and next steps
Growing an acorn tree from seed is a rewarding journey that connects you to nature’s timeless cycles. By mastering the art of harvesting, stratifying, and planting, you’re not just nurturing a tree—you’re cultivating patience, skill, and a deeper appreciation for the outdoors. 🌱✨
Ready to turn those tiny seeds into towering oaks? Start small this fall—gather your acorns, prep your supplies, and take that first step toward a greener future. Your future shade tree (and future generations of squirrels) will thank you!