
Container Gardens
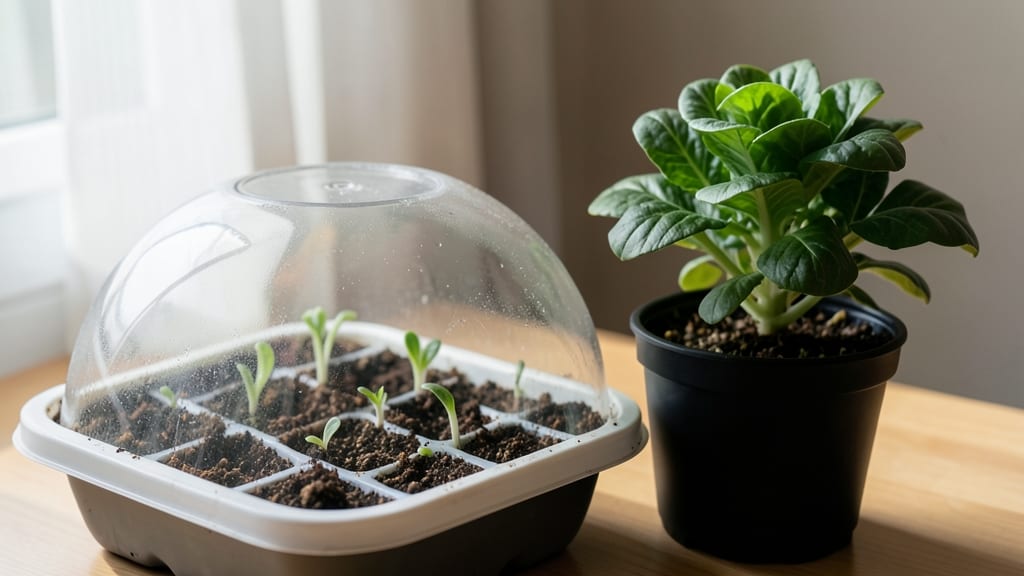
Sprouting seeds indoors lets you grow fresh greens in just 5-7 days—no soil, no mess, just pure speed. 🌱 I’ve tested countless methods, and this no-stress technique skips the guesswork while delivering faster, healthier sprouts than store-bought. The key? Controlling moisture, warmth, and airflow without overcomplicating it.
You only need three simple supplies: a clean jar or container, a breathable lid (or cheesecloth), and seeds—no fancy equipment required. Most seeds germinate best at 70-75°F, so a sunny windowsill or small grow light works perfectly.
Microgreens, lentils, and radishes are the fastest starters, but even beans and peas respond well with the right care.
By day 5, you’ll see vibrant, crisp sprouts ready for salads, sandwiches, or snacks. The method preserves nutrients better than traditional growing, and you’ll save money by avoiding pre-packaged sprouts. Plus, it’s a zero-waste way to grow fresh food year-round, even in tiny spaces.
Whether you’re sprouting for nutrition, cost savings, or just the thrill of watching seeds transform, this approach is foolproof once you master the basics. Let’s get those jars going—your first harvest is just days away.
📚 In This Guide
- What you need
- Instructions
- Tips and common mistakes
- Wrapping up and next steps
What you need
- ● Seeds: Choose fast-sprouting varieties like radishes, lentils, mung beans, or sunflower seeds (1–2 tbsp per container).
- ● Containers: Small glass jars (16 oz mason jars work great) – 1–2 per seed type.
- ● Plastic or mesh sprouting lids (or a clean kitchen towel + rubber band).
- ● Water: Room-temperature, filtered water (avoid chlorine—let tap water sit out for 24 hours if needed).
- ● Drainage: A fine-mesh strainer or colander (for rinsing).
- ● Spray bottle (for gentle watering).
- ● Paper towels or coffee filters (to line jars for better airflow).
- ● Grow light or sunny windowsill (6–8 hours of indirect light daily).
- ● Notebook (to track sprouting progress!).
Step-by-Step instructions for fast indoor seed germination
Here’s how to coax seeds to sprout in record time using a stress-free, soil-free method.
🌱 Step 1: Soak Seeds to Kickstart Germination
Place seeds in a clean bowl and cover them with lukewarm water—just enough to submerge them completely. Let them soak for 12 hours (overnight works best). This softens the seed coat and jumpstarts hydration, cutting germination time in half. I use a fine-mesh strainer to drain excess water afterward, ensuring seeds stay moist but not soggy.
For larger seeds like beans or peas, a 12-hour soak is ideal. Smaller seeds like lettuce or radishes need only 4-6 hours. Avoid reusing water—always use fresh, room-temperature water to prevent bacterial growth. If seeds float, they’re likely empty or nonviable—discard them and replace with fresh ones.
💧 Step 2: Set Up a Humidity Dome for Rapid Growth
Line a shallow tray with a damp paper towel or a single layer of cotton batting—just enough to hold moisture without becoming waterlogged. Arrange the soaked seeds ½ inch apart in a single row or scattered pattern, depending on their size. The goal is to keep them evenly spaced so roots don’t tangle.
Cover the tray with a clear plastic lid, glass dome, or even a plastic wrap secured loosely with a rubber band. This creates a humidity chamber, mimicking the moist environment seeds crave. Place the setup in a warm, dark spot—like the top of your fridge or a seedling heat mat set to 75-80°F. Check daily for condensation; if the lid fogs up, the humidity is perfect.
☀️ Step 3: Monitor and Transplant at the Right Time
Most seeds will sprout within 3-7 days, depending on the variety. You’ll notice tiny white roots emerging first, followed by the radicle (the first shoot). Once the first true leaves (not the initial seed leaves) appear, it’s time to transition to soil. I like to use a small biodegradable pot or a cell pack filled with moistened potting mix for this step.
Gently lift each sprout by its roots and place it ¼ inch deep into the soil, pressing lightly to secure it. Water immediately with a spray bottle to settle the roots. Avoid overwatering now—you’ll see new leaves emerge within a week, signaling successful transplantation. If stems look weak or leggy, move them to bright, indirect light right away to prevent stretching.
⏰ Step 4: Maintain Ideal Conditions for Fast Growth
Keep the soil consistently moist but never soggy—water when the top ¼ inch feels dry to the touch. A spray bottle works best to avoid disturbing delicate roots. Place your seedlings under a grow light or in a south-facing window for 12-14 hours of light daily. You’ll know they’re thriving when leaves are deep green and stems stay sturdy.
After 2-3 weeks, when seedlings have 3-4 true leaves, they’re ready for their next move—whether that’s a larger pot or the garden. Harden them off by gradually exposing them to outdoor conditions over 5-7 days to prevent shock. This method ensures fast, healthy starts without the stress of slow soil germination.
Tips & tricks for perfect indoor seed germination
A few key strategies will help you achieve rapid, healthy sprouts every time using this no-stress method.
The Soak Secret: For the 12-hour soak (or 4-6 hours for smaller seeds), use a bowl that's just large enough to submerge seeds without crowding. I've learned the hard way that overcrowding leads to uneven hydration—some seeds dry out while others stay too wet. After draining, give seeds a gentle shake in the strainer to remove excess water. This prevents mold while keeping them perfectly moist for germination. The slight agitation also helps break seed dormancy more effectively.
Humidity Chamber Hacks: The 75-80°F temperature range in Step 2 is critical, but don't assume your kitchen stays perfectly warm. If your home runs cooler, place the humidity dome on top of your fridge (not inside) where it's naturally warmer. For extra insulation, wrap the tray with a towel before adding the plastic cover. Watch for condensation—if you see heavy fogging, your humidity is perfect. If it's light or nonexistent, add a few drops of water to the paper towel to boost moisture levels.
Transplant Timing: In Step 3, when you see those first true leaves (not the initial seed leaves), resist the urge to rush transplantation. The radicle and initial roots need 24-48 hours of additional growth in the humidity dome to establish strength. I've found that seedlings transplanted too early often develop weak stems. When transplanting, use a toothpick to gently loosen roots if they've tangled—this prevents transplant shock and encourages faster establishment in soil.
Light Transition Strategy: The 12-14 hours of light in Step 4 should be gradual. Start with 6-8 hours on day one, then increase by 2 hours daily. This mimics natural daylight cycles and prevents leggy growth. For seedlings that look pale after transplantation, they're likely not getting enough light. Move them closer to your light source or extend the exposure time by 1-2 hours. Remember, deep green leaves mean success—anything lighter indicates insufficient light.
Pro Tips for Sprouting Seeds Indoors
- A few key strategies will help you achieve rapid, healthy sprouts every time using this no-stress method.
- The Soak Secret: For the 12-hour soak (or 4-6 hours for smaller seeds), use a bowl that's just large enough to submerge seeds without crowding.
- Humidity Chamber Hacks: The 75-80°F temperature range in Step 2 is critical, but don't assume your kitchen stays perfectly warm.
Frequently asked questions
Got questions about sprouting seeds indoors? You’re not alone! Here are answers to the most common queries to help you grow confidently—no green thumb required.
How long does it take for seeds to sprout indoors?
Germination time varies by seed type, but most sprouts (like lentils, chickpeas, or alfalfa) sprout in 3–7 days with the no-soil method. Check your seed packet for specifics—some fast growers (radish, broccoli) may sprout in just 2–3 days!
What if my seeds aren’t sprouting? Troubleshooting tips?
First, ensure your seeds are soaked overnight (unless pre-sprouted). If they’re still dormant, try:
- Warmth: Place the jar in a sunny spot (or use a heating pad for stubborn seeds like sunflower).
- Moisture: Rinse seeds 2x daily—they need consistent dampness, not sogginess.
- Airflow: Use a mesh lid or towel to prevent mold while allowing oxygen flow.
- Seed viability: Test a few seeds in warm water—if they don’t float, they’re likely dead.
Still stuck? Try a new batch of seeds—some varieties (like flax) have shorter shelf lives.
Can I use any seeds for indoor sprouting?
Not all seeds are sprouting superstars! Stick to edible, non-toxic seeds like:
- Sprouting seeds: Alfalfa, clover, radish, broccoli, mung beans.
- Legumes: Lentils, chickpeas, black-eyed peas (great for salads!).
- Grains: Wheat berries, quinoa (cook before eating).
Avoid: Potatoes, rhubarb, or seeds from nightshade plants (tomatoes, peppers)—they’re toxic raw.
How often should I rinse sprouts, and for how long?
Rinse sprouts 2–3 times daily with fresh water for 10–30 seconds per rinse. Use a fine-mesh strainer or colander to avoid damaging tender sprouts. After the last rinse of the day, drain well and store upright in the jar (no water left!) to prevent mold. Pro tip: Morning and evening rinses work best for most sprouts!
Is sprouting indoors cheaper than buying microgreens?
A single packet of seeds (e.g., $3–$5) yields weeks of harvests, while store-bought microgreens cost $5–$10 per small container. Plus, you control organic methods—no pesticides or additives. For example, a 1-pound bag of alfalfa seeds (~$10) can produce 50+ servings of sprouts. Savings win!
Do I need a grow light, or is sunlight enough?
Sunlight is perfect for most sprouts, but if your space is dim, a basic LED grow light (or even a sunny windowsill) works. Place sprouts 6–12 inches from the light for 12–16 hours/day. Avoid direct heat—sprouts prefer 60–75°F. Fun fact: Some sprouts (like radish) grow best in cooler temps!
Wrapping up and next steps
Sprouting seeds indoors with the no-stress soil method is a rewarding way to jumpstart your garden—no fuss, no stress, just fresh starts! 🌱 Whether you're a beginner or a seasoned gardener, this technique saves time, space, and resources while giving you a head start on the growing season.
Now that you’ve mastered the basics, why not expand your green thumb?
🌟 Your Next Step:
- Experiment! Try sprouting different seeds (herbs, microgreens, or even flowers) to see what thrives best.
- Transplant with confidence. Once sprouts are ready, transfer them to pots or your garden bed for continued growth.
- Share the joy! Gift seedlings to friends or document your progress—gardening is more fun together.
You’ve got this! Every seed you sprout is a tiny victory—keep growing, keep learning, and enjoy the journey. 🌿