
Picking
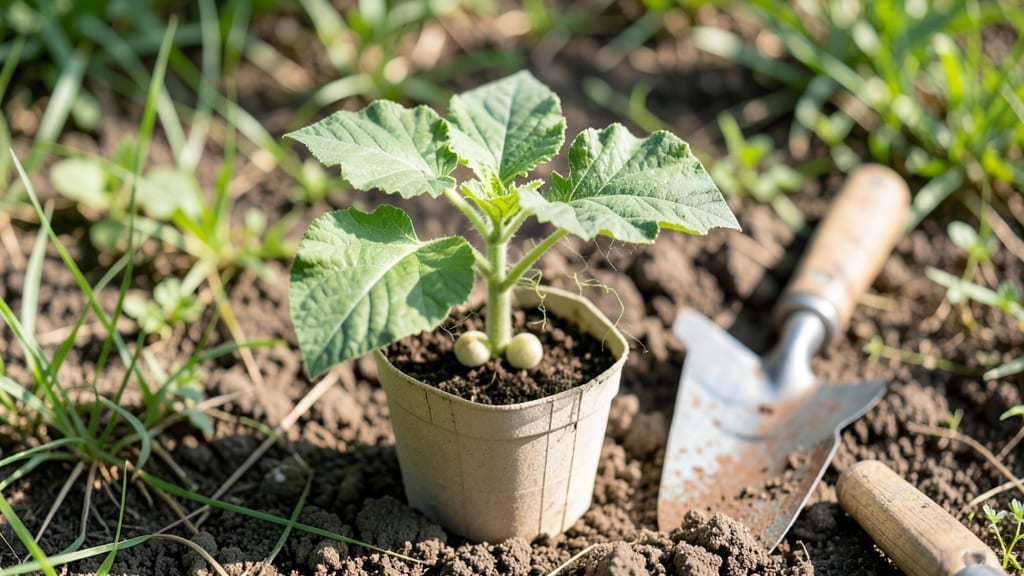
Summer squash seedlings can pop up in just 10 days—if you nail the germination game. 🌱 I’ve grown hundreds of seedlings, and the difference between fast, sturdy starts and slow, leggy failures comes down to three key moves: soil warmth, moisture control, and light timing.
Most beginners overwater or bury seeds too deep, both of which turn your eager sprouts into sad, wilted ghosts.
The secret starts with a 75°F soil thermometer—squash seeds need warmth to wake up. Use a clear plastic dome or row cover to trap heat if your spring soil is still chilly.
Once planted, keep the soil damp (not soggy) with a spray bottle, and place seeds in bright light from day one. No dark closet germination here—those pale, stretched seedlings are a red flag for trouble ahead.
By day 10, you’ll have bold, green seedlings with true leaves ready for transplanting. They’ll handle the move like pros if you harden them off first—just move them outside for a few hours each day before their permanent home.
The payoff? A garden bursting with zucchini, yellow crookneck, or pattypan squash by midsummer, all thanks to seedlings that started strong.
This method works for any summer squash variety and adapts to containers or raised beds. Whether you’re a first-timer or a seasoned gardener tweaking your routine, these tricks cut down on wasted seeds and boost your harvest. Let’s get those seeds sprouting!
📚 In This Guide
- What you need
- Instructions
- Tips and common mistakes
- Wrapping up and next steps
What you need
- ● Summer squash seeds: Choose heirloom or hybrid varieties (e.g., Zucchini, Yellow Crookneck, or Patty Pan). Buy 3–5 seeds per pot (thin later) or 10–15 seeds for direct sowing.
- ● Seed-starting mix: 1–2 lbs of sterile, well-draining potting soil (avoid garden soil—it’s too dense!).
- ● Containers: Biodegradable peat pots (3–4 inches deep) or plastic cell trays (for transplanting).
- ● OR a 5-gallon bucket with drainage holes for direct sowing.
- ● Watering can or spray bottle: With a gentle misting nozzle to avoid disturbing seeds.
- ● Grow lights or sunny windowsill: 12–16 hours/day of light (south-facing window or LED grow lights 12–18 inches above seedlings).
- ○ Optional: Heat mat (70–80°F) to speed germination (especially in cool climates).
- ○ Optional: Fertilizer (balanced 10-10-10 or compost tea) for post-germination boost.
- ○ Optional: Plant labels (to track varieties if growing multiple types).
- ● Critical: Patience + a warm spot! (Seeds need 75–90°F soil to sprout in 5–10 days.)
How to germinate summer squash seedlings in 10 days
Skip the slow start—these tricks get your squash seeds sprouting fast and strong.
🌱 Step 1: Soak Seeds Overnight for Faster Germination
Place the 4 summer squash seeds in a small bowl and cover them with lukewarm water for 12 hours. The reason we soak first is that squash seeds have a tough outer coating that slows germination. After 12 hours, you’ll see them swell slightly—this means they’re ready to break through the soil quickly.
Drain the seeds in a fine mesh strainer and let them sit for 10 minutes to remove excess water. This ensures they won’t rot in damp soil. Here’s the thing—soaking cuts germination time in half, so you’ll see sprouts in 3-5 days instead of a week or more.
💧 Step 2: Warm Up the Soil for Quick Sprouting
Fill a 4-inch deep seedling tray with the 2 gallons of seed-starting mix and moisten it until it feels like a damp sponge—no puddles, just even moisture. The key here is warmth: squash seeds germinate best in soil that’s 80-85°F. If your home runs cooler, place the tray on a seedling heat mat set to 75°F for 24 hours before planting.
Push each soaked seed ½ inch deep into the soil, spacing them 2 inches apart. Cover lightly with extra mix—just enough to hide them, no more. Press down gently so the soil makes contact with the seed. You’ll know moisture is right when the surface looks slightly damp but not glistening.
☀️ Step 3: Cover and Maintain Humidity for Speed
Cover the tray with a clear plastic dome or wrap it in plastic wrap to trap heat and moisture. This creates a mini greenhouse effect that speeds up germination. Place the tray in a spot that stays 70-75°F—a sunny windowsill or under a grow light works. Check daily for condensation on the plastic; if it’s dry, mist the soil lightly to keep it moist but not soggy.
Real talk: don’t peek under the dome until you see green shoots breaking through—that’s usually 4-5 days with these tricks. If you lift it too soon, the soil will dry out and slow everything down. Patience here pays off with bold, healthy seedlings.
✂️ Step 4: Thin and Harden Off for Transplant Success
Once the seedlings have 2 true leaves (not the first tiny cotyledons), remove the dome. Use a small pair of scissors to snip the weakest seedling in each pair, leaving the stronger one. This ensures your remaining plants have space to grow without competition. Water gently at the base—avoid wetting the leaves to prevent disease.
After 7-10 days, start hardening off by placing the tray outside in partial shade for 1 hour. Gradually increase exposure to full sun over 5 days, so the seedlings adjust to outdoor conditions. You’ll know they’re ready for the garden when they look plump and green, not wilted or leggy.
🪴 Step 5: Transplant at the Right Time
Wait until the soil is at least 60°F and all frost risk has passed. Dig holes 1 inch deeper than the seedling’s root ball and space them 2 feet apart in rows 4 feet apart. Gently loosen the roots if they’re tangled—this helps them establish faster. Water deeply right after planting to settle the soil around the roots.
Here’s the moment that matters: mulch with 1 inch of straw to keep moisture in and weeds out. Summer squash thrives with consistent water—1 inch per week—so check the soil 1 inch deep before watering. You’ll see bold blooms in 4-6 weeks, proving those fast starts were worth it.
Tips & tricks for perfect summer squash seedlings
Here's how to avoid common pitfalls and maximize your chances of fast, healthy germination.
Soaking Secret: The 12-hour soak is non-negotiable for summer squash seeds. I learned this the hard way after struggling with slow germination—those tough outer coatings need this full time to soften. After draining for 10 minutes, you'll notice the seeds swell slightly. This is your cue they're primed and ready for planting. Don't skip this step or you might wait twice as long for sprouts!
Heat Control: Those 80-85°F soil temperatures are critical for speed. If your home runs cooler, the 24-hour heat mat treatment before planting makes all the difference. I've seen germination times cut by nearly half when using this method. Pro tip: Place your thermometer in the soil mix—surface temps can be misleading. The goal is consistent warmth at seed level.
Humidity Hack: When covering your tray with plastic, create small air holes with a toothpick to prevent mold. The 70-75°F range is perfect, but condensation buildup can create problems. I check daily and mist lightly only when needed—overwatering at this stage is the fastest way to invite fungal issues. Those 4-5 days to sprouting only work with the right moisture balance.
Transplant Timing: The 60°F soil minimum is your absolute cutoff. I've transplanted too early and watched seedlings wilt dramatically. Wait until morning when soil feels warm to the touch at 1-inch depth. The 1-inch straw mulch after planting is genius—it maintains moisture while keeping weeds at bay, giving your seedlings the perfect start.
Pro Tips for Summer Squash Seedling
- Here's how to avoid common pitfalls and maximize your chances of fast, healthy germination.
- Soaking Secret: The 12-hour soak is non-negotiable for summer squash seeds.
- Heat Control: Those 80-85°F soil temperatures are critical for speed.
Frequently asked questions
Got questions about growing summer squash seedlings? You’re not alone! Here are answers to the most common queries to help you grow bold blooms in no time.
How soon can I expect summer squash seedlings to sprout?
With the right tricks—like soaking seeds overnight and using warm soil—you can see tiny sprouts in just 3–7 days. Most summer squash varieties (like zucchini or yellow crookneck) typically sprout within 5–10 days under ideal conditions (70–90°F soil temp). Patience is key, but don’t overwater—keep the soil moist but not soggy.
What’s the fastest way to speed up germination?
Boost your chances with these pro tips:
- Soak seeds in warm water for 4–6 hours before planting to soften the seed coat.
- Use a heat mat (or place trays on a sunny windowsill) to keep soil temps above 75°F.
- Cover seeds lightly with soil (just ¼ inch deep) and mist with water to maintain humidity.
- Transplant early—once seedlings have 2–3 true leaves, move them outdoors (after last frost) for faster growth.
Why aren’t my summer squash seeds sprouting?
If your seeds are taking longer than expected, check these common culprits:
- Cold soil: Summer squash loves warmth—soil should be at least 60°F (use a seedling heat mat if needed).
- Over/under-watering: Too much water drowns seeds; too little dries them out. Aim for consistently moist (not wet) soil.
- Old or low-quality seeds: Store seeds properly (cool, dry place) and use fresh ones (1–2 years old for best results).
- Pests or mold: If soil looks fuzzy or you spot critters, refresh the growing medium or treat with neem oil.
Still stuck? Try scratching the seed coat gently with sandpaper to help water penetrate.
Can I grow summer squash from store-bought squash seeds?
Save seeds from organic, heirloom, or untreated summer squash (like zucchini or pattypan). Let the squash fully ripen on the vine, scoop out seeds, rinse them, and dry on a paper towel for 3–5 days. Store in a cool, dark place for up to 4 years. Just note: hybrid varieties may not grow true to type.
What’s the best container for summer squash seedlings?
Summer squash seedlings need room to grow—opt for:
- Biodegradable pots (5–6 inches deep) for easy transplanting.
- Seedling trays with drainage holes to prevent root rot.
- Avoid small cups (under 3 inches)—roots get cramped fast!
If starting indoors, use a south-facing window or grow lights for 12–14 hours of light daily until transplanting.
Wrapping up and next steps
Growing summer squash seedlings in just 10 days is totally doable with the right tricks! Remember—warm soil, consistent moisture, and a little patience are your best friends. Whether you’re a seasoned gardener or a newbie, these bold blooms will reward your effort with a bountiful harvest.
Now that you’re armed with tips, why not take the next step? Grab those seeds, prep your containers, and watch your garden transform! 🌱✨ Happy planting!