
Vegetables
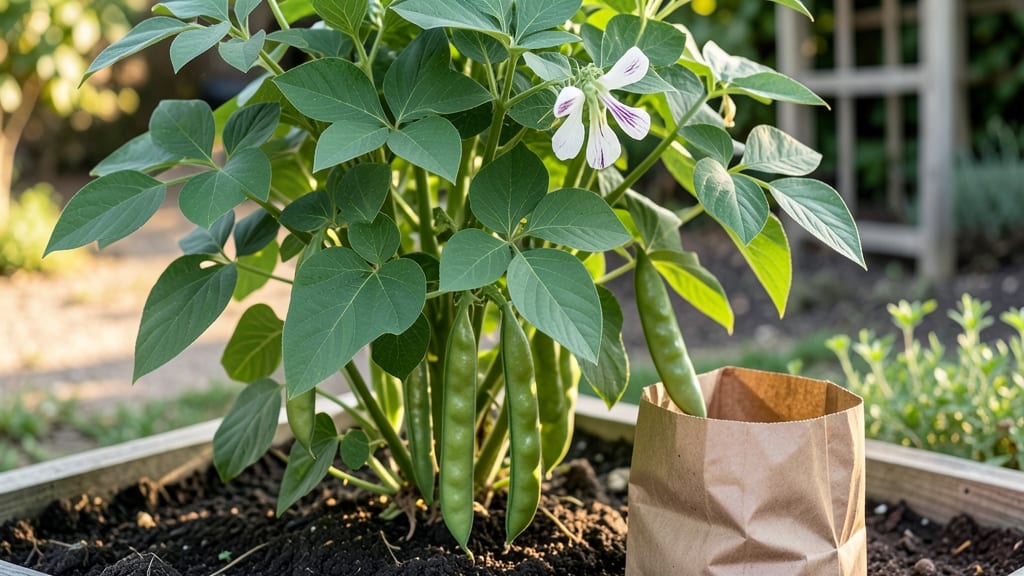
Saving green bean seeds is like preserving a piece of last summer’s garden—except these seeds will grow into plants that produce even better harvests next year. 🌱 I’ve saved seeds for five seasons now, and the difference between store-bought beans and my homegrown ones is night and day: thicker pods, sweeter flavor, and plants that thrive in my exact soil conditions.
The process starts with selecting the healthiest plants from your harvest—look for disease-free beans with no blemishes, as these are your future seed parents. Green beans are self-pollinating, so cross-pollination isn’t an issue, but saving seeds from heirloom varieties ensures you’ll get true-to-type plants.
Once you’ve picked the best pods, the real magic happens in the drying and storage steps, which keep seeds viable for years.
You’ll end up with a stash of seeds that produce plants hardier than anything you’d buy at the store. Imagine plucking fresh beans from vines that know exactly what your soil needs—no more struggling with finicky hybrids or weak starts.
The best part? You’ll be cutting costs and reducing waste, one seed pod at a time.
This method works for both bush and pole beans, and the steps are simple enough for beginners but detailed enough for perfectionists. Let’s get those seeds ready for next spring’s planting—your future self (and your dinner table) will thank you.
📚 In This Guide
- What you need
- Instructions
- Tips and common mistakes
- Wrapping up and next steps
What you need
- ● Mature green beans: 5–10 healthy, disease-free pods from your best-producing plants (save from open-pollinated or heirloom varieties only).
- ● Paper towels or newspaper: 2–3 sheets for drying.
- ● Small mesh bag or envelope: 1–2 breathable bags (like paper coffee filters or seed-saving envelopes) to store dried seeds.
- ● Pencil or marker: For labeling (include variety name and year).
- ● Scissors or knife: To open pods carefully.
- ○ Air-tight container: 1 small jar or resealable bag for long-term storage (optional but recommended).
- ● Desiccant packets: 1–2 to keep moisture out of storage containers.
- ● Humidity indicator card: To monitor storage conditions.
- ● Freezer or cool, dark space: For short-term seed storage before drying.
- ● Seed catalog or notebook: To track germination rates over time.
Step-by-Step instructions for saving green bean seeds
Here’s how to preserve seeds from your best green beans for planting next season—no fancy tools needed.
🌱 Step 1: Select and Harvest Mature Pods
Choose pods from your healthiest, most productive plants—these will yield the best seeds. Wait until the pods are completely dry and papery on the vine, usually 4-6 weeks after flowering. Snap them off cleanly with your fingers, leaving the stem intact. If you pick green pods, the seeds inside won’t mature properly.
Spread the harvested pods on a clean, dry surface in a single layer. Place them in a warm, dry spot with good air circulation, like a sunny windowsill or a well-ventilated shelf. This encourages the pods to dry fully without molding. You’ll know they’re ready when the outer shell cracks open slightly on its own.
💧 Step 2: Dry the Seeds Inside the Pods
Once the pods are brittle and dry to the touch, gently squeeze them between your fingers to release the seeds. Avoid using tools—this can damage the seed coats. Lay the seeds out in a single layer on a paper towel or parchment paper (not plastic, which traps moisture). Place them in a warm, dry spot for 7-10 days to finish drying.
Stir the seeds occasionally to prevent clumping. They’re fully dry when they feel hard and lightweight, like tiny marbles. If any seeds still feel damp or sticky, give them a few more days. Overly moist seeds won’t store well and may spoil.
⏰ Step 3: Store Seeds Properly for Long-Term Viability
Transfer the dried seeds into a small, airtight container—glass jars or envelope-style seed packets work best. Label the container with the bean variety and the year harvested. Store it in a cool, dark place, like a pantry or refrigerator, where temperatures stay between 35-50°F. This slows seed aging and keeps them viable for 3-5 years.
Check the container after 6 months to ensure no moisture has seeped in. If you notice condensation or a musty smell, transfer the seeds to a fresh, dry container immediately. Properly stored seeds should remain dry and firm—never soft or crumbly.
☀️ Step 4: Test Seed Viability Before Planting Next Year
Before using saved seeds, test their viability by placing 10 seeds in a damp paper towel inside a sealed plastic bag. Keep them in a warm spot (70-75°F) for 5-7 days. If 80% or more sprout, your seeds are ready to plant. If fewer than half sprout, store the remaining seeds for another year or try a fresh packet.
Plant tested seeds ½ inch deep in well-draining soil, keeping it consistently moist until germination. You’ll see sprouts in 7-14 days if conditions are right. This simple test saves you from wasting time on seeds that may not grow.
Tips & tricks for perfectly preserved green bean seeds
A few simple tricks will help you maximize seed quality and avoid common pitfalls that ruin your harvest.
Pod Selection Matters: In Step 1, focus on pods that are completely dry and papery—these contain fully mature seeds. I learned this the hard way after trying to save seeds from green pods, which yielded only shriveled, non-viable seeds. The 4-6 week waiting period after flowering is crucial; don't rush this step even if your plants look ready.
Drying Strategy: During Step 2, I recommend placing your seeds on a mesh screen instead of paper towels for the 7-10 day drying period. This allows air to circulate on all sides, preventing any moisture buildup. Stir them every 2-3 days to ensure even drying—this is where many people go wrong by letting seeds clump together.
Storage Secrets: For Step 3, add a small silica gel packet to your airtight container (the ones that come in shoeboxes) to absorb any residual moisture. This extra step can extend seed viability beyond the 3-5 years, especially in humid climates. Just check the packet periodically and replace if it turns from blue to pink.
Viability Test Hack: When testing seed viability in Step 4, I've found that using a clear plastic bag lets you visually monitor the seeds without opening it. Place the bag on a sunny windowsill (70-75°F) and you'll see sprouts appear in just 3-4 days if they're viable. This gives you faster results than waiting the full 5-7 days.
Pro Tips for Save Green Bean Seeds
- A few simple tricks will help you maximize seed quality and avoid common pitfalls that ruin your harvest.
- Pod Selection Matters: In Step 1, focus on pods that are completely dry and papery—these contain fully mature seeds.
- Drying Strategy: During Step 2, I recommend placing your seeds on a mesh screen instead of paper towels for the 7-10 day drying period.
Frequently asked questions
Got questions about saving green bean seeds? You’re not alone! Here are some of the most common queries—and their answers—to help you master seed-saving like a pro.
How do I know when green beans are ready to harvest for seed saving?
Harvest seeds from fully mature pods—when they turn dry, brown, and papery (not green!). Let them stay on the vine until they split open naturally (or dry indoors for 2–3 weeks). If you pick them too early, the seeds won’t mature properly. Pro tip: Save seeds from heirloom or open-pollinated varieties only—hybrids won’t grow true to type!
How long can I store saved green bean seeds before planting?
With proper drying and storage (cool, dark, and dry), green bean seeds stay viable for 3–5 years. Test germination by planting a few seeds—if <70% sprout, it’s time to refresh your seed stash. Fun fact: Some seeds last even longer if stored in airtight containers with silica gel!
Can I save seeds from green beans I bought at the store?
Probably not! Store-bought beans are often hybrids or treated to prevent germination. For reliable seeds, grow your own from open-pollinated or heirloom varieties. If you’re unsure, ask the seed supplier—they’ll usually confirm.
Do I need to worry about cross-pollination when saving green bean seeds?
Yes, if growing multiple varieties! Green beans are self-pollinating, but bees can transfer pollen between plants. To avoid mixed seeds, space varieties by at least 30 feet or grow them in separate cages. Bush beans are less prone to cross-pollination than pole beans.
What if my saved seeds don’t germinate next year?
Don’t panic! Low germination could mean moisture loss, poor storage, or old seeds. Try soaking seeds in warm water overnight before planting, or test a few in damp paper towels. If they still fail, it’s time to order fresh seeds—but you’ll nail it next time!
Wrapping up and next steps
Saving green bean seeds is a rewarding way to ensure a fresh, homegrown harvest next season—and you’ve got all the know-how to make it happen! 🌱 By selecting healthy pods, properly drying the seeds, and storing them in a cool, dry place, you’re setting yourself up for success.
Whether you’re a seasoned gardener or just starting out, this simple process connects you more deeply to the cycle of growth.
Now that you’re ready to save seeds, why not take it a step further? Try experimenting with different varieties or even sharing your saved seeds with fellow gardeners. Happy growing—your future harvests will thank you! 🌿