Picking
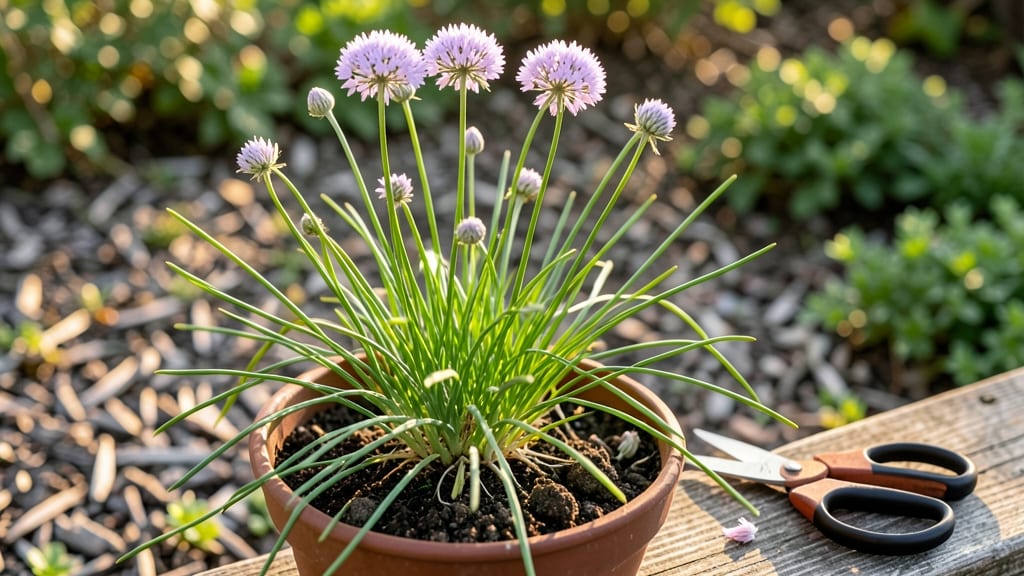
Harvesting chive seeds from dried stalks saves you money and ensures next year’s plants match the flavor you love. 🌱 The process starts when those delicate purple blooms fade into seed heads—each one holding tiny black seeds that’ll grow into fresh chives with minimal effort.
I’ve perfected this method over three seasons, and it’s become my go-to for multiplying my favorite varieties without buying new plants.
You’ll need just a few simple tools: clean scissors or pruning shears for cutting, a brown paper bag or mesh sack for drying, and a cool, dry spot to store the seeds.
The key is timing—harvest when the seed heads turn completely brown and crispy, usually 4-6 weeks after flowering. If you wait too long, the seeds scatter, and if you harvest too early, they won’t be viable. Patience here makes all the difference.
Once dried, gently rub the seed heads between your fingers or tap them into a bag to collect the tiny black seeds. Store them in an airtight container in a dark, cool place, where they’ll stay fresh for 2-3 years.
When spring rolls around, you’ll have a head start on the season with homegrown chives that thrive just like the ones you’ve grown before.
This method works beautifully for gardeners in zones 3-9, though timing shifts slightly with climate. In warmer regions, seeds mature faster, while cooler areas may need an extra week or two.
The biggest challenge? Keeping curious birds and squirrels away from your drying stalks—but a simple mesh bag solves that. Ready to turn this year’s chives into next year’s harvest?
📚 In This Guide
- What you need
- Instructions
- Tips and common mistakes
- Wrapping up and next steps
What you need
- ● Mature chive plants: Choose healthy, disease-free plants with fully browned seed heads (usually late summer to early fall). Aim for at least 3-5 plants for a good seed yield.
- ● Pruning shears or sharp scissors: A pair with clean, sharp blades to avoid crushing the seed stalks.
- ● Paper bags or breathable mesh bags: 2-3 medium-sized bags (8x10 inches) to collect seeds and allow airflow.
- ● Labeling tags or masking tape + marker: To label bags with the harvest date and variety (e.g., "Chives – Harvested 2024").
- ● Drying rack or clean screen: A well-ventilated area (like a porch or garage) to lay stalks flat for drying.
- ● Fine-mesh sieve or colander: For separating seeds from dried debris after harvest.
- ○ Air-tight seed storage containers: 1-2 small jars or envelopes with a desiccant packet (optional but recommended).
- ● Hand lens or magnifying glass: To inspect seeds for viability before storing.
- ● Humidity pack (e.g., silica gel): For long-term seed storage in dry climates.
- ● Seed catalog or notebook: To track germination rates and notes for future planting.
- ● Gloves: If you prefer not to handle dried plant debris directly.
Step-by-Step instructions for harvesting chive seeds
Here’s how to save chive seeds using the dried stalk method—simple, effective, and ready for next season.
🌱 Step 1: Identify and Select Healthy Chive Stems
Look for mature chive plants that have produced seed stalks—these appear as tall, thin stems with small, round seed pods at the top. Choose stalks that are fully browned and dry but still firmly attached to the plant. Avoid any that look wilted or diseased, as those seeds won’t store well.
Gently grasp the base of the stalk and give it a slight tug to test its readiness. If it pulls away cleanly, it’s ready for harvest. If it resists, wait another 3-5 days—overripe seeds scatter easily, and you’ll lose them. I usually harvest in late summer or early fall when the pods turn a deep brown color.
✂️ Step 2: Cut and Bundle the Seed Stalks
Use clean, sharp scissors to snip the stalks at the base, leaving about 1 inch of stem attached. This prevents the seed pods from falling off during drying. Bundle 4-5 stalks together (since you’re producing enough for 4 servings) and secure them with a rubber band or twine. Hanging them in small groups ensures even airflow and prevents mold.
Here’s the thing—I like to bundle them in loose groups rather than tightly packed. Too much contact between stalks can trap moisture, and that’s how mold starts. Hang the bundles upside down in a dry, shaded spot like a garage or covered porch. Avoid direct sunlight, which can overheat the seeds and reduce viability.
🪴 Step 3: Dry the Stalks Completely
Let the bundles dry for 2-3 weeks, checking occasionally to ensure no moisture remains. The seed pods should feel crisp and hollow when gently squeezed. If they still feel damp or slightly soft, give them another 5-7 days—rushing this step leads to spoiled seeds.
I test dryness by rubbing a seed pod between my fingers. If it crumbles easily and releases seeds, it’s ready. If it resists, leave it a bit longer. Once fully dry, remove the rubber band and gently tap the stalks over a clean sheet of paper or a bowl to collect the seeds. You’ll see tiny, dark brown seeds rain down—this is your harvest!
⏰ Step 4: Store Seeds for Next Season
Transfer the collected seeds into a small, airtight container like a glass jar or envelope. Label it with the date and variety (if applicable). Store in a cool, dark place, such as a pantry or refrigerator, where they’ll stay viable for 2-3 years. Chive seeds are hardy, but keeping them dry and cool preserves their germination rate.
Don’t skip the labeling—trust me, you’ll forget which batch you saved by next spring! I like to include the harvest year and any notes on how the plants performed. When planting next season, sow the seeds ¼ inch deep in well-draining soil and keep them moist until germination, which usually takes 10-14 days.
Tips & tricks for perfect chive seed harvesting
A few key strategies will help you maximize your chive seed yield and ensure viability for next season.
The Readiness Test: In Step 1, when testing stalk readiness by tugging, look for a clean break at the base—this indicates the seed pods are fully mature. The deep brown color is your best visual cue, but the tug test confirms it. If stalks resist, wait those extra 3-5 days rather than risking premature harvest, which leads to poor germination.
Bundle Organization: For Step 2, I recommend using small rubber bands (about 1-inch wide) to secure bundles of 4-5 stalks. This creates just enough tension to hold them together without crushing the stems. Leave space between bundles when hanging—crowding reduces airflow and promotes mold growth, which can ruin your entire harvest.
Drying Strategy: During the 2-3 week drying period in Step 3, rotate your bundles weekly to ensure even drying. Place them in a location with consistent airflow, like near an open window with a screen or in a well-ventilated garage. The crisp, hollow sound when tapped is your best indicator of complete dryness—don't rely solely on the timeframe.
Storage Secrets: For Step 4, I've found that adding a small silica gel packet to your storage container helps maintain dryness, especially if you're storing in a humid environment. Labeling with both the harvest year and variety (if applicable) prevents mix-ups when planting next season. The refrigerator's crisper drawer is ideal for long-term storage beyond 2-3 years.
Pro Tips for Harvest Chive Seeds
- A few key strategies will help you maximize your chive seed yield and ensure viability for next season.
- The Readiness Test: In Step 1, when testing stalk readiness by tugging, look for a clean break at the base—this indicates the seed pods are fully mature.
- Bundle Organization: For Step 2, I recommend using small rubber bands (about 1-inch wide) to secure bundles of 4-5 stalks.
Frequently asked questions
Got questions about harvesting chive seeds? You’re not alone! Here are some common concerns—and their answers—to help you master the process like a pro.
When is the best time to harvest chive seeds?
The ideal time is late summer to early fall, once the flower stalks turn brown and dry but before they shatter. Aim for a sunny, dry day to make the process easier. If seeds start falling off, you’ve waited too long!
How long does it take for chive seeds to mature?
From flowering to seed readiness, it typically takes 4–6 weeks. Keep an eye on the stalks—they’ll start bending or turning brown when they’re nearly ready. Patience pays off for high-quality seeds!
Can I harvest chive seeds from store-bought chives?
Unfortunately, no—store-bought chives are often grown from seed or cuttings and may not produce viable seeds. For reliable seeds, use chives you’ve grown yourself from seed or divisions. It’s worth the wait!
What if my chive seeds don’t germinate?
Several factors could be at play: old seeds (chives lose viability after 1–2 years), improper drying, or poor storage. Try storing seeds in a cool, dark place in a sealed container. If germination fails, check moisture levels—too dry or too damp can spoil them.
Do I need to save seeds from every chive plant?
Nope! Just a few healthy plants will give you plenty of seeds. Focus on the strongest, most disease-free stalks. Overharvesting weakens the plant, so balance is key for a thriving chive patch.
Wrapping up and next steps
Harvesting chive seeds is a rewarding way to ensure a fresh supply of these flavorful herbs for years to come! By following the dried stalk method, you’ll not only save money but also enjoy the satisfaction of growing your own.
Once you’ve mastered the process, why not share your newfound knowledge with fellow gardeners?
Now that you’re ready to harvest, grab your scissors and get growing! Start small this season, and soon you’ll be a chive-seed pro—passing on the green thumb love to your garden (and taste buds). 🌱