Tools
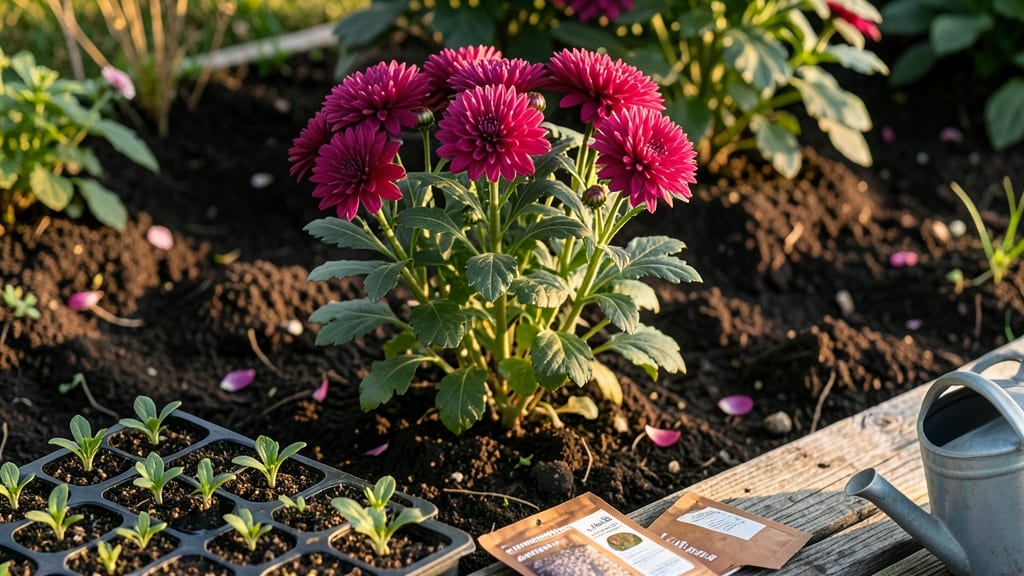
Growing garden chrysanthemums from seed gives you hardy perennials that bloom from late summer through frost. ✨ I’ve grown them for years, and the secret to success starts with the right seed varieties and timing—especially if you want plants that return every season.
The key isn’t just throwing seeds in the ground; it’s matching them to your climate and giving them the right start, whether indoors or outdoors.
You’ll need cold-hardy varieties like ‘Ruby Mound’ or ‘Hardy Bonanza,’ which thrive in zones 5-9, plus a sunny spot with well-draining soil. Start seeds indoors 8-10 weeks before your last frost, or direct-sow in early spring.
The trick is keeping soil consistently moist (not soggy) and warm—around 70°F—until those first green shoots appear, which usually takes 7-14 days.
Once seedlings pop up, thin them to 6-12 inches apart to give roots room to grow. They love full sun and regular watering, but don’t overdo it—chrysanthemums hate soggy feet. By midsummer, you’ll have sturdy plants ready to reward you with vibrant blooms that last until the first frost.
The best part? These perennials multiply over time, giving you free plants for years.
Fair warning: Seedlings can be finicky at first—damping off is the biggest enemy. If you see black stems, act fast with a fungicide or improve airflow. But once they’re established, these plants are tough as nails and will come back bigger and better each year. Ready to grow yours?
📚 In This Guide
- What you need
- Instructions
- Tips and common mistakes
- Wrapping up and next steps
What you need
- ● Garden chrysanthemum seeds – Choose cold-hardy varieties like Chrysanthemum × grandiflorum or Chrysanthemum × morifolium. Purchase 50-100 seeds for a small garden or 200+ seeds for larger coverage.
- ● Seed-starting trays or biodegradable pots – 50-100 cell trays (3-4 inches deep) or 2-inch pots for individual seedlings.
- ● High-quality seed-starting mix – 10-20 lbs of sterile, well-draining potting mix (avoid garden soil).
- ● Plant labels or markers – 50+ labels to track varieties and planting dates.
- ● Spray bottle or watering can with a fine rose nozzle – For gentle watering to avoid disturbing seeds.
- ● Plastic wrap or humidity dome – To retain moisture during germination.
- ● Grow lights or sunny windowsill – A 12-16 hour daylight exposure per day (grow lights are ideal for indoor starts).
- ● Fertilizer (balanced or low-nitrogen) – 5-10-5 or 10-10-10 ratio, diluted to half-strength for seedlings.
- ● Garden gloves – To protect hands during handling.
- ● Trowel or transplanting tool – For carefully moving seedlings outdoors.
- ● Heating mat – Speeds up germination (especially in cooler climates).
- ● Compost or worm castings – Boosts soil fertility for stronger seedlings.
- ● Mulch (straw or shredded leaves) – Protects young plants from temperature fluctuations.
- ● Organic pest control (neem oil, insecticidal soap) – Prevents early-season pests like aphids.
- ● Stakes or plant supports – Useful for taller varieties (6+ inches tall).
- ● Garden journal or app – To log planting dates, growth progress, and blooming times.
Step-by-Step instructions for planting garden chrysanthemum seeds
Here's how to transform those tiny seeds into vibrant, cold-hardy perennials that bloom year after year.
🌱 Step 1: Start Seeds Indoors for Strong Starts
Fill seed trays with the seed-starting mix (not garden soil) and moisten it until damp but not soggy. Chrysanthemums need warmth to germinate, so place the trays on a seedling heat mat set to 70-75°F. Sow seeds ¼ inch deep, spacing them ½ inch apart—they grow fast and need room.
Cover the trays with plastic wrap to retain moisture and place them in a bright spot (like a south-facing window) but out of direct sunlight. Germination takes 10-14 days, but don’t give up if it takes longer—some varieties are slower. Once sprouts appear, remove the plastic immediately to prevent damping-off, a fungal disease that kills seedlings overnight.
☀️ Step 2: Provide Gentle Light and Gradual Sun Exposure
Seedlings need 14-16 hours of light daily to stay strong. If your windows aren’t bright enough, add a grow light positioned 3-4 inches above the plants. Raise it as they grow to keep the light from scorching the leaves. You’ll know they’re getting enough light when they’re deep green and compact, not leggy or stretching toward the window.
After 4-6 weeks, when seedlings have 3-4 true leaves, start hardening them off. Place them outside in a shaded spot for 1-2 hours the first day, then gradually increase their time outdoors over 7-10 days. This toughens their stems and leaves so they survive transplanting without shock.
🪴 Step 3: Transplant Seedlings to the Garden
Choose a location with full sun to partial shade—chrysanthemums tolerate a little shade but bloom best with at least 6 hours of sunlight daily. Dig holes twice as wide as the root ball and space plants 12-18 inches apart (closer for dwarf varieties, farther for large ones). This gives them room to spread and prevents overcrowding, which leads to weak stems and fewer blooms.
Water the soil before transplanting, then place each seedling in its hole, covering the roots with soil up to the first set of leaves. Press gently around the base to remove air pockets, then water deeply to settle the soil. Mulch with 2-3 inches of organic mulch (like straw or shredded leaves) to retain moisture and keep roots cool.
💧 Step 4: Water and Fertilize for Continuous Blooms
Chrysanthemums thrive with consistent moisture—water 1-2 inches per week, more in hot weather. Let the top 1 inch of soil dry out between waterings to prevent root rot, but don’t let them wilt. You’ll see strong, healthy growth when leaves stay crisp and stems are sturdy. Avoid overhead watering to prevent fungal diseases like powdery mildew.
Feed plants every 4-6 weeks with a balanced, slow-release fertilizer (like 10-10-10) to encourage lush foliage and abundant blooms. Stop fertilizing 6-8 weeks before the first frost—this helps harden the plants for winter. Deadhead spent blooms regularly to encourage more flowers and extend the season.
⏰ Step 5: Prepare for Winter and Encourage Regrowth
In fall, cut back stems to 2-3 inches above the ground after the first frost. This helps the plant conserve energy and establishes a strong root system for next year. Cover the base with 4-6 inches of mulch to insulate roots from freezing temperatures. Chrysanthemums are cold-hardy, but extra protection ensures they bounce back in spring.
In early spring, remove the mulch and fertilize lightly to wake up the roots. You’ll see new growth within 2-3 weeks—this is your signal that the plants are ready for another season of color. Thin out crowded stems to improve airflow and reduce disease risk.
Tips & tricks for perfect chrysanthemum seedlings
Don't let these small details make or break your chrysanthemum growing success—here's what I've learned from years of trial and error.
Germination Temperature: Those 70-75°F heat mats are non-negotiable for chrysanthemum seeds. I learned this the hard way after trying to use a regular windowsill—my first batch took 3 weeks to germinate instead of 10-14 days. The slight extra warmth makes all the difference in getting those sprouts to appear consistently. If you don't have a heat mat, try placing your trays on top of your refrigerator for that gentle warmth.
Lighting Secret: The 14-16 hours of daily light in Step 2 is crucial for preventing leggy seedlings. I use a simple LED grow light on a timer to automate this—set it for 16 hours on, 8 hours off. Position it just 3-4 inches above the plants and raise it weekly as they grow. You'll know it's working when your seedlings stay compact and deep green rather than stretching toward the light.
Hardening Off Strategy: That gradual 7-10 day hardening process in Step 2 is where most people fail. Start with just 1-2 hours in shade, then increase by 1 hour each day. I've seen seedlings wilt dramatically when moved too quickly—this method prevents transplant shock. On cloudy days, you can extend the outdoor time since the UV isn't as intense. Watch for slight wilting as a sign they need more time.
Transplanting Pro Tip: When transplanting in Step 3, make those holes twice as wide as the root ball—this prevents root binding and gives your chrysanthemums room to establish quickly. I like to water the soil before transplanting, then add a handful of compost to each hole. This gives your seedlings a nutrient boost right when they need it most after the transplant shock.
Pro Tips for Garden Chrysanthemum Seeds
- Don't let these small details make or break your chrysanthemum growing success—here's what I've learned from years of...
- Germination Temperature: Those 70-75°F heat mats are non-negotiable for chrysanthemum seeds. I learned this the hard ...
- Lighting Secret: The 14-16 hours of daily light in Step 2 is crucial for preventing leggy seedlings. I use a simple L...
Frequently asked questions
Got questions about growing garden chrysanthemums from seed?
You’re not alone! Here are answers to the most common queries to help you cultivate vibrant blooms with confidence.
When is the best time to plant garden chrysanthemum seeds?
For most climates, sow seeds indoors 8–10 weeks before your last frost date (typically March–April). Transplant seedlings outdoors after the soil warms to 55–65°F and nighttime temps stay above 40°F. In warmer zones (zones 8–10), you can direct-sow in early spring or late summer for fall blooms.
Are garden chrysanthemums truly cold-hardy? How do I protect them in winter?
Yes! Many varieties survive winters in USDA zones 5–9, but mulch heavily (3–4 inches of straw or leaves) after the first frost to insulate roots. In colder zones (below 5), dig up tubers in fall, store them in dry peat moss, and replant in spring. Hardy types like ‘Ruby Mound’ or ‘Jeanne d’Arc’ are great choices for harsh climates.
Why aren’t my chrysanthemum seeds germinating? Troubleshooting tips?
Chrysanthemum seeds need consistent moisture and warmth (70–75°F) to sprout. Try these fixes:
- Lightly cover seeds with soil (¼ inch max)—they need light to germinate.
- Keep soil damp (not soggy) with a spray bottle or humidity dome.
- Use a heat mat if germination stalls after 2–3 weeks.
- Test seed viability: Soak seeds in warm water for 24 hours—floating seeds are likely dead.
If all else fails, try fresh seeds or propagate via stem cuttings instead.
Can I grow chrysanthemums from store-bought flowers? How does it work?
Yes! While not always reliable, you can save seeds from spent blooms (let a few flowers dry on the plant, then extract seeds). For better results, root cuttings from a healthy plant in spring or fall. Alternatively, buy certified organic seeds for guaranteed varieties and disease resistance.
What pests or diseases should I watch for with garden chrysanthemums?
Common issues include:
- Aphids/spider mites: Spray with neem oil or introduce ladybugs.
- Powdery mildew: Improve airflow, avoid overhead watering, and treat with baking soda spray (1 tsp + 1 quart water).
- Root rot: Ensure well-draining soil and avoid overwatering.
Rotate crops yearly to prevent blight and sterilize containers if reusing them.
Pro Tip:
For longer vase life, harvest blooms in the morning when stems are fully hydrated. Re-cut stems under water and change the vase water every 2–3 days to keep your chrysanthemums fresh for weeks!
Wrapping up and next steps
Growing garden chrysanthemum seeds is a rewarding way to add bold color and texture to your landscape—even in cooler climates! With the right variety, soil prep, and care, these cold-hardy perennials will thrive year after year, offering stunning blooms from late summer to frost. 🌼
Ready to transform your garden? Start by choosing your seeds, prepping your soil, and planting with confidence. Whether you’re a seasoned gardener or just beginning, chrysanthemums are a fantastic choice for low-maintenance beauty. Happy planting—your future garden will thank you!