
Lawn
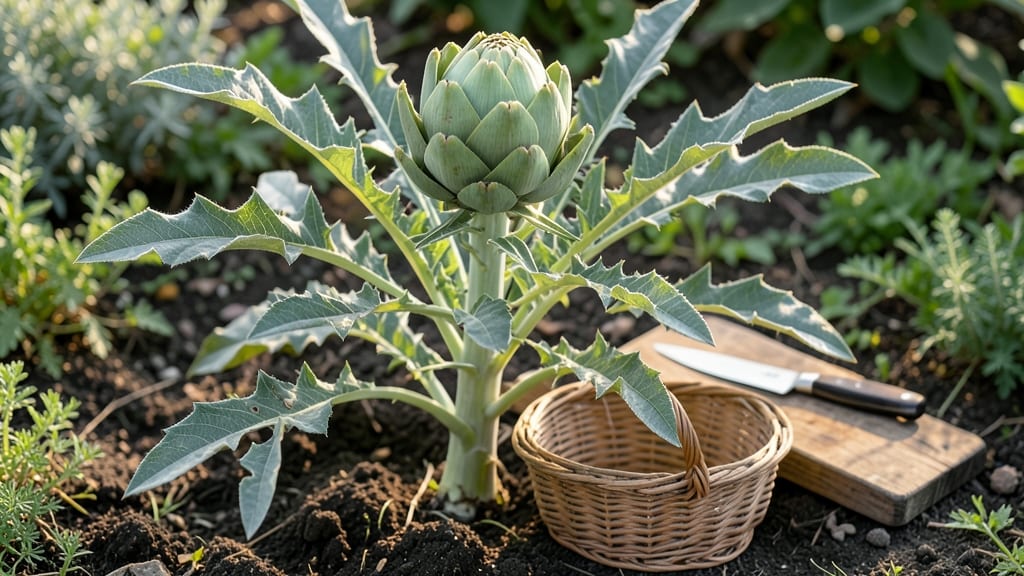
Growing artichokes from seed pods is one of those gardening adventures that feels like uncovering a secret. 🌱 I’ve watched those fuzzy, pinecone-like pods transform into towering plants bearing their own edible treasures—all from a single dried seed.
The process isn’t just rewarding; it’s a lesson in patience, with results that taste as good as they look.
You’ll need just a few things: a sunny spot with well-draining soil, some basic gardening tools, and a little time—artichokes take 6-8 months to mature. The real magic happens when you harvest the pods, dry them properly, and extract the seeds, which can be replanted or even used in cooking.
My first batch turned into everything from fresh greens to decorative centerpieces.
By the time harvest rolls around, you’ll have lush, thistle-like plants that attract pollinators and produce artichokes with tender hearts. The pods themselves can be dried and stored for years, making this a project that keeps giving.
Whether you’re growing for food or just the joy of it, this is gardening at its most satisfying.
Works in USDA Zones 7-10, though container growing extends the range. Here’s how to turn those fuzzy pods into your next garden star—step by step.
📚 In This Guide
- What you need
- Instructions
- Tips and common mistakes
- Wrapping up and next steps
What you need
- ● Artichoke seeds: 5–10 seeds (choose heirloom varieties like 'Green Globe' or 'Violetto' for best results).
- ● Well-draining potting mix: 1–2 gallons (sterilized to prevent disease).
- ● Containers or seed trays: 4–6" deep with drainage holes (or a seed-starting kit).
- ● Organic compost: 1–2 cups (to enrich soil for transplanting).
- ● Watering can or spray bottle: With a fine mist nozzle.
- ○ Garden twine or stakes: (Optional but helpful for trellising later).
- ● Gloves: Heavy-duty (artichoke leaves are prickly!).
- ● Trowel or small shovel: For transplanting seedlings.
- ● Sunlight access: 6+ hours of direct sun daily (or a grow light for indoors).
- ○ pH test kit: (Optional) Ideal soil pH: 6.5–7.5.
- ● Fertilizer: Balanced 10-10-10 or compost tea (for established plants).
Step-by-step instructions for growing artichokes from seed pods
Here’s how to transform those fuzzy artichoke seed pods into thriving plants—no fancy equipment needed.
🌱 Step 1: Extract and Prepare the Seeds
Start by harvesting mature artichoke seed pods—the fuzzy ones you’d normally toss. Split them open and scrape out the small, flat seeds inside. Rinse them gently to remove any debris, then spread them on a paper towel to dry for 24 hours at room temperature. This prevents mold when you plant them later.
I like to soak the seeds overnight in lukewarm water to soften the tough outer coating. This speeds up germination, which can be slow with artichokes. After soaking, drain them and let them sit for another 12 hours before planting. The seeds will feel slightly plump—this is your signal they’re ready.
💧 Step 2: Sow Seeds Indoors for Early Growth
Fill 4-inch pots with sterile seed-starting mix (not garden soil—it’s too dense). Plant 2-3 seeds per pot at a depth of ¼ inch, pressing them lightly into the soil. Cover them with a thin layer of mix, then mist the surface with water until evenly damp. Use a spray bottle to avoid displacing the seeds.
Place the pots in a warm, dark spot (like a seedling heat mat set to 75°F) until germination. Artichoke seeds can take 10-21 days to sprout—patience is key. Once you see first true leaves (not the initial seed leaves), move the pots to bright, indirect light for 12 hours daily. Too much direct light now will scorch tender seedlings.
☀️ Step 3: Harden Off and Transplant Outdoors
After 6-8 weeks, when seedlings have 4-6 true leaves, it’s time to harden them off. Start by placing them outside in a shaded, sheltered spot for 1-2 hours the first day. Gradually increase exposure over 10-14 days, ending with full sun for the last few days. This toughens their stems and prevents transplant shock.
Choose a sunny, well-draining spot in your garden with 6+ hours of direct sunlight. Dig holes twice as wide as the root ball but the same depth. Space plants 3-4 feet apart—artichokes need room to grow. Water deeply after planting to settle the soil around the roots. Mulch with 2-3 inches of organic mulch to retain moisture and suppress weeds.
🌿 Step 4: Maintain for Healthy Growth and Bud Formation
Water deeply once a week, ensuring the soil stays consistently moist but not soggy. Artichokes are drought-tolerant once established, but young plants need steady moisture. You’ll know they’re thirsty when the top inch of soil feels dry to the touch. Avoid overhead watering—wet foliage invites fungal diseases.
Fertilize every 4-6 weeks with a balanced, organic fertilizer (like 5-5-5) to encourage strong growth. When plants reach 18-24 inches tall, they’ll start forming buds. Pinch off any side shoots that appear below the first 12 inches—this directs energy to the main stem and larger artichokes. Watch for green, fuzzy buds—these are your future harvests!
Tips & tricks for perfect artichoke seed pod growth
Transforming those fuzzy artichoke seed pods into thriving plants takes patience and precision—here’s how to optimize every step for success.
Seed Preparation: The 24-hour drying period is crucial for preventing mold, but don’t rush it. Spread seeds on a clean paper towel in a single layer and place them in a warm, dry spot. If you’re short on time, you can reduce this to 12 hours by using a fan on low to speed up evaporation—just monitor closely to avoid over-drying. For even faster germination, try cold-stratifying the seeds by placing them in the fridge for 24 hours after drying before soaking. This mimics winter conditions and can cut germination time by up to 3 days.
Germination Environment: Maintaining that consistent 75°F temperature during germination is key, but don’t stress if your home fluctuates slightly. Artichoke seeds are surprisingly resilient—temperatures between 70-80°F will still work, though it may take 2-3 extra days. If you don’t have a heat mat, place your pots on top of your refrigerator (not inside) for gentle warmth. The dark environment is equally important—cover pots with a plastic bag to create a mini greenhouse effect, but remove it daily for 10 minutes to prevent mold buildup.
Transplanting Strategy: When hardening off your seedlings in Step 3, I recommend starting with just 30 minutes outside on day one rather than the full 1-2 hours. This gradual approach prevents shock, especially if you’re in a windy climate. For the 10-14 day hardening process, increase exposure by 30 minutes each day rather than doubling time—this gives seedlings time to adjust their internal moisture balance. And here’s a pro tip: transplant on an overcast day or in the late afternoon when UV intensity is lower, giving your seedlings a fighting chance against midday sun.
Ongoing Care: The once-weekly watering guideline works best in well-draining soil, but if you notice the top inch drying faster than expected, increase to twice weekly until plants establish deeper roots (typically after 6-8 weeks). For the 2-3 inches of mulch, I prefer straw over wood chips—it breaks down more evenly and adds nutrients as it decomposes. And when those green fuzzy buds appear, resist the urge to harvest immediately! Let them grow to about the size of a golf ball for optimal flavor and tenderness.
Pro Tips for Artichoke Seed Pod
- Transforming those fuzzy artichoke seed pods into thriving plants takes patience and precision—here’s how to optimize every step for success.
- Seed Preparation: The 24-hour drying period is crucial for preventing mold, but don’t rush it.
- Germination Environment: Maintaining that consistent 75°F temperature during germination is key, but don’t stress if your home fluctuates slightly.
Frequently asked questions
Got questions about growing artichoke seed pods? You’re not alone! Here are some of the most common queries—plus quick, actionable answers to keep your garden thriving.
Can I grow artichokes from seed pods I find in the store?
Yes, but with a few caveats! Store-bought artichokes are often hybrid varieties bred for flavor, not seed viability. Try saving seeds from heirloom or open-pollinated artichokes instead—these are more likely to produce true-to-type pods. If you’re experimenting, check for plump, firm seed pods inside the artichoke before planting.
How long does it take for artichoke seed pods to germinate?
Germination can take 10–30 days, depending on soil temperature and moisture. Keep seeds in warm (70–80°F), damp soil and maintain consistency. A heat mat can speed up the process if your climate is cool. Pro tip: Soak seeds overnight before planting to kickstart germination!
What’s the best soil temperature for planting artichoke seeds?
Artichokes thrive in soil temperatures between 60–70°F (15–21°C). If your area has cold springs, start seeds indoors 8–10 weeks before the last frost. Use a seedling heat mat if needed—cold soil can delay or prevent germination entirely.
Are there any easy alternatives if my artichoke seeds don’t sprout?
Try these backup options:
- Transplant seedlings: Buy young artichoke plants from a nursery for a head start.
- Grow from slips: If you have a mature artichoke plant, propagate it by dividing the roots in early spring.
- Try globe artichokes: They’re hardier and often more reliable for beginners.
Why are my artichoke seedlings wilting or turning yellow?
Wilting or yellowing usually signals overwatering, poor drainage, or pests. Check for:
- Root rot: Ensure pots/dirt have drainage holes and avoid soggy soil.
- Fungal issues: Space seedlings properly (12+ inches apart) to improve airflow.
- Pests: Inspect for aphids or slugs—use neem oil or diatomaceous earth if needed.
Adjust watering to 1 inch per week and keep soil slightly moist but not waterlogged.
Wrapping up and next steps
Growing artichoke seed pods from scratch is a rewarding journey that connects you to nature—and your kitchen! 🌱 Whether you’re drawn to their unique texture, bold flavor, or the satisfaction of nurturing a plant from seed, you now have all the tools to succeed.
Start by gathering your supplies, follow the step-by-step instructions, and don’t hesitate to troubleshoot common challenges along the way.
Ready to take the next step? Plant your seeds this season and watch your garden transform into a thriving artichoke patch. Share your progress with fellow gardeners or experiment with recipes featuring your homegrown harvest—bon appétit! 🍽️