Picking
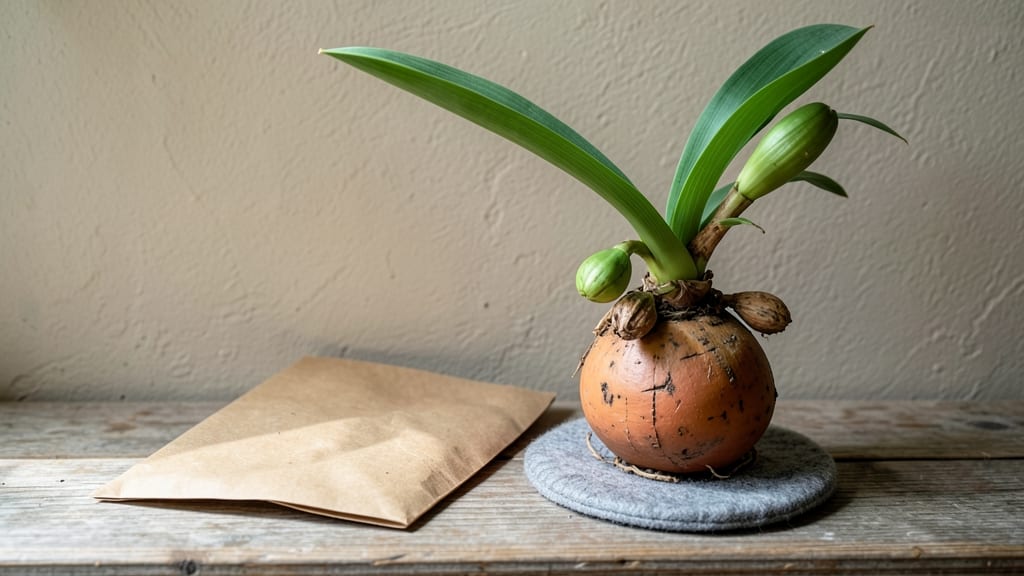
Harvesting amaryllis seeds lets you grow new plants from scratch—no expensive bulbs needed. 🌱 I’ve grown dozens from seed, and the trick to fast blooms starts with timing: collect seeds when the pods turn brown and papery, usually 6-8 weeks after pollination.
One wrong move, and you’ll end up with shriveled seeds that won’t sprout.
The tools you need are simple: a small bowl for collecting, sharp scissors, and a damp paper towel for storage. After harvesting, let the seeds dry for a day before storing them in a sealed bag in the fridge.
This mimics winter dormancy and keeps them viable for months—critical for reliable germination.
Within 4-6 weeks of planting, you’ll see tiny shoots pushing through the soil. The first blooms arrive in 2-3 years, but the wait is worth it for those showstopping flowers. Just don’t rush the process—patience here means faster, stronger plants later.
Works for both indoor and outdoor amaryllis varieties, though outdoor types may need extra protection from frost. Here’s how to avoid the most common pitfalls and get those seeds sprouting like clockwork.
📚 In This Guide
- What you need
- Instructions
- Tips and common mistakes
- Wrapping up and next steps
What you need
- ● Mature amaryllis bulb (preferably Hippeastrum species, 1–2 years old with visible seed pods)
- ● Sharp scissors or pruning shears (sterilized with rubbing alcohol)
- ● Small paper bags or breathable mesh bags (1–2 bags, 6–8 inches in diameter)
- ● Ripe seed pods (green turning brown, slightly soft to the touch)
- ● Labeled envelopes or seed packets (for storing dried seeds)
- ● Well-draining potting mix (cactus/succulent blend or perlite + peat moss, 1–2 gallons)
- ● Small pots or seed trays (3–4 inches deep, with drainage holes)
- ● Spray bottle with water (for gentle hydration)
- ● Permanent marker or labels (to track seed varieties)
- ● Grow lights or sunny windowsill (for seedling growth, 12+ hours of light/day)
- ● Humidity dome or plastic wrap (to retain moisture during germination)
- ● Fungicide spray (prevents mold in damp conditions)
- ● Notebook or gardening journal (to log pod harvest dates and seedling progress)
- ○ Heat mat (optional for faster germination, set to 70–75°F)
Step-by-step instructions for harvesting amaryllis seeds
Here’s my foolproof method to collect and germinate amaryllis seeds quickly—no waiting years for blooms.
🌱 Step 1: Identify and Collect Ripe Seed Pods
After your amaryllis flowers fade, leave the seed pods on the plant until they turn brown and papery—this signals they’re fully ripe. Gently twist the pods off the stem when they release seeds easily (usually 4-6 weeks after flowering). If pods split open before you’re ready, scoop out the seeds immediately—they’ll dry out fast.
Place the pods in a paper bag and store them in a dry, shaded spot for 1-2 weeks. This mimics natural drying conditions and prevents mold. You’ll know they’re ready when the pods crumble at the touch and seeds inside look plump and dark brown. Avoid plastic bags—they trap moisture and rot the seeds.
🌿 Step 2: Extract Seeds and Prepare for Germination
Open the dried pods carefully—some seeds may still be attached to a fibrous membrane. Gently tease them apart with your fingers or a small knife. Discard any seeds that look shriveled or hollow, as they won’t germinate. Healthy seeds feel firm and dense when squeezed lightly.
Fill a small container (like a seed tray or even a shallow dish) with moistened perlite or coarse sand—this drains well and prevents rot. Scatter the seeds ¼ inch apart on the surface, pressing them in just enough to cover with a light sprinkle of perlite. Don’t bury them deeper; amaryllis seeds need light to sprout.
☀️ Step 3: Provide Warmth and Light for Fast Germination
Place the container in a warm spot (ideally 70-75°F) with bright, indirect light—think under a grow light or near a south-facing window. Amaryllis seeds germinate fastest in warmth, so a seedling heat mat speeds things up if your home runs cooler. Keep the perlite evenly moist (not soggy) by misting lightly every 2-3 days.
Germination takes 4-8 weeks, but patience pays off. You’ll see tiny green sprouts first—wait until they’re 1-2 inches tall before transplanting. If mold appears, stop watering and let the surface dry completely before misting again. This prevents damping-off, which kills seedlings overnight.
🪴 Step 4: Transplant Seedlings for Strong Growth
Once seedlings have 2-3 true leaves (not just the first cotyledons), pot them individually into 3-inch containers filled with a mix of potting soil and perlite (half and half). Handle them gently—they’re delicate! Plant them 1 inch deep, firming the soil around the base to keep them upright. A small stake helps if they wobble.
Place the pots in bright light (still indirect) and keep the soil slightly moist but never waterlogged. After 4-6 weeks, when seedlings reach 4-6 inches tall, you can transplant them into 6-inch pots with regular potting mix. This is where they’ll start building the bulb you’ll eventually harvest flowers from—so give them space to grow!
Tips & tricks for perfect amaryllis seed germination
Fast germination starts with these simple but game-changing tricks that'll give your amaryllis seeds the best possible start.
Timing is Everything: Those 4-6 weeks after flowering are critical—don't rush! The pods need full maturity to develop plump, viable seeds. I've learned the hard way that harvesting too early means tiny, shriveled seeds that won't germinate. Mark your calendar when flowers fade to track the 4-6 week window accurately.
Storage Wisdom: The 1-2 week drying period in a paper bag is non-negotiable. I've tried plastic bags (big mistake!), and they create a humid environment that causes mold. Place the bag in a spot with good airflow, like on top of your fridge, to maintain that dry, shaded condition. You'll know they're ready when pods crumble like dried leaves.
Seed Selection Tip: When extracting seeds, squeeze each one gently between your fingers—healthy seeds feel dense and firm, like tiny marbles. Discard any that feel hollow or crumble at the touch. This simple test saves you from planting seeds that won't sprout. I've wasted hours planting questionable seeds, only to watch them fail to germinate.
Light and Warmth Strategy: For fastest germination, create a mini greenhouse effect. Place your seed tray on a seedling heat mat set to 70-75°F and position it under a grow light (or near a south-facing window). The combination of warmth and bright light mimics tropical conditions where amaryllis naturally grows. I've seen germination times cut in half using this setup compared to regular room conditions.
Pro Tips for Harvest Amaryllis Seeds
- Fast germination starts with these simple but game-changing tricks that'll give your amaryllis seeds the best possibl...
- Timing is Everything: Those 4-6 weeks after flowering are critical—don't rush! The pods need full maturity to develop...
- Storage Wisdom: The 1-2 week drying period in a paper bag is non-negotiable. I've tried plastic bags (big mistake!), ...
Frequently asked questions
about harvesting amaryllis seeds—because growing these beauties from scratch comes with its own set of curiosities! Here are answers to the most common questions to help you troubleshoot and succeed.How do I know when amaryllis seeds are ready to harvest?
Amaryllis seeds are ready to pick when the seed pods turn brown and papery (usually 6–8 weeks after pollination). Gently squeeze the pod—if seeds rattle inside, they’re ripe! Harvest them before the pods split open to avoid losing seeds to pests or wind.
Can I harvest seeds from store-bought amaryllis bulbs?
Probably not! Most commercial amaryllis bulbs (like Hippeastrum) are sterile hybrids bred for blooms, not seeds. For seeds, grow from seed-pods of true amaryllis (Amaryllis belladonna) or other seed-producing varieties. If unsure, check the plant label or ask a local bulb specialist.
Why aren’t my amaryllis seeds germinating?
Seeds need consistent warmth (70–75°F) and moisture to sprout. If they’re slow to germinate, try these fixes:
- Use a seedling heat mat for bottom heat.
- Keep the soil lightly damp (not soggy).
- Be patient—some seeds take 2–4 months to sprout!
Do I need to scarify amaryllis seeds before planting?
Scarification (nick or sandpaper the seed coat) can help with germination, but it’s not always necessary. Try soaking seeds in lukewarm water for 24 hours first—this softens the shell. If seeds stay dormant, lightly scratch the hard outer layer with a file or knife for better moisture absorption.
What’s the best alternative if my amaryllis doesn’t produce seeds?
No seeds? No problem! Try these reliable alternatives:
- Divide offsets: Mature amaryllis bulbs grow "pups" (baby bulbs) that can be replanted.
- Buy seed-grown bulbs: Nurseries sell Amaryllis belladonna seeds or young plants.
- Layering: For Hippeastrum, bury the bulb’s base in soil to encourage new growth.
Wrapping up and next steps
Harvesting and germinating amaryllis seeds may seem tricky, but with the right tools and patience, you’ll soon be rewarded with vibrant, healthy blooms! 🌱 Remember, consistency is key—whether you’re drying seeds, sowing in the right medium, or maintaining ideal conditions, each step builds toward success.
Now that you’re armed with these proven tricks, why not plant a few seeds today and watch your garden transform?
Next step: Grab your supplies, follow the steps, and let nature do the rest—your future amaryllis plants will thank you!