Vegetables
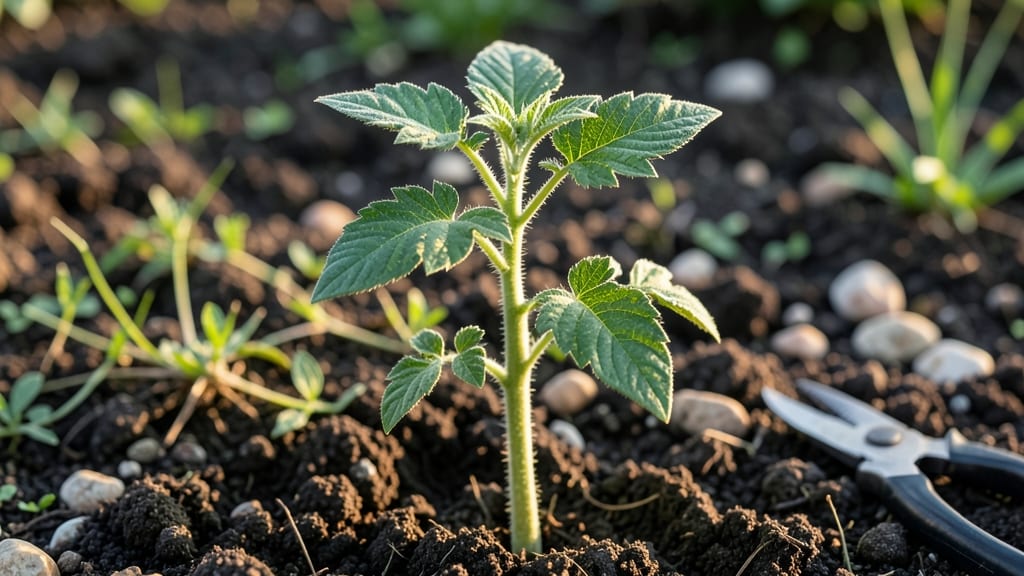
Seeing tomato seedlings grow from tiny sprouts to sturdy transplants is one of the most rewarding parts of gardening. 🌱 I’ve tracked their progress for years, and these images show exactly what healthy seedlings look like at each stage—from the first peep of green to the perfect time to move them outside.
The cotyledon stage is all about those first two leaves, followed by true leaves that tell you the plant is ready for light. You’ll spot signs of trouble like yellowing leaves or leggy stems before they become big problems.
These visual cues help you adjust watering, light, and care before it’s too late.
By the time seedlings have 4-6 true leaves and strong stems, they’re transplant-ready—stocky, vibrant, and full of potential. The right timing means fewer setbacks and bigger harvests later. I’ll show you what to watch for so your plants thrive from day one.
This guide pairs with my tips on hardening off seedlings and avoiding common pitfalls. Whether you’re a first-timer or a seasoned grower, these images will help you spot success early—and fix mistakes before they derail your garden.
📚 In This Guide
- What you need
- Instructions
- Tips and common mistakes
- Wrapping up and next steps
What you need
- ● Tomato seeds: Choose heirloom, hybrid, or organic seeds based on your preference (e.g., cherry, beefsteak, or Roma varieties). Aim for 5–10 seeds per container if starting indoors.
- ● Seed-starting mix: A sterile, lightweight potting mix (avoid garden soil—it’s too dense!). A 10–12 quart bag is ideal for most setups.
- ● Containers: Seed trays or flats (with drainage holes) – 72-cell trays work great for precision.
- ● OR small pots (3–4 inches deep) for individual seedlings.
- ● Grow lights or a sunny windowsill: Seedlings need 12–16 hours of light daily. A full-spectrum LED grow light (e.g., 24–36-inch model) is perfect for indoor setups.
- ● Spray bottle: For gentle watering (avoid over-saturating seeds).
- ○ Heat mat (optional but helpful): Keeps soil warm (70–80°F) to speed up germination.
- ● Labels or markers: To track seed varieties (e.g., masking tape + permanent marker).
- ● Humidity dome or plastic wrap: Creates a mini greenhouse effect to retain moisture.
- ● Fertilizer: A balanced, water-soluble fertilizer (e.g., 5-5-5 or 10-10-10) for later stages (once seedlings have 2–3 true leaves).
- ● Scissors or knife: For trimming leggy seedlings (if needed).
- ● Camera or smartphone: For documenting those adorable tomato seedling images at every stage!
How to identify tomato seedling growth stages visually
Recognizing these key stages helps you spot problems early and adjust care before seedlings struggle.
🌱 Step 1: Spot the Germination Stage (Days 5-14)
The first sign is tiny white roots breaking through the seed coat, followed by a curved sprout called the hypocotyl. You'll see a looped stem with two small leaves (cotyledons) unfurling within 3-7 days after that. These aren't true leaves—they're the plant's first food factories, storing energy from the seed.
Watch for even moisture—if the soil surface dries out, new sprouts may never emerge. I keep a spray bottle handy to mist trays daily until 50% of seeds sprout, then remove any plastic cover to prevent damping-off. Uneven germination often means inconsistent soil temperature or moisture.
🌿 Step 2: Recognize First True Leaves (Days 14-21)
True leaves appear as smaller, serrated edges (unlike the smooth cotyledons). For tomatoes, these will look like miniature versions of the mature plant's foliage. You'll notice 3-5 true leaves within 10-14 days of germination, signaling it's time to remove weaker seedlings if overcrowded.
Leggy seedlings here mean insufficient light—stems stretch toward any available source. I move mine under grow lights within 2 inches of the tallest sprout. Strong seedlings at this stage have thick stems, deep green color, and leaves spaced 1-2 inches apart. Yellowing leaves? Too much water or cold soil.
✂️ Step 3: Watch for Seedling Hardening (Days 21-30)
Healthy seedlings now show hairy stems and compound leaves with 3-7 leaflets. The roots fill the container, and you'll see side shoots forming at the base. This is when I start hardening off—gradually exposing them to outdoor conditions for 1-2 hours daily in a shaded spot.
Look for sturdy stems that don't snap when gently pinched. Weak stems here won't survive transplant shock. If leaves cup downward or develop brown edges, they're getting too much sun—move to partial shade for a few days. The goal is uniform color and vigorous growth before moving outdoors.
☀️ Step 4: Identify Transplant-Ready Seedlings (Days 30-45)
Ready seedlings have 4-6 true leaves, thick stems, and roots filling the container. You'll notice deep green color with no yellowing, and the bottom leaves may start touching the soil surface. This is your cue to transplant before they become root-bound.
I check for strong stems that don't bend easily and compact growth (not leggy). If you see purple stems, they're phosphorus-deficient—add a balanced fertilizer. Avoid transplanting when seedlings show flower buds (wait until after first true leaves if possible). The soil should be warm (at least 60°F) to prevent shock.
Tips & tricks for perfect tomato seedling growth
Here's what nobody tells you about nurturing tomato seedlings—these tricks will help you avoid the most common pitfalls and grow strong, healthy plants.
Lighting is Everything: In Step 2, when you notice those first true leaves stretching toward light, you're already too late for perfect growth. Start seedlings under grow lights within 2 inches from day one to prevent legginess. I use LED grow lights on a timer for 14-16 hours daily—natural sunlight alone won't cut it, especially in early spring. The key is keeping lights close enough that seedlings almost touch them without burning.
Moisture Management: The germination stage (Days 5-14) is critical for moisture control. After you've misted until 50% of seeds sprout, remove any plastic covers immediately to prevent damping-off—a fungal disease that kills seedlings overnight. I've learned this the hard way: keep trays on a moisture tray with pebbles and water (not touching the bottom) to maintain consistent humidity without overwatering. The soil should stay damp but never soggy.
Hardening Off Strategy: When you begin the hardening process in Step 3, start with just 1-2 hours daily in a shaded spot, gradually increasing exposure. I place my seedlings on a north-facing porch or under a sheer curtain to filter sunlight. Watch for color changes—if leaves develop brown edges, they're getting too much sun too soon. The goal is to toughen them up without shocking their systems.
Transplant Timing: In Step 4, waiting until seedlings have 4-6 true leaves gives them the best chance of surviving transplant shock. But here's the secret: check soil temperature first! Even if your seedlings are ready, cold soil below 60°F will stunt their growth. I always test with a soil thermometer—if it's cooler, I wait or use black plastic mulch to warm the soil faster. Purple stems? That's your plant screaming for phosphorus—add a balanced fertilizer like 10-10-10 at half strength.
Pro Tips for Tomato Seedling Images
- Here's what nobody tells you about nurturing tomato seedlings—these tricks will help you avoid the most common pitfal...
- Lighting is Everything: In Step 2, when you notice those first true leaves stretching toward light, you're already to...
- Moisture Management: The germination stage (Days 5-14) is critical for moisture control. After you've misted until 50...
Frequently asked questions
Got questions about tomato seedlings? You’re not alone! Here are some of the most common queries—plus quick answers to help you grow strong, healthy plants from sprout to transplant.
How long does it take for tomato seeds to sprout?
Most tomato seeds sprout within 5–14 days, depending on temperature, moisture, and seed freshness. Keep soil consistently warm (70–85°F) and moist (not soggy) to speed up germination. If nothing appears after 2 weeks, try pressing seeds into fresh soil or checking for mold.
When should I transplant tomato seedlings outdoors?
Wait until after the last frost and when nighttime temps stay above 50°F (10°C). Seedlings should also be 3–4 inches tall with 2–3 sets of true leaves. Harden them off for 5–7 days first by gradually exposing them to outdoor conditions.
Why are my tomato seedlings leggy or weak?
Leggy seedlings usually mean too little light. Move them to a sunny windowsill or grow light immediately. Overcrowding or cool temps can also cause weakness. Thin seedlings to 1–2 inches apart and ensure pots have drainage holes.
Can I use regular potting soil for tomato seedlings?
Yes, but opt for a lightweight, sterile seed-starting mix (like 50% peat/50% perlite) to prevent damping-off disease. Avoid garden soil—it’s too dense and may harbor pathogens. Mix in a slow-release fertilizer (like 5-10-5) for a nutrient boost.
What do I do if my tomato seedlings get mold or fungus?
Mold (like damping-off) thrives in damp conditions. Stop watering from above—use a spray bottle or bottom-water instead. Remove infected seedlings, repot healthy ones in fresh, dry soil, and improve airflow. A baking soda spray (1 tsp/L water) can help as a preventative.
Are there fast-growing tomato varieties for seedlings?
Yes! Try ‘Early Girl’ (55 days), ‘Stupice’ (45 days), or ‘Cherry Tomato’ varieties like ‘Sweet 100.’ These sprout and grow quickly, making them ideal for short seasons. Check seed packets for “days to germination” to compare options.
Wrapping up and next steps
Watching your tomato seedlings grow from tiny sprouts to sturdy transplants is incredibly rewarding! 🌱 Whether you’re capturing each stage for reference or simply admiring nature’s magic, these tomato seedling images serve as a perfect guide.
Now that you’re equipped with the knowledge of growth stages and common questions, it’s time to roll up your sleeves—your garden awaits!
Ready to take the next step? Start planting those seedlings with confidence, and don’t forget to share your progress with fellow gardeners. Happy growing! 🌿