Picking
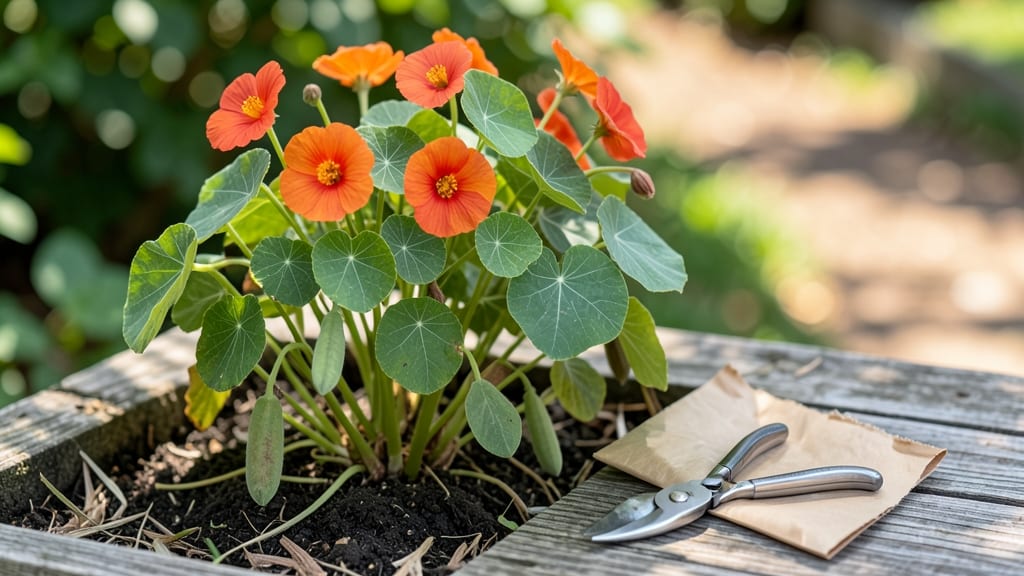
Harvesting nasturtium seeds at the right moment means saving seeds that’ll sprout next spring with the same vibrant orange and yellow blooms you love. ✨ I’ve learned the hard way that waiting too long or harvesting too early can ruin everything—so timing is everything.
The key is watching those seed pods turn from green to papery brown, then snapping them open just as they begin to split.
You’ll need a few simple tools: sharp scissors or pruners for clean cuts, a bowl to catch the seeds, and a dry, well-ventilated spot to let them cure. The process only takes about 30 minutes if you work quickly, but patience is key—rushing leads to shriveling seeds.
I’ve saved hundreds of seeds this way, and the trick is keeping the pods dry once they’re picked.
Once harvested, spread the seeds on a paper towel in a warm, dry place for 1-2 weeks until completely dry. Store them in an envelope or jar in a cool, dark spot—they’ll stay viable for 3-5 years if kept dry.
The payoff? A fresh batch of nasturtiums that’ll bloom even more prolifically than the last.
Here’s where it gets interesting—if you miss the window, the pods will burst open on their own, scattering seeds everywhere. But with practice, you’ll nail the timing and end up with seeds that’re ready to plant by next spring. Let’s get those pods harvested before they self-destruct!
📚 In This Guide
- What you need
- Instructions
- Tips and common mistakes
- Wrapping up and next steps
What you need
- ● Mature nasturtium flowers: Choose fully bloomed, slightly wilted flowers (preferably orange, yellow, or red varieties for best seed viability). Aim for at least 10-15 flowers per batch for a reliable harvest.
- ● Small paper bags or envelopes: 1-2 per flower head (or a single large breathable bag for bulk collection). Brown kraft paper works best—avoid plastic to prevent moisture buildup.
- ● Sharp scissors or pruning shears: For cleanly snipping flower stems without damaging the seed pods.
- ● Labeling tags or masking tape + marker: To tag each bag with the variety name and harvest date.
- ● Drying tray or screen: A mesh screen or elevated tray (like a cooling rack) to air-dry seeds for 2-4 weeks.
- ● Small paper towels or coffee filters: For gently separating seeds from chaff during cleaning.
- ● Glass jars or airtight seed packets: For long-term storage (e.g., 1-2 oz mason jars or seed-saving envelopes).
- ● Desiccant packets: Place 1-2 in storage jars to absorb excess moisture and extend shelf life.
- ● Fine-mesh sieve: For effortlessly sifting seeds from dried flower debris.
- ● Notebook: To log germination rates or notes on growing conditions for future reference.
- ● Humidity monitor: If storing seeds in a basement or garage, ensure humidity stays below 40%.
How to harvest nasturtium seeds for next year's garden
Here’s the foolproof method I use to save seeds from my nasturtiums—no fancy tools, just a little timing and patience.
🌱 Step 1: Identify and Select Healthy Seed Pods
Wait until late summer or early fall when the nasturtium flowers have faded and small, round seed pods form in their place. These pods start green but turn papery brown as they mature. Choose pods that are fully dry and slightly wrinkled to the touch—this means they’re ready for harvesting.
Skip any pods that look shriveled, moldy, or still green. I also avoid pods from flowers that were damaged by pests or disease, as those seeds may not grow true. A healthy pod should rattle slightly when shaken—this is your signal it’s packed with viable seeds.
⏰ Step 2: Harvest at the Right Time for Best Viability
Pick the pods on a dry, sunny morning after the dew has evaporated. This prevents moisture from causing mold or rotting inside the pods. Use clean, sharp scissors or your fingers to snip the stem just above the pod—don’t tug too hard, or you might pull the whole flower off.
Harvest when the pods are completely dry but before they split open on their own. If you wait too long, seeds will scatter, and you’ll lose them. I like to collect pods over a few days as they mature, storing them in a paper bag until I’m ready to process them.
🪴 Step 3: Dry and Clean the Seeds Properly
Spread the harvested pods on a clean, dry towel or paper towel in a single layer. Let them dry for another 3-5 days in a warm, dry place away from direct sunlight. This ensures any remaining moisture evaporates, preventing mold during storage.
Once fully dry, gently crush the pods between your fingers or roll them with a rolling pin to release the seeds. Nasturtium seeds are large and easy to handle, but I sift them through a fine mesh strainer to remove any chaff or debris. Store the clean seeds in a labeled envelope or small jar.
💧 Step 4: Store Seeds for Long-Term Viability
Place the dried seeds in an airtight container, like a small glass jar or envelope, and store them in a cool, dark place. A pantry or seed storage box works perfectly. Nasturtium seeds stay viable for 3-5 years if kept dry and cool, but I like to label them with the harvest year to keep track.
Check the seeds occasionally for signs of moisture or pests. If you notice any dampness or mold, transfer them to a new container immediately. Properly stored seeds should remain dry and ready for planting whenever you’re ready to grow next year’s nasturtiums.
☀️ Step 5: Test a Few Seeds Before Full Planting
Before committing to planting all your saved seeds, I recommend testing a small batch. Sow a few seeds in a pot or small patch of soil in early spring. If they germinate well and grow into healthy plants, you’ll know your stored seeds are still good.
Nasturtiums are tough, but even the best-stored seeds can lose viability over time. If germination is slow or uneven, try planting a fresh batch of store-bought seeds as a backup. This way, you’ll always have a reliable supply for your garden.
Tips & tricks for perfect nasturtium seed harvesting
Here's what I've learned after saving seeds for years—these little details make all the difference between seeds that sprout and ones that don't.
Visual Cues for Step 1: In Step 1, when selecting pods, look for that papery brown color and slight wrinkling—it's your clear sign they're ready. I've learned to trust my fingers more than my eyes: a healthy pod should feel dry and papery, not leathery or damp. If you're unsure, give it a gentle shake—viable seeds will make a faint rattling sound inside.
Timing Secret in Step 2: The dry, sunny morning timing in Step 2 is critical for preventing mold. I've ruined batches by harvesting after rain or when dew was still present. If you must harvest later in the day, wait until the pods have completely dried—this might mean waiting until late afternoon. Store them in a paper bag with a few holes punched in the side to allow airflow until you're ready to process.
Drying Strategy for Step 3: Don't rush the 3-5 day drying period in Step 3—this is where most people go wrong. I've seen seeds develop mold when dried too quickly. Place your drying tray somewhere with gentle airflow, like near an open window (but not in direct sunlight). You'll know they're fully dry when the pods crumble easily between your fingers and no moisture remains when you squeeze them.
Storage Wisdom from Step 4: For long-term storage in Step 4, I add a small packet of silica gel to my seed jars—it helps absorb any lingering moisture. Label your containers with both the seed type and harvest year. I also recommend storing seeds in the refrigerator if you have one, as the cooler temperature can extend viability beyond the 3-5 year mark. Check your seeds annually for any signs of pests or moisture.
Pro Tips for Harvesting Nasturtium Seeds
- Here's what I've learned after saving seeds for years—these little details make all the difference between seeds that...
- Visual Cues for Step 1: In Step 1, when selecting pods, look for that papery brown color and slight wrinkling—it's yo...
- Timing Secret in Step 2: The dry, sunny morning timing in Step 2 is critical for preventing mold. I've ruined batches...
Frequently asked questions
Got questions about harvesting nasturtium seeds? You’re not alone! Here are some of the most common concerns—plus straightforward answers to help you succeed.
When is the best time to harvest nasturtium seeds?
Harvest seeds when the seed pods turn from green to papery brown and start splitting open on their own. This usually happens 8–12 weeks after flowering. Wait too long, and the seeds may scatter—or worse, sprout in the pod! Aim for late summer to early fall in most climates.
What if my nasturtium pods never dry out?
If pods stay green or mushy, you’re likely dealing with humidity or overwatering. Try harvesting them indoors on a paper towel-lined tray in a warm, dry spot (like a sunny windowsill). For extra help, thin out crowded plants to improve airflow. If pods still refuse to dry, they may not be viable.
Can I save seeds from store-bought nasturtium flowers?
Technically yes, but expect mixed results. Many commercial varieties are hybrids (marked as "F1") and won’t grow true to type. For reliable seeds, choose heirloom or open-pollinated nasturtiums from seed catalogs. If you’re experimenting, plant extra seeds—some may surprise you!
How do I store nasturtium seeds long-term?
Once fully dry, remove seeds from pods and store them in a cool, dark place (like a sealed envelope or airtight container). Add a desiccant packet to prevent moisture buildup. Viability lasts 2–4 years if stored properly—just check for freshness before planting!
Do I need to worry about cross-pollination?
Nasturtiums are self-pollinating, so cross-pollination is rare unless you’re growing multiple varieties nearby. To ensure purity, isolate plants by at least 10 feet or hand-pollinate with a brush. Bees and butterflies help, but they won’t drastically alter your seeds unless you’re working with highly specialized hybrids.
Wrapping up and next steps
Harvesting nasturtium seeds is a rewarding way to grow vibrant, edible flowers year after year!
By following these steps—from selecting healthy pods to proper drying and storage—you’ll ensure strong germination and a bountiful garden. Don’t let those seeds go to waste: share your newfound knowledge with fellow gardeners or experiment with growing nasturtiums in pots, containers, or vertical gardens for a pop of color and flavor.
Now that you’re ready, grab those seed pods and get planting! 🌱 Your future garden (and taste buds) will thank you.